No-Bake Peanut Butter Cheesecake Balls
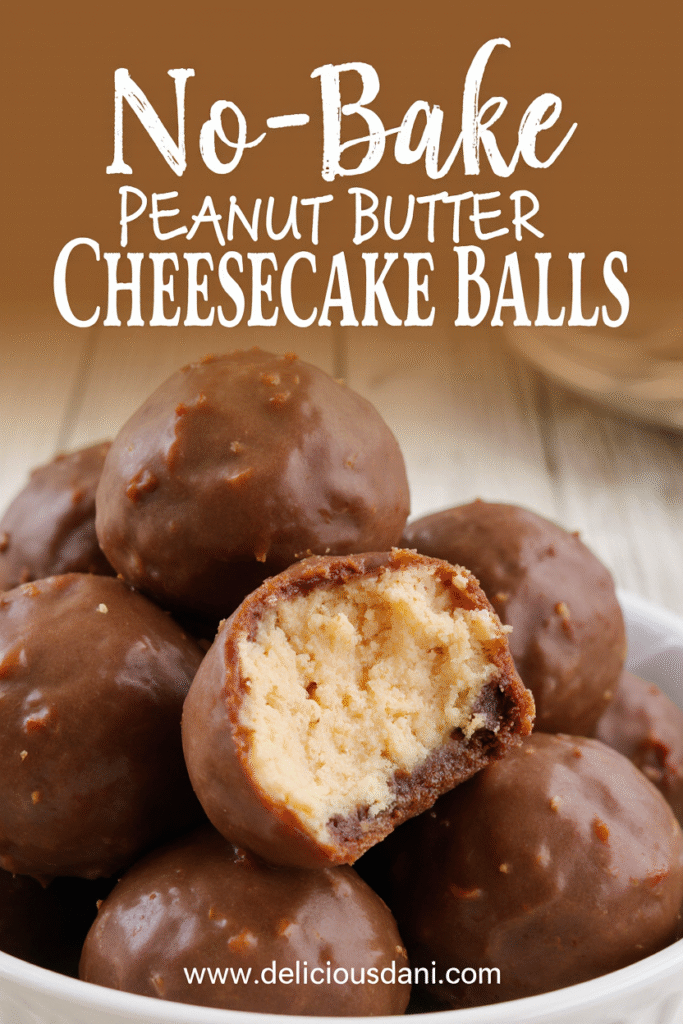
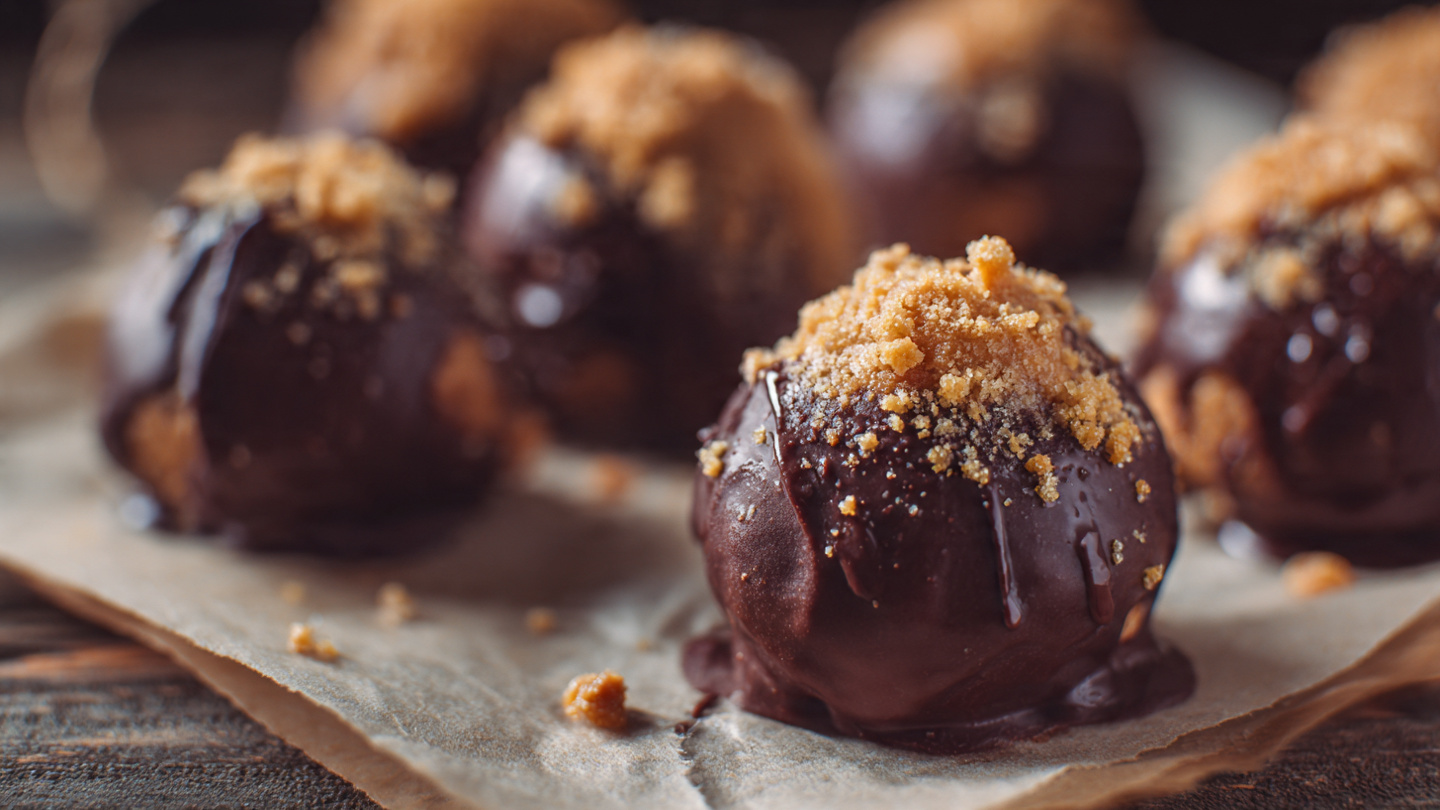
If you’re looking for a dessert that’s ridiculously easy, incredibly delicious, and requires absolutely zero baking skills, let me introduce you to my obsession: No-Bake Peanut Butter Cheesecake Balls! These little spheres of heaven combine the creamy richness of cheesecake with the irresistible flavor of peanut butter, all coated in a smooth chocolate shell. I created this recipe after a particularly hectic holiday season when I needed something impressive for a party but had zero time (or energy) to turn on the oven. The result? These bite-sized beauties that had everyone begging for the recipe! What I love most about these cheesecake balls is how they taste like you spent hours in the kitchen, when in reality, they come together in about 20 minutes of hands-on time. They’re perfect for holidays, potlucks, birthday parties, or just those moments when you need something sweet and indulgent. My kids love helping me roll these into balls, making it a fun family activity that ends with an amazing treat. Trust me, once you try these creamy, dreamy, peanut buttery bites, they’ll become your secret weapon for any occasion that calls for something special!
Overview of Recipe Content
No-Bake Peanut Butter Cheesecake Balls are perfect for any occasion where you want to impress without the stress – think holiday cookie exchanges, birthday parties, bridal showers, Valentine’s Day treats, or casual weekend indulgences. It’s a great recipe because it requires no special equipment (no mixer needed!), no baking, and uses simple ingredients you probably already have in your pantry. The flavor profile is the ultimate sweet-and-salty combination: creamy, tangy cheesecake meets rich, nutty peanut butter, all enrobed in smooth chocolate with a satisfying crunch from graham cracker crumbs. This recipe is perfect for beginner bakers who want to create something impressive, busy parents who need quick desserts, anyone who doesn’t have an oven, college students with limited kitchen access, or experienced bakers looking for an effortless crowd-pleaser. They’re also fantastic for gift-giving and can be customized with different coatings and toppings to suit any taste or occasion.
Ingredients
For the Cheesecake Balls:
| Ingredient | Quantity |
|---|---|
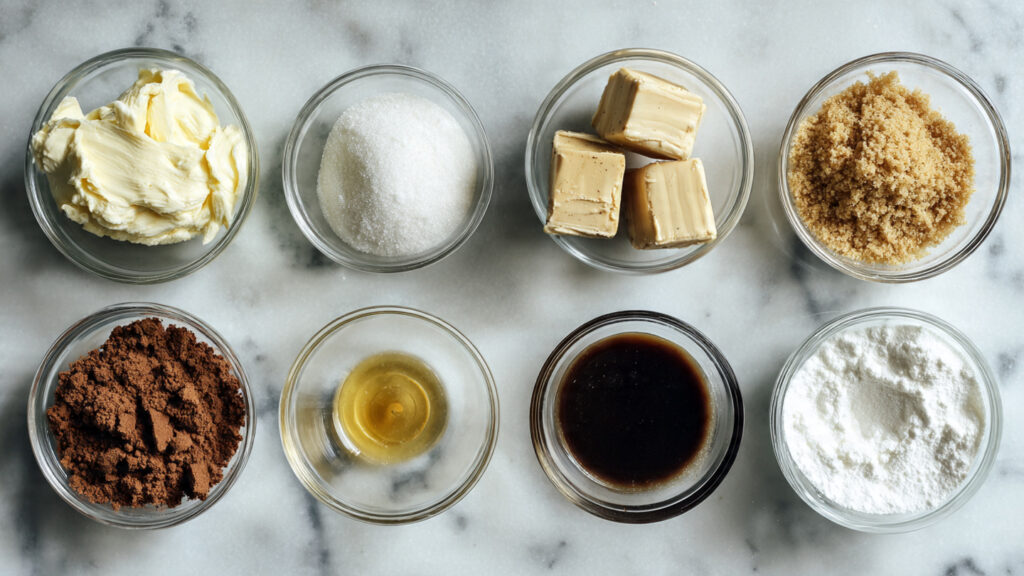
| Cream cheese, softened to room temperature | 8 oz (225g) |
| Creamy peanut butter | ½ cup |
| Powdered sugar (confectioners’ sugar) | ¼ cup |
| Granulated sugar | 2 tablespoons |
| Vanilla extract | 1 teaspoon |
| Graham cracker crumbs (about 5-6 full crackers) | ¾ cup |
| Salt | Pinch |
For the Chocolate Coating:
| Ingredient | Quantity |
|---|---|
| Chocolate chips (semi-sweet, milk, or dark chocolate) | 12 oz (340g) |
| Coconut oil or vegetable shortening | 2 tablespoons |
Optional Toppings and Garnishes:
| Topping | Amount |
|---|---|
| Crushed peanuts | As desired |
| Sea salt flakes | As desired |
| Mini chocolate chips | As desired |
| Sprinkles | As desired |
| Drizzled white chocolate | As desired |
| Crushed pretzels | As desired |
| Toffee bits | As desired |
Tools Needed
- Large mixing bowl
- Spatula or wooden spoon
- Measuring cups and spoons
- Baking sheet or large plate
- Parchment paper or wax paper
- Cookie scoop or tablespoon (for portioning)
- Microwave-safe bowl or double boiler
- Fork or dipping tool
- Toothpicks (optional, for dipping)
- Airtight container (for storage)
Suggested Substitutions and Additions
Cream Cheese Alternatives:
- Regular cream cheese: Full-fat works best for richness and structure
- Light cream cheese: Can be used but may result in slightly softer balls
- Dairy-free cream cheese: Works well for vegan version (use plant-based butter and vegan chocolate too)
- Mascarpone: Creates an even richer, more luxurious texture
Peanut Butter Options:
- Creamy peanut butter: Standard choice for smooth texture
- Natural peanut butter: Works but may be slightly oilier; stir well first
- Crunchy peanut butter: Adds texture and peanut chunks throughout
- Other nut butters: Almond butter, cashew butter, or sunflower seed butter (for nut-free option) all work beautifully
- Cookie butter: For a completely different but equally amazing flavor
Graham Cracker Substitutes:
- Vanilla wafers: Classic alternative that works perfectly
- Digestive biscuits: Popular in UK, great option
- Oreo cookies: Makes them more indulgent (remove or keep the cream filling)
- Nilla wafers: Creates a lighter, more delicate flavor
- Gingersnaps: Adds a spicy kick
- Gluten-free graham crackers: For gluten-free version
- Pretzels: For sweet and salty combination
Chocolate Coating Variations:
- Semi-sweet chocolate: Balanced sweetness, most popular choice
- Milk chocolate: Sweeter, creamier option
- Dark chocolate: Less sweet, more sophisticated
- White chocolate: Creates a beautiful contrast
- Candy melts: Easier to work with, comes in many colors
- Chocolate bark or almond bark: Budget-friendly alternative
Flavor Additions:
- Add 2 tablespoons cocoa powder to the filling for chocolate peanut butter version
- Mix in mini chocolate chips or peanut butter chips
- Add ½ teaspoon cinnamon for warmth
- Incorporate 2 tablespoons Nutella for hazelnut flavor
- Mix in crushed Reese’s pieces or chopped Reese’s cups
- Add ¼ cup mini marshmallows for rocky road version
- Stir in toffee bits for added crunch
Dietary Modifications:
- Gluten-free: Use gluten-free graham crackers
- Vegan: Use dairy-free cream cheese, dairy-free chocolate, and ensure peanut butter contains no honey
- Lower sugar: Reduce powdered sugar to 2 tablespoons and use sugar-free chocolate chips
- Keto-friendly: Use sugar-free sweetener instead of sugar, and sugar-free chocolate
How to Make No-Bake Peanut Butter Cheesecake Balls
Step 1: Prepare and Mix the Cheesecake Filling
Start by ensuring your cream cheese is at room temperature – this is crucial for getting a smooth, lump-free mixture. If you forgot to take it out ahead of time, you can microwave it for 10-15 seconds to soften, but be careful not to melt it. In a large mixing bowl, combine the softened cream cheese and peanut butter. Using a spatula or wooden spoon, mix them together vigorously until completely smooth and well combined – this should take about 2-3 minutes of stirring. You want absolutely no lumps of cream cheese remaining.
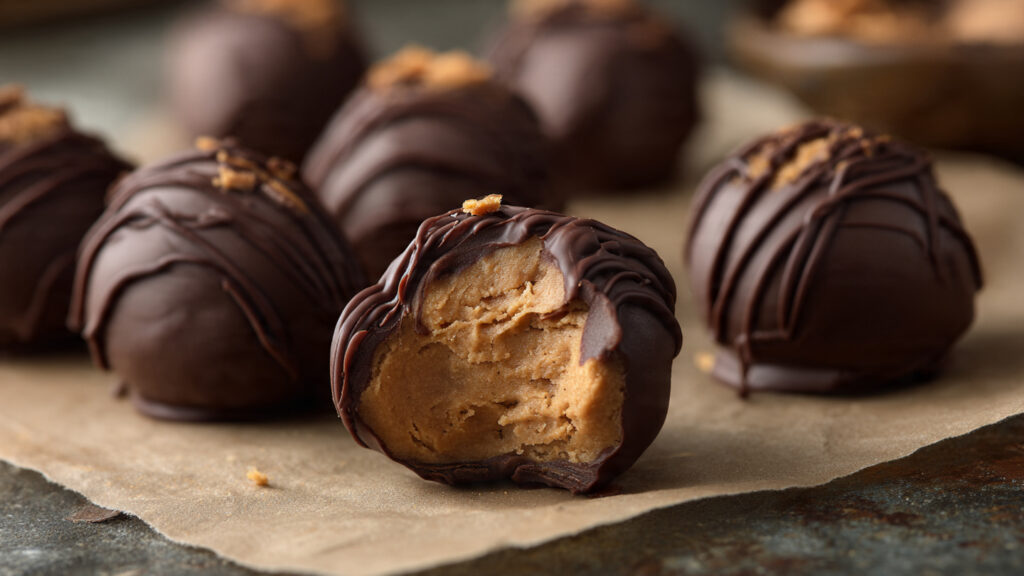
Add the powdered sugar, granulated sugar, vanilla extract, and a pinch of salt to the bowl. Mix everything together until fully incorporated and the mixture is creamy and smooth. The texture should be thick but spreadable, similar to frosting. Now fold in the graham cracker crumbs, stirring until they’re evenly distributed throughout the mixture. The graham crackers add structure, a subtle sweetness, and help the balls hold their shape. Your filling should now be thick enough to hold its shape when scooped but still creamy. Taste it at this point – if you want it sweeter, add another tablespoon of powdered sugar; if you want more peanut butter flavor, add another tablespoon of peanut butter.
Step 2: Form the Cheesecake Balls
Line a baking sheet or large plate with parchment paper or wax paper – this prevents the balls from sticking and makes cleanup a breeze. Using a cookie scoop (I use a 1-tablespoon size for perfectly uniform balls) or a regular tablespoon, scoop out portions of the cheesecake mixture. Roll each portion between your palms to form smooth, round balls. Try to make them as uniform as possible so they look professional and dip evenly in the chocolate later. You should get approximately 20-24 balls depending on the size you make.
As you form each ball, place it on the prepared baking sheet, spacing them about an inch apart. If the mixture is too sticky and difficult to roll, you can lightly dampen your hands with cold water or coat them with a tiny bit of oil. Once all the balls are formed, place the baking sheet in the refrigerator for at least 1-2 hours, or in the freezer for 30-45 minutes. This chilling step is absolutely essential – it firms up the balls so they hold their shape when dipped in warm chocolate and prevents them from falling apart or melting. Don’t skip this step! I usually make the balls the night before and let them chill overnight, which makes the dipping process even easier.
Step 3: Melt the Chocolate Coating
While your cheesecake balls are chilling and firming up, prepare your chocolate coating. Place the chocolate chips and coconut oil (or shortening) in a microwave-safe bowl. The coconut oil is important because it thins the chocolate slightly, making it easier to dip and creating a smooth, glossy finish that hardens nicely. Microwave on 50% power in 30-second intervals, stirring thoroughly between each interval. This gradual melting prevents the chocolate from seizing or burning. It typically takes 2-3 intervals (1-1.5 minutes total) to completely melt the chocolate.
Alternatively, you can use a double boiler method: place a heat-safe bowl over a pot of simmering water (making sure the bottom of the bowl doesn’t touch the water), and stir the chocolate and oil until melted and smooth. Once melted, stir the chocolate well to ensure it’s perfectly smooth and the oil is fully incorporated. The chocolate should be warm but not hot – if it’s too hot, it will melt your cheesecake balls. Let it cool for 2-3 minutes if needed. The consistency should be thin enough to easily coat the balls but thick enough to create a nice shell.
Step 4: Dip and Coat the Balls
Remove your chilled cheesecake balls from the refrigerator or freezer. They should be very firm to the touch. Set up your dipping station with the melted chocolate, a fork or dipping tool, and a clean parchment-lined baking sheet for the finished balls. Working with one ball at a time (keep the rest chilled), drop a ball into the melted chocolate. Using a fork, roll it around to coat completely, then lift it up, letting the excess chocolate drip back into the bowl. Tap the fork gently on the edge of the bowl a few times to remove even more excess chocolate.
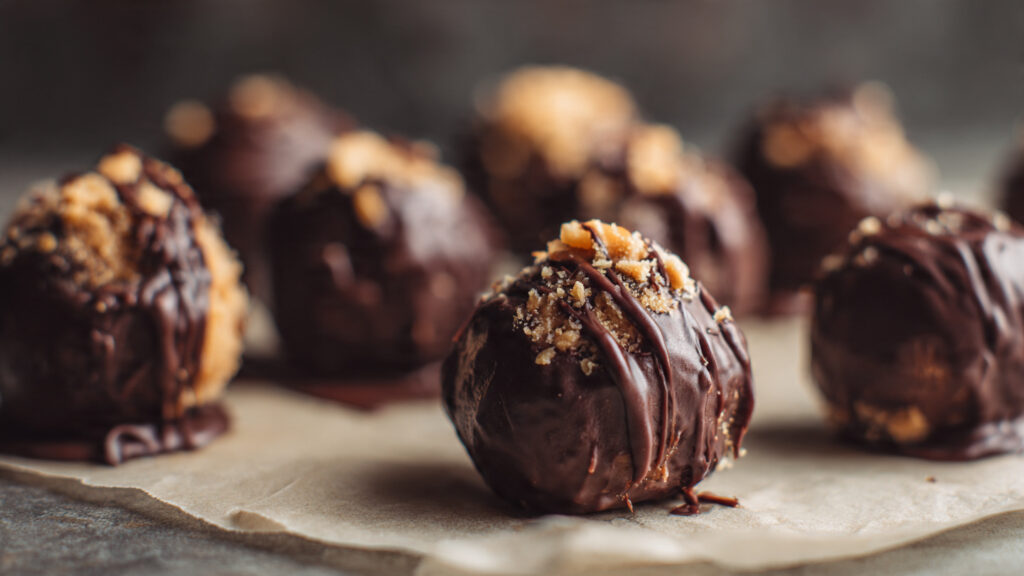
Carefully slide the coated ball onto the prepared parchment paper using another fork or toothpick to help guide it off. If you’re adding toppings like crushed peanuts, sea salt, or sprinkles, add them immediately while the chocolate is still wet. Repeat with the remaining balls, working quickly but carefully. If the chocolate starts to thicken as you work, microwave it for 10-15 seconds to thin it out again. If the balls start to soften, pop them back in the fridge for 10 minutes before continuing.
Step 5: Set and Finish
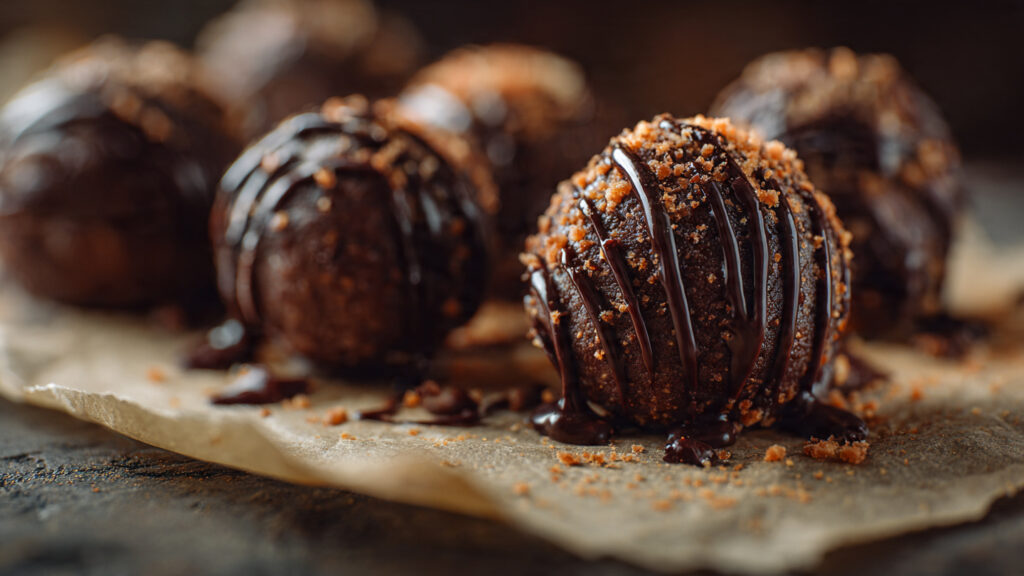
Once all the balls are coated and topped (if desired), place the baking sheet in the refrigerator for 15-20 minutes to allow the chocolate coating to fully set and harden. The chocolate should be firm and no longer tacky to the touch. If you want to add a decorative drizzle of white chocolate or a contrasting chocolate color, now is the time: melt a small amount of white or dark chocolate, place it in a small zip-top bag, snip off a tiny corner, and drizzle it back and forth over the set balls in a zigzag pattern. Return to the fridge for another 5 minutes to set the drizzle.
Once completely set, your No-Bake Peanut Butter Cheesecake Balls are ready to serve! Arrange them on a pretty serving plate or pack them into gift boxes. They’re absolutely irresistible and will disappear quickly, so you might want to hide a few for yourself before serving!
What to Serve with It
No-Bake Peanut Butter Cheesecake Balls are rich and satisfying on their own, but they pair beautifully with certain beverages and accompaniments. Serve them with hot coffee or espresso – the slight bitterness cuts through the sweetness perfectly and is a classic pairing with chocolate and peanut butter. A glass of cold milk is also traditional and beloved, especially by kids.
For an elegant dessert spread, arrange these alongside other bite-sized treats like chocolate truffles, brownie bites, or fruit tarts for variety. They also look stunning on a dessert charcuterie board surrounded by fresh strawberries, raspberries, and grapes – the fresh fruit provides a light, refreshing contrast to the rich cheesecake balls.
For adult gatherings, these pair surprisingly well with port wine, dessert wines, or even Irish cream liqueur. You could also serve them as part of an afternoon tea service with hot tea varieties like Earl Grey or English Breakfast. For parties, display them alongside vanilla ice cream or whipped cream for guests who want to make their own little sundae creations. They also make excellent accompaniments to hot chocolate during winter months – just place one or two in the bottom of a mug and pour hot chocolate over them for a melting, indulgent treat!
Tips for Making It Perfect
- Room temperature cream cheese is non-negotiable: Cold cream cheese will create lumps that are nearly impossible to smooth out. Let your cream cheese sit at room temperature for at least 1-2 hours before starting. If you’re in a rush, cut it into small cubes to speed up the softening process, but never microwave it for more than 10-15 seconds or it will become too soft and oily.
- Chill thoroughly before dipping: This is the most important step for success! If the balls aren’t cold enough, they’ll soften and fall apart when they hit the warm chocolate. I recommend freezing them for at least 30 minutes or refrigerating for 2+ hours. Some people even keep them in the freezer while dipping, only taking out 3-4 at a time to work with.
- Use quality chocolate: Since the chocolate coating is such a prominent part of these treats, using good quality chocolate makes a noticeable difference. Ghirardelli, Guittard, or good quality chocolate bars chopped up work better than generic chocolate chips. If you do use chips, adding the coconut oil or shortening helps improve the texture and shine.
- Work quickly but patiently: The dipping process requires a balance. Work quickly enough that your balls don’t warm up, but patiently enough to let excess chocolate drip off properly. If you rush and don’t tap off the excess, you’ll get thick, puddle-like chocolate bases instead of neat, professional-looking balls.
- Fix imperfections while the chocolate is wet: If you notice bare spots, drips, or imperfections after placing a ball on the parchment, use a toothpick dipped in chocolate to touch up spots while the coating is still wet. Once the chocolate sets, it’s much harder to fix issues without the repair being visible.
- Prevent chocolate from seizing: Chocolate can seize (become grainy and thick) if it comes into contact with even a tiny amount of water. Make sure all your bowls and utensils are completely dry before melting chocolate. Also, avoid getting steam from a double boiler into the chocolate. If chocolate does seize, you can sometimes save it by stirring in a tablespoon of coconut oil or shortening.
- Store with parchment between layers: If you need to stack these in a container, place parchment or wax paper between layers to prevent them from sticking together or the decorations from getting damaged. This keeps them looking beautiful for gift-giving or party presentations.
Storage Instructions
Room Temperature: While these can sit at room temperature for 2-3 hours during serving (perfect for parties), they should not be stored at room temperature long-term as the cream cheese filling can spoil. If your room is particularly warm, they may also become too soft.
Refrigerator: Store No-Bake Peanut Butter Cheesecake Balls in an airtight container in the refrigerator for up to 1 week. Place parchment paper between layers if stacking to prevent sticking. They’re actually delicious straight from the fridge – the chocolate shell is firm and snappy, and the filling is perfectly creamy and chilled. Let them sit at room temperature for 5-10 minutes before serving if you prefer a slightly softer texture.
Freezer: These freeze exceptionally well for up to 2-3 months! Arrange them in a single layer on a baking sheet and freeze until solid (about 1 hour), then transfer to a freezer-safe container or bag with parchment between layers. This initial freezing prevents them from sticking together. To serve, thaw in the refrigerator for 2-3 hours or at room temperature for 30-45 minutes. Some people actually prefer eating them partially frozen, straight from the freezer – they’re like frozen cheesecake bites with a fudgy texture!
Gift-Giving Storage: If packaging these as gifts, arrange them in a decorative box or tin lined with parchment paper. Include a note indicating they should be refrigerated and consumed within 5-7 days. If shipping, pack them with cold packs and ship overnight or 2-day maximum to ensure they stay cold during transit.
Make-Ahead Tips: These are perfect for make-ahead entertaining! You can prepare the cheesecake balls up to 2 weeks in advance and keep them frozen, then dip them in chocolate 1-2 days before serving. Alternatively, make them completely finished and store them in the fridge for up to 5 days before your event.
General Information
No-bake desserts have a rich history dating back to the early 20th century when home refrigeration became common, allowing cooks to create chilled desserts without the need for baking. The combination of cream cheese, peanut butter, and chocolate is distinctly American, reflecting the country’s love affair with these three ingredients that really took off in the mid-1900s.
Cream cheese itself became popular in the United States in the 1920s and 1930s, particularly after the Philadelphia brand (established in 1880) began widespread marketing. The no-bake cheesecake concept emerged as a convenient alternative to traditional baked cheesecake, especially during hot summer months when people wanted to avoid heating up their kitchens. The genius of stabilizing the filling with cookie crumbs (graham crackers in this case) creates structure without needing gelatin or other setting agents.
Peanut butter, an American invention from the late 1800s, became a household staple during World War II when it was included in soldiers’ rations. Its pairing with chocolate became iconic, particularly after H.B. Reese created Reese’s Peanut Butter Cups in 1928. Our No-Bake Peanut Butter Cheesecake Balls are essentially an homage to this beloved flavor combination, reimagined in an elegant, bite-sized format.
The trend of “cake balls” and “truffles” exploded in popularity in the early 2000s, particularly after Angie Dudley’s “Cake Pops” book came out in 2010. While cake pops use crumbled cake, our cheesecake balls use a no-bake cream cheese base, making them even easier and requiring no baking whatsoever. This makes them accessible to anyone with a refrigerator, regardless of baking skill or equipment!
Frequently Asked Questions (FAQ)
Q: Can I make these without graham crackers? A: Absolutely! The graham crackers primarily add texture and help the balls hold their shape, but you can substitute with crushed vanilla wafers, Oreo cookies (with or without the cream filling), gingersnaps, or even finely ground nuts like almonds or pecans. For a nut-free and cookie-free version, you can add an extra 2-3 tablespoons of powdered sugar to help firm up the mixture, though the texture will be slightly different.
Q: Why are my cheesecake balls too soft and won’t hold their shape? A: This usually happens for a few reasons: (1) The cream cheese was too soft or warm when mixing, (2) You didn’t chill them long enough before dipping, (3) The ratio of wet to dry ingredients is off (too much peanut butter or not enough graham crackers), or (4) You used natural peanut butter which tends to be oilier. To fix: add more graham cracker crumbs (1-2 tablespoons at a time) until the mixture is firm enough to roll, and always chill for at least 1-2 hours (or freeze for 30+ minutes) before dipping.
Q: Can I use natural or no-stir peanut butter? A: You can, but results may vary. Natural peanut butter (the kind with oil separation) tends to be runnier and can make your mixture too soft. If using natural peanut butter, stir it very well first, and you may need to add extra graham cracker crumbs to achieve the right consistency. Regular creamy peanut butter (like Jif or Skippy) works most reliably for this recipe because it has stabilizers that create a more consistent texture.
Q: My chocolate coating is too thick and clumpy – what should I do? A: Thick, clumpy chocolate is usually due to insufficient fat content or overheating. Add 1-2 more tablespoons of coconut oil or shortening to thin it out, stirring until smooth. If it’s seized (grainy and tight), you may have gotten water in it – try stirring in a tablespoon of vegetable oil to save it. Always melt chocolate slowly at 50% power or use a double boiler, and ensure all tools are completely dry before starting.
Q: Can I make these nut-free? A: Yes! Substitute the peanut butter with sunflower seed butter (like SunButter) or soy nut butter for a nut-free version. Make sure to check that your chocolate chips are also nut-free (some are processed on equipment with nuts). Instead of garnishing with crushed peanuts, use sprinkles, crushed graham crackers, or leave them plain. The flavor will be slightly different but still delicious!
Q: How far in advance can I make these? A: You can make these up to 1 week in advance and store them in the refrigerator, or up to 2-3 months in advance if you freeze them. For best results when making ahead, I recommend forming and chilling the balls, then dipping them in chocolate 1-2 days before serving so the chocolate coating stays perfectly fresh and shiny. However, fully completed balls also store beautifully and actually taste even better after a day or two as the flavors meld together.
Conclusion
I hope you’re as excited to make these No-Bake Peanut Butter Cheesecake Balls as I am every single time I whip up a batch! There’s something so satisfying about creating an impressive, delicious dessert without ever turning on the oven, and these little beauties deliver on flavor, texture, and wow-factor. They’re proof that the best desserts don’t have to be complicated – sometimes simple ingredients combined thoughtfully create pure magic.
I’d absolutely love to hear about your experience making these! Please leave a comment below telling me how they turned out, what toppings you used, or any creative variations you tried. If these cheesecake balls made you (or your lucky recipients) happy, please give this recipe a five-star rating to help other dessert lovers find it!
Don’t forget to snap a photo of your gorgeous chocolate-coated creations and share them on Instagram – tag me so I can see your beautiful work and share it with our community! And please, please pin this recipe to your “Easy Desserts,” “No-Bake Treats,” or “Party Food” boards on Pinterest so you can find it whenever a celebration calls for something special. Happy no-baking, and may your kitchen always be filled with the irresistible aroma of chocolate and peanut butter!
Nutritional Information (per serving)
Based on 24 cheesecake balls (1 ball per serving)
| Nutrient | Amount |
|---|---|
| Calories | 165 |
| Total Fat | 11g |
| Saturated Fat | 5g |
| Trans Fat | 0g |
| Cholesterol | 12mg |
| Sodium | 75mg |
| Total Carbohydrates | 15g |
| Dietary Fiber | 1g |
| Sugars | 12g |
| Protein | 3g |
| Calcium | 20mg |
| Iron | 0.5mg |
| Potassium | 85mg |
Note: Nutritional values are approximate and may vary based on specific brands and ingredients used, size of balls, and amount of chocolate coating.