Chocolate Crinkle Cookies
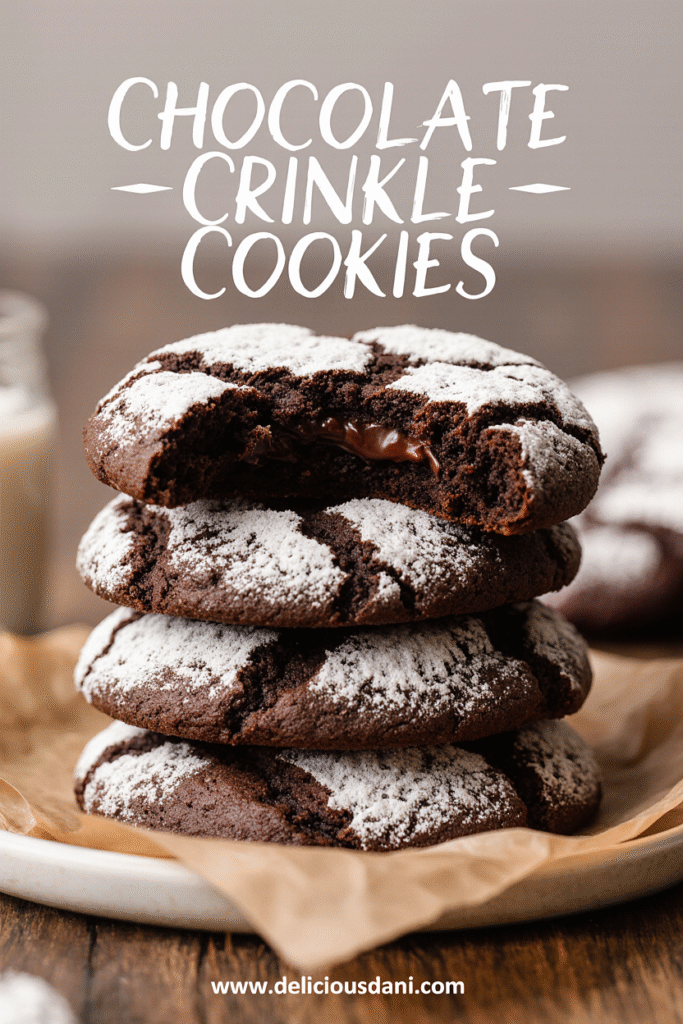
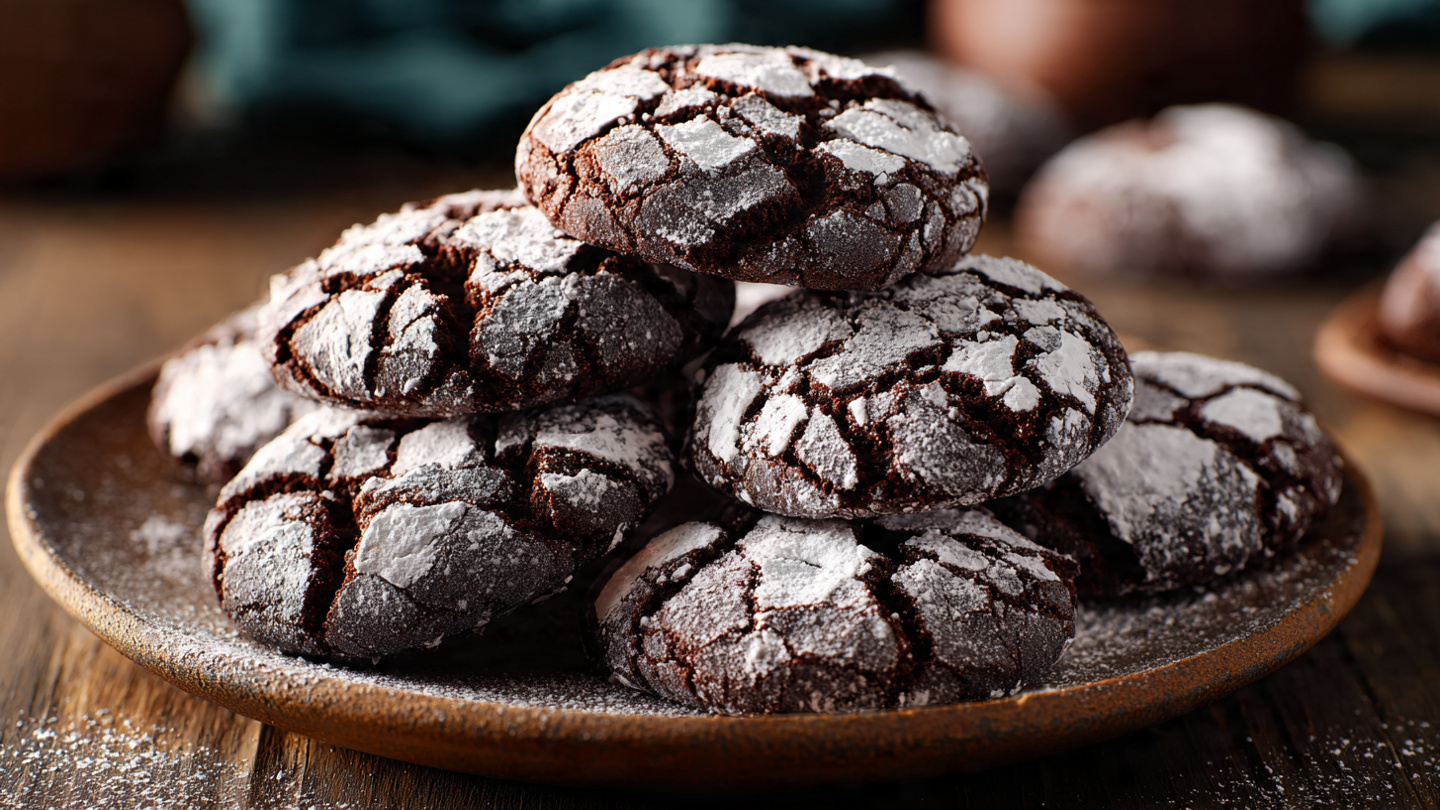
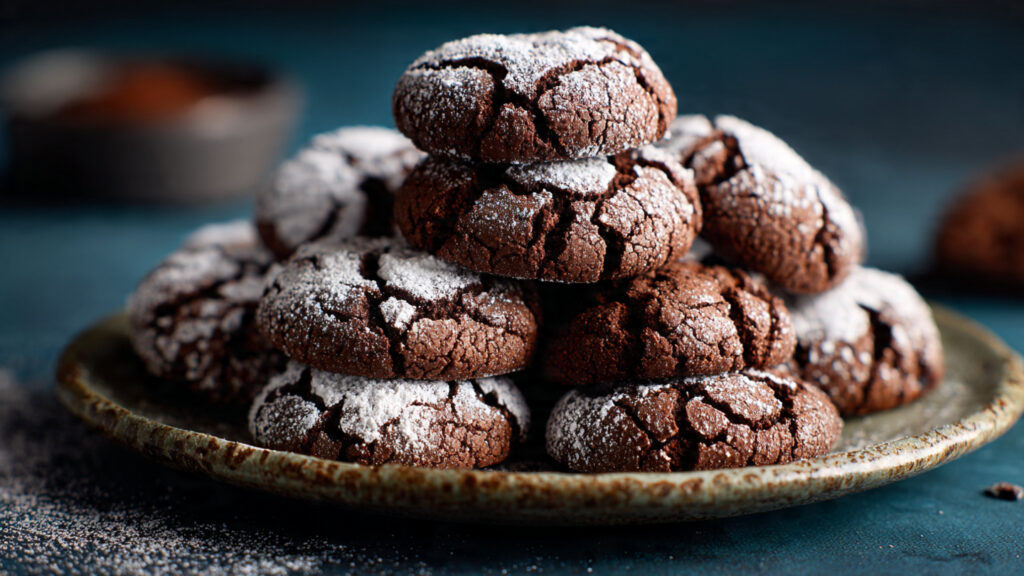
Prepare to fall head over heels for these Chocolate Crinkle Cookies – those stunning, festive cookies with dark chocolate centers and snowy white powdered sugar crackles that look like they’ve been kissed by winter itself! I’ll never forget the first time I made these for a holiday cookie exchange: people literally gasped when I pulled them out of the box, and within minutes they were all gone with everyone begging for the recipe. What makes these cookies so incredibly special is their dramatic appearance – they look like something from a fancy bakery window – combined with their incredible texture and deep chocolate flavor. The exterior is delicate and slightly crisp, giving way to an intensely chocolatey, fudgy, almost brownie-like center that’s soft and chewy. The contrast between the dark chocolate cookie and the bright white powdered sugar creates that signature crinkled effect that’s absolutely gorgeous and makes these cookies perfect for any occasion where you want to impress. These cookies have become my signature holiday bake, my go-to when I need something that looks impressive but is actually quite easy, and the recipe that friends and family request every single Christmas. Whether you’re baking for holiday parties, cookie exchanges, gift-giving, or just want to treat yourself to something spectacular, these chocolate crinkle cookies are about to become your new favorite showstopper!
Overview of Recipe Content
Chocolate Crinkle Cookies are perfect for holiday baking and Christmas cookie platters, cookie exchanges where you want to stand out, impressive gifts for teachers, neighbors, and coworkers, bake sales that sell out instantly, Hanukkah celebrations and winter gatherings, anytime you need something that looks bakery-quality, chocolate lovers who want intense chocolate flavor, or adding elegance to any dessert table. It’s a great recipe because they look incredibly impressive but are actually quite simple to make, deliver deep, rich chocolate flavor in every bite, have that perfect texture – crispy outside, fudgy inside, create that stunning crackled appearance naturally as they bake, can be made ahead and frozen (dough or baked cookies), use simple ingredients you likely already have, and are naturally nut-free. The flavor profile is pure chocolate bliss: intensely rich, fudgy chocolate that’s deep and satisfying, subtle sweetness that’s not overwhelming, hint of espresso that enhances the chocolate (optional but recommended), slight chewiness that’s almost brownie-like, and the sweet powdered sugar coating that adds textural contrast. This recipe is perfect for chocolate lovers and serious bakers, holiday baking enthusiasts, cookie exchange participants who want something special, anyone wanting impressive-looking cookies without advanced techniques, gift-givers seeking bakery-quality homemade treats, and families wanting festive activities (kids love rolling these in sugar!). These are naturally nut-free, can be made gluten-free, and are a hit with all ages.
Ingredients
For the Cookie Dough:
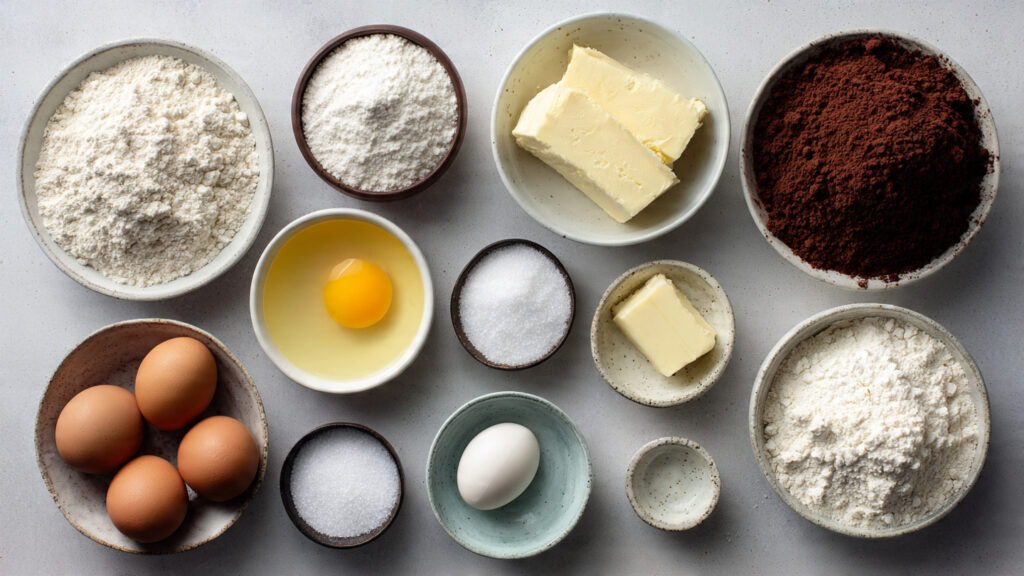
| Ingredient | Quantity |
|---|---|
| All-purpose flour | 1 cup (125g) |
| Unsweetened cocoa powder (Dutch-process or natural) | ½ cup (50g) |
| Baking powder | 1 teaspoon |
| Salt | ¼ teaspoon |
| Granulated sugar | ¾ cup (150g) |
| Light brown sugar, packed | ¼ cup (50g) |
| Large eggs, room temperature | 3 |
| Vegetable oil or melted coconut oil | ⅓ cup (80ml) |
| Vanilla extract | 2 teaspoons |
| Semi-sweet or bittersweet chocolate, melted and cooled | 4 oz (115g) |
| Instant espresso powder (optional) | 1 teaspoon |
For Coating:
| Ingredient | Quantity |
|---|---|
| Powdered sugar (confectioners’ sugar) | ½ cup (60g) |
| Granulated sugar (optional, for double coating) | ½ cup (100g) |
Optional Add-Ins:
| Item | Purpose |
|---|---|
| Mini chocolate chips | Extra chocolate chunks |
| Peppermint extract | Holiday mint flavor |
| Cinnamon | Warmth and depth |
| Cayenne | Spicy kick (Mexican chocolate) |
Tools Needed
- Two large mixing bowls
- Whisk
- Rubber spatula
- Measuring cups and spoons
- Baking sheets (2-3)
- Parchment paper or silicone baking mats
- Small bowls for coating sugars
- Cookie scoop (1½ tablespoon size) or spoon
- Wire cooling rack
- Microwave-safe bowl (for melting chocolate)
Suggested Substitutions and Additions
Flour Options:
- All-purpose flour: Standard, reliable (recommended)
- Gluten-free flour blend: Use 1:1 substitute (Bob’s Red Mill, King Arthur)
- Whole wheat pastry flour: Denser, nuttier flavor
- Cake flour: More delicate, tender texture
- Gluten-free: add ¼ teaspoon xanthan gum if blend doesn’t include it
Cocoa Powder Types:
- Dutch-process cocoa: Darker color, mellower flavor, less acidic
- Natural cocoa powder: Lighter, more acidic, fruitier chocolate flavor
- Black cocoa powder: Very dark, Oreo-like color (use half regular, half black)
- Combination: Half Dutch, half natural for complexity
- Quality matters: Use good cocoa (Valrhona, Ghirardelli, Guittard)
Chocolate Options:
- Semi-sweet chocolate: Classic, balanced sweetness
- Bittersweet chocolate (60-70%): More intense, less sweet
- Dark chocolate: Rich, sophisticated
- Milk chocolate: Sweeter, milder (for kids)
- Chocolate chips: Convenient, melt-safe
- Chopped chocolate bar: Better quality, smoother melting
Oil Alternatives:
- Vegetable oil: Neutral, creates fudgy texture (recommended)
- Coconut oil: Slight coconut flavor, fudgier
- Butter (melted): Richer flavor, slightly different texture
- Avocado oil: Neutral, healthy fats
- Olive oil: Interesting flavor (use light, not extra virgin)
Sugar Modifications:
- Granulated + brown sugar: Perfect balance (as written)
- All granulated: Less moisture, crisper
- All brown sugar: Chewier, caramel notes
- Reduce sugar: Can reduce by ¼ cup total for less sweet
- Coconut sugar: Caramel flavor, darker color
Egg Substitutes:
- Regular eggs: Best for structure and rise
- Flax eggs: 3 tablespoons ground flax + 9 tablespoons water (vegan)
- Chia eggs: 3 tablespoons chia seeds + 9 tablespoons water
- Applesauce: ¾ cup unsweetened (denser texture)
- Note: Egg substitutes will change texture significantly
Flavor Variations:
- Classic chocolate: As written
- Mint chocolate: Add ½ teaspoon peppermint extract
- Orange chocolate: Add 1 tablespoon orange zest + ½ teaspoon orange extract
- Mexican chocolate: Add ½ teaspoon cinnamon + pinch cayenne
- Mocha: Increase espresso powder to 2 teaspoons
- Almond chocolate: Add ½ teaspoon almond extract
- Spiced chocolate: Add ¼ teaspoon each: cinnamon, ginger, cardamom
Mix-Ins:
- Mini chocolate chips: ½ cup, folded into dough
- White chocolate chips: Beautiful contrast
- Crushed peppermint candies: Holiday version
- Chopped nuts: Walnuts, pecans (no longer nut-free)
- Dried cherries: Chopped, tart-sweet
- Espresso beans: Chocolate-covered, chopped
- Caramel bits: Gooey centers
Coating Variations:
- Standard: Powdered sugar only (recommended)
- Double coat: Roll in granulated sugar first, then powdered
- Colored sugar: Use colored powdered sugar for holidays
- Cocoa powder: Roll in cocoa instead for ultra-chocolate
- Cinnamon sugar: Mexican hot chocolate style
- Pearl sugar: Swedish style, crunchy
Dietary Modifications:
- Gluten-free: Use GF flour blend 1:1
- Dairy-free: Use dairy-free chocolate, already no butter
- Vegan: Use flax/chia eggs, dairy-free chocolate, plant-based oil
- Refined sugar-free: Use coconut sugar, but coating won’t be white
- Paleo: Use almond flour (texture will differ), coconut sugar, eggs
- Lower sugar: Reduce sugar by ¼ cup (cookies will be less sweet, still good)
How to Make Chocolate Crinkle Cookies
Step 1: Melt Chocolate and Mix Dry Ingredients
Start by melting your chocolate – you can do this in the microwave or double boiler. For microwave: place chopped chocolate or chocolate chips in a microwave-safe bowl and heat at 50% power in 30-second intervals, stirring between each, until smooth and melted (about 1-1.5 minutes total). Let it cool to room temperature while you prep other ingredients – hot chocolate will cook the eggs when mixed!
In a large mixing bowl, whisk together the flour, cocoa powder, baking powder, salt, and espresso powder (if using). Whisk thoroughly for about 30 seconds to ensure even distribution and to break up any cocoa lumps. The espresso powder won’t make these taste like coffee – it enhances and deepens the chocolate flavor. Set this dry mixture aside.
Pro tip: Sifting the cocoa powder ensures no lumps and a smoother dough, but whisking vigorously works too if you don’t have a sifter!
Step 2: Beat Eggs and Sugars
In another large bowl (or the bowl of a stand mixer), combine the eggs, granulated sugar, and brown sugar. Using an electric hand mixer or stand mixer fitted with the whisk attachment, beat on medium-high speed for 3-4 minutes until the mixture is thick, pale, and fluffy. It should increase in volume and become lighter in color – this is called “ribboning” because when you lift the beaters, the mixture should fall back in thick ribbons that hold their shape briefly before dissolving.
This step is crucial for creating the right texture! The air incorporated during beating helps create that characteristic crackled surface and gives the cookies their slightly crispy exterior with fudgy interior. Don’t rush this step – beat for the full 3-4 minutes!
Step 3: Add Oil, Vanilla, and Melted Chocolate
With the mixer on medium-low speed, drizzle in the vegetable oil and vanilla extract. Mix until combined, about 30 seconds. The mixture should be smooth and glossy.
Add the cooled melted chocolate and mix on low speed just until fully incorporated and uniform in color, about 30-45 seconds. Make sure the chocolate isn’t hot or it will cook the eggs! The batter should be thick, smooth, and very chocolatey-looking. Scrape down the sides and bottom of the bowl to ensure everything is evenly mixed.
At this point, the batter will look quite wet and almost brownie batter-like – that’s perfect! It will thicken as you add the dry ingredients.
Step 4: Fold in Dry Ingredients
Add all the dry ingredients (flour mixture) to the wet ingredients at once. Using a rubber spatula, gently fold the dry ingredients into the wet ingredients. Fold by cutting down through the center, across the bottom, and up the side of the bowl, rotating the bowl as you go. Continue folding just until no flour streaks remain and the dough is uniform.
The dough will be quite soft, sticky, and more like thick brownie batter than traditional cookie dough – this is exactly right! Don’t overmix or the cookies will be tough. A few small lumps are okay.
If adding mix-ins like chocolate chips, fold them in now with just a few strokes. The dough should be thick and glossy.
Step 5: Chill the Dough (Critical Step!)
Cover the bowl tightly with plastic wrap, pressing it directly onto the surface of the dough to prevent a skin from forming. Refrigerate for at least 2 hours, or preferably overnight (up to 3 days). This chilling step is absolutely essential and cannot be skipped!
Why? The dough is too soft to scoop and shape when first mixed. Chilling firms it up so you can roll it into balls. It also allows the flour to fully hydrate, which improves texture, and gives the flavors time to meld and develop. Overnight chilling produces the best results – the cookies have better flavor and texture, and develop more dramatic cracks!
Time-saving option: If you’re really short on time, chill for at least 2 hours. If you’re in a rush, you can scoop the dough into balls before chilling, then chill the balls on a baking sheet for just 30-45 minutes – but longer is always better!
Step 6: Shape and Coat Cookie Dough Balls
When ready to bake, preheat your oven to 350°F (175°C). Line 2-3 baking sheets with parchment paper or silicone baking mats.
Set up your coating station: Place the powdered sugar in a small bowl. If doing a double coating, place granulated sugar in a separate small bowl.
Using a cookie scoop (1½ tablespoon size) or spoon, scoop the chilled dough and roll it between your palms into smooth balls, each about 1 inch in diameter (or slightly larger – size is flexible based on preference). The dough should be firm enough to shape but still slightly sticky.
If doing a double coat: First roll each ball in granulated sugar to coat completely, then roll in powdered sugar to coat generously. The double coat creates more dramatic cracks! If doing single coat: Roll each ball generously in powdered sugar only, making sure it’s completely coated – don’t be shy with the sugar! The more powdered sugar, the more white crackles you’ll see.
Place coated balls on prepared baking sheets, spacing them about 2 inches apart (they spread moderately). You should get about 24-30 cookies depending on size.
Critical tip: Coat generously with powdered sugar! A thick coat is what creates those beautiful white cracks. A thin dusting won’t give you the dramatic crinkle effect.
Step 7: Bake to Perfect Crinkles
Bake cookies one sheet at a time (for most even results) on the center rack for 10-12 minutes. The cookies are done when the edges are set and look dry, but the centers still look slightly underbaked and soft. You should see beautiful cracks forming with dark chocolate peeking through the white sugar.
Don’t overbake! The cookies will look underdone when you remove them – the centers might even look wet or shiny. That’s perfect! They continue cooking on the hot pan after removal from the oven (called “carryover cooking”). Overbaked chocolate crinkle cookies are dry and cake-like instead of fudgy.
The timing is crucial: At 10 minutes, check cookies. If edges are set but centers look very wet, bake 1-2 more minutes. If edges are set and centers look slightly glossy/soft, remove immediately. Better to underbake slightly than overbake!
Remove from oven and let cookies cool on the baking sheet for 5 minutes – they’re very soft when hot and will firm up as they cool. After 5 minutes, transfer to a wire cooling rack to cool completely.
Step 8: Cool and Enjoy
Let cookies cool completely on the wire rack – this takes about 15-20 minutes. As they cool, they’ll firm up on the outside while staying fudgy inside, achieving that perfect texture.
The cookies are at their absolute best on day 1-2 when the powdered sugar coating is still bright white and the contrast is most dramatic. Over time, the powdered sugar absorbs moisture from the cookies and becomes slightly gray – they still taste delicious, but don’t look as stunning!
Store cooled cookies in an airtight container at room temperature for up to 5 days. For gifting or presenting, arrange in boxes or on platters right before serving for maximum visual impact. These cookies are guaranteed to impress every single time!
What to Serve with It
Chocolate Crinkle Cookies are incredibly versatile and pair beautifully with various beverages and occasions. For beverages, the classic pairing is cold milk – the traditional cookie companion that balances the rich chocolate. Coffee (hot or iced) complements the chocolate beautifully, especially if you added espresso powder to the dough. Hot chocolate or cocoa creates an ultra-indulgent chocolate experience, perfect for winter evenings. Espresso or cappuccino cuts through the sweetness and adds sophistication for adult gatherings. Tea works wonderfully too – try English Breakfast, Earl Grey, or chai.
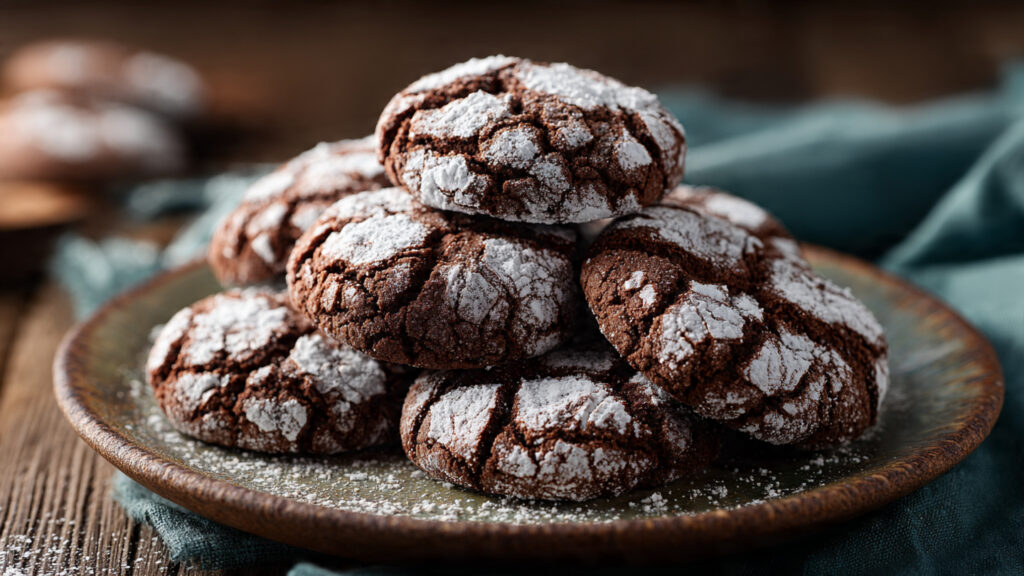
For holiday entertaining, arrange these on a festive cookie platter alongside other classics like sugar cookies, gingerbread, peanut butter blossoms, and snickerdoodles. The black and white contrast makes them stand out beautifully on any dessert table.
For dessert pairings, serve alongside vanilla ice cream (the temperature and flavor contrast is perfect), create ice cream sandwiches (sandwich ice cream between two cookies), pair with chocolate mousse or pot de crème for an all-chocolate dessert experience, or serve with fresh berries and whipped cream for brightness.
For special occasions and gifts, these cookies are perfect for: Christmas cookie exchanges (they’re always a hit and look festive), holiday gift boxes (pack in decorative tins or boxes with tissue paper), cookie platters for teachers, neighbors, coworkers, bake sales (they sell out fast because they look so impressive), or winter celebrations and snow-themed parties (they look like snow-covered cookies!).
For children’s parties or activities, serve with milk or chocolate milk, arrange on winter/snowflake themed plates, or let kids help make them (they love rolling the dough in sugar!).
For elegant events, pair with champagne or prosecco (surprisingly delicious!), port or dessert wine (the richness complements chocolate), Irish coffee or spiked hot chocolate (for adult gatherings), or arrange on tiered cake stands with fresh flowers for fancy presentation.
Tips for Making It Perfect
- Don’t skip the chilling time: This is the most important step! The dough must be chilled for at least 2 hours, but overnight is even better. Chilling firms up the dough so you can shape it, allows flavors to develop, and improves the texture dramatically. Without proper chilling, the cookies will spread too much and won’t develop those beautiful cracks. If you’re short on time, you can scoop balls first then chill them for 30-45 minutes minimum.
- Coat generously with powdered sugar: Don’t be shy! A thick, generous coating of powdered sugar is what creates those dramatic white cracks against the dark chocolate. A light dusting won’t give you the stunning effect you’re looking for. Roll each ball completely until it’s thoroughly coated in a thick layer of white. For even more dramatic cracks, do the double coating method (granulated sugar first, then powdered sugar).
- Don’t overbake – they should look underdone: These cookies continue cooking after you remove them from the oven. When you pull them out, the centers should still look soft, slightly shiny, and even a bit wet – that’s perfect! They’ll firm up as they cool. Overbaked chocolate crinkle cookies are dry and cake-like instead of having that signature fudgy, brownie-like center. Better to underbake by 1 minute than overbake by 1 minute!
- Use room temperature eggs: Room temperature eggs incorporate more easily and create better volume when beaten. Cold eggs don’t emulsify as well with the sugar and can create a denser texture. Take eggs out of the refrigerator 30 minutes before baking, or quick-warm them by placing in a bowl of warm (not hot) water for 5 minutes.
- Melt and cool the chocolate completely: Hot chocolate will cook the eggs when mixed in, creating scrambled egg bits in your dough – not appetizing! Melt the chocolate, then let it cool to room temperature (it should feel barely warm or cool to the touch) before adding to the egg mixture. This ensures smooth, properly mixed dough.
- Size consistency matters for even baking: Use a cookie scoop for uniform size – this ensures all cookies bake evenly in the same time. If some are larger and some smaller, the small ones will overbake while large ones are still raw. A 1½ tablespoon scoop is ideal, but any size works as long as they’re all the same.
- Bake one sheet at a time for best results: For the most even baking and best crinkle development, bake one sheet at a time on the center oven rack. If you must bake two sheets, rotate them halfway through and be prepared for slightly uneven results. The top sheet may brown faster while the bottom sheet needs more time.
Storage Instructions
Room Temperature: Store completely cooled cookies in an airtight container at room temperature for up to 5 days. Place parchment or wax paper between layers to prevent them from sticking together and to protect the powdered sugar coating. The cookies stay soft and fudgy at room temperature. Note: Over time (2-3 days), the powdered sugar coating will absorb moisture from the cookies and may turn slightly gray – they still taste delicious but don’t look as stunning!
Refrigerator: You can refrigerate cookies for up to 1 week in an airtight container, though it’s not necessary. Refrigeration firms them up and makes them less fudgy, more like brownies when cold. Some people actually prefer the texture cold! Bring to room temperature before serving for best flavor and texture.
Freezing Baked Cookies: These freeze beautifully! Place completely cooled cookies in a single layer on a baking sheet and freeze for 1 hour until solid (this prevents them from sticking together). Transfer frozen cookies to a freezer bag or airtight container with parchment between layers. Freeze for up to 3 months. To serve: thaw at room temperature for 30 minutes to 1 hour. The powdered sugar coating holds up remarkably well in the freezer!
Freezing Cookie Dough: This is my favorite make-ahead method! After chilling the dough, scoop and roll into balls, but don’t coat in sugar yet. Place balls on a baking sheet and freeze until solid (1-2 hours). Transfer frozen dough balls to a freezer bag and freeze for up to 3 months. To bake: let frozen dough balls sit at room temperature for 10-15 minutes until you can press into them slightly, roll in powdered sugar, then bake as directed, adding 1-2 extra minutes to the baking time. Or, thaw overnight in refrigerator, then roll in sugar and bake as usual.
Maintaining the White Coating: For the best visual impact, plan to serve cookies within 1-2 days of baking when the powdered sugar is brightest white. If making ahead for an event, consider freezing and thawing the day before, or rolling in fresh powdered sugar right before serving (though this won’t look as natural as the original coating).
Gift Giving: These cookies are perfect for gifting! Package in decorative tins, boxes, or cellophane bags tied with ribbon. They stay fresh for 3-4 days at room temperature, making them excellent for holiday gifts. For the best appearance, package the same day or day after baking when the contrast is most dramatic.
Refreshing Cookies: If cookies have softened or the powdered sugar has absorbed too much moisture, you can place them in a 300°F oven for 2-3 minutes to refresh (the sugar will melt into them slightly), then let cool. Or, lightly dust with fresh powdered sugar just before serving to brighten the appearance.
General Information
Chocolate crinkle cookies, also called “chocolate crackles,” have somewhat mysterious origins with several regions claiming their creation. The most widely accepted story traces them to American home baking in the 1940s-1950s, when they began appearing in community cookbooks and newspaper columns. Some food historians believe they may have been inspired by German or Austrian baking traditions of rolling cookies in powdered sugar.
The cookies gained significant popularity in the United States during the 1960s-1970s, appearing in major cookbooks and becoming a holiday baking staple. Their dramatic black-and-white appearance made them especially popular for Christmas and winter celebrations, as they visually evoke snow-covered landscapes or winter scenes. The contrast also made them perfect for black-and-white themed parties and elegant events.
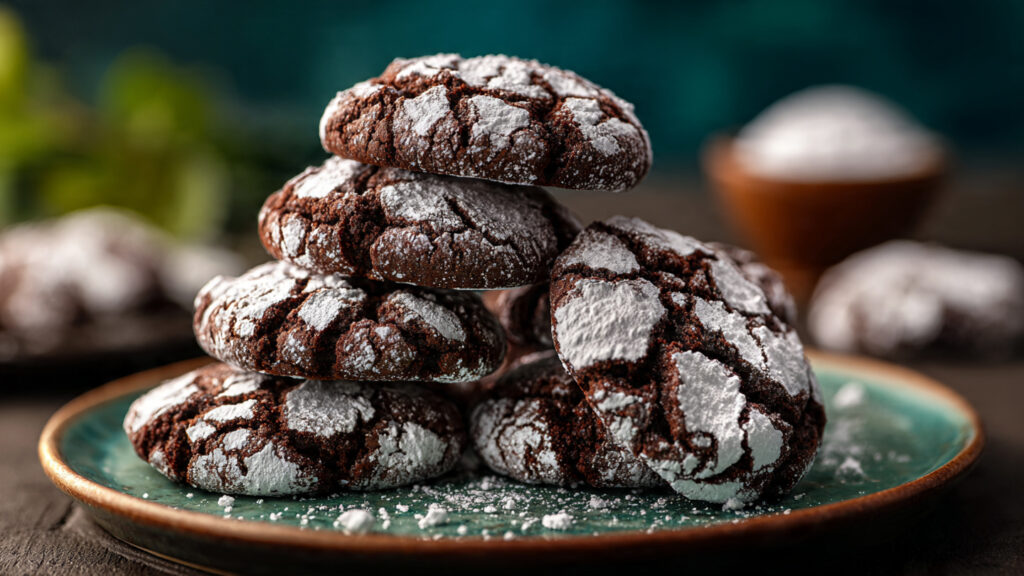
What makes these cookies unique from a baking science perspective is the interaction between the cocoa powder-based dough and the powdered sugar coating. As the cookies bake, they spread and rise, causing the surface to crack. The powdered sugar coating remains in place where it first adhered but doesn’t expand with the cookie, creating those characteristic white “cracks” or “crinkles” with dark chocolate showing through.
The texture of chocolate crinkle cookies is often described as “brownie-like” – and for good reason! The high ratio of chocolate to flour, the use of oil rather than butter, and minimal mixing all contribute to a dense, fudgy interior similar to brownies. The eggs provide structure and rise, while the baking powder creates slight lift. The result is a cookie with a delicate, slightly crispy exterior that gives way to an intensely chocolatey, soft interior.
These cookies have maintained their popularity for decades because they deliver on multiple levels: they look impressive (always important for holiday baking), they taste intensely chocolatey (satisfying chocolate lovers), they’re relatively simple to make (no complicated techniques required), and they photograph beautifully (perfect for the Instagram age!).
The cookies have also inspired numerous variations over the years: peppermint crinkles, orange chocolate crinkles, red velvet crinkles, and even savory versions. However, the classic chocolate crinkle remains the most beloved, appearing on holiday cookie platters alongside sugar cookies, gingerbread, and other seasonal favorites year after year.
Frequently Asked Questions (FAQ)
Q: Why didn’t my cookies crackle/crinkle properly? A: Several reasons can cause poor cracking: (1) Dough wasn’t chilled long enough – must chill at least 2 hours, preferably overnight, (2) Not enough powdered sugar coating – you need a generous, thick coating, (3) Dough balls were too cold when baked – let them sit at room temp for 10-15 minutes if frozen, (4) Overbaking – cookies continue cooking after removal, don’t overbake, or (5) Oven temperature incorrect – use an oven thermometer to verify. For best cracks: chill overnight, coat generously, bake just until edges set.
Q: Can I skip chilling the dough? A: Unfortunately, no. Chilling is essential and cannot be skipped! The dough is too soft to shape when first mixed – it’s almost liquid-like. Chilling firms it up so you can roll it into balls and it holds its shape during baking. Chilling also develops flavors and improves texture. If you’re really pressed for time, chill for the absolute minimum of 2 hours, but overnight produces superior results. You can scoop balls first then chill them for 30-45 minutes minimum.
Q: My powdered sugar turned gray/disappeared – what happened? A: This is normal over time! Powdered sugar absorbs moisture from the cookies, causing it to dissolve into the cookie and turn gray rather than staying bright white. It happens faster in humid environments. The cookies still taste delicious but don’t look as stunning. To maintain appearance: serve within 1-2 days of baking, store in airtight container, or for events, bake the day before. You can lightly dust with fresh powdered sugar before serving, though it won’t look quite as natural.
Q: Can I make these gluten-free? A: Yes! Replace the all-purpose flour with a 1:1 gluten-free flour blend (Bob’s Red Mill, King Arthur, or similar). Make sure the blend contains xanthan gum or guar gum for structure – if it doesn’t, add ¼ teaspoon xanthan gum. Everything else stays the same. The texture will be very slightly different but still delicious and they’ll still crackle beautifully. Make sure all other ingredients (especially baking powder and chocolate) are certified gluten-free if needed for celiac.
Q: Why are my cookies flat and spread out too much? A: Excessive spreading happens when: (1) Dough wasn’t chilled long enough or at all, (2) Oven temperature too low – use an oven thermometer, (3) Too much oil in the dough, (4) Cookies were too warm when they went in the oven, or (5) Baking sheets were hot from previous batch. Always chill dough thoroughly, let baking sheets cool between batches, and verify your oven temperature is accurate at 350°F.
Q: Can I make these dairy-free or vegan? A: Yes! These cookies are already dairy-free (no butter or milk) as long as you use dairy-free chocolate. For vegan: replace the 3 eggs with flax eggs (3 tablespoons ground flax + 9 tablespoons water, let sit 5 minutes until thickened) or 3 tablespoons aquafaba (chickpea liquid) whipped until foamy. The texture will be slightly different (less rise, more dense) but they’ll still be delicious and will still crackle!
Q: How do I get that super dark, almost black color? A: For the darkest cookies: (1) Use Dutch-process cocoa powder (darker than natural cocoa), (2) Use dark/bittersweet chocolate (60-70% cacao) for melting, (3) Consider using half regular cocoa and half “black cocoa powder” (Oreo-dark), available online or specialty stores. Black cocoa creates that dramatic almost-black color that makes the white cracks even more striking. Don’t add food coloring – it won’t work the same way and cocoa is what gives the flavor!
Conclusion
I’m absolutely thrilled to share these Chocolate Crinkle Cookies with you – they’re truly one of those magical recipes that look like they came from a professional bakery but are actually quite simple to make at home! The combination of intensely chocolatey, fudgy centers and that stunning crackled appearance makes these cookies perfect for any occasion where you want to impress, from holiday parties to elegant gifts. Whether you’re an experienced baker or just starting out, these cookies will make you look like a superstar.
I’d absolutely love to hear how your chocolate crinkle cookies turned out! Please leave a comment below sharing your experience, any flavor variations you tried, or what occasion you made them for. If these cookies wowed your family, friends, or cookie exchange participants and had everyone asking for the recipe, please give it a five-star rating – it helps other bakers discover this showstopper!
Don’t forget to snap photos of your beautiful crinkle cookies (especially that gorgeous black and white contrast!) and share them on Instagram – tag me so I can see your creations and celebrate your baking success! And please pin this recipe to your “Holiday Baking,” “Chocolate Cookies,” or “Cookie Exchange” boards on Pinterest so you’ll always have it when you need something spectacular. Happy baking, and may your cookies always crackle beautifully!
Nutritional Information (per serving)
Based on 30 cookies (1 cookie per serving)
| Nutrient | Amount |
|---|---|
| Calories | 95 |
| Total Fat | 4g |
| Saturated Fat | 1.5g |
| Trans Fat | 0g |
| Cholesterol | 20mg |
| Sodium | 35mg |
| Total Carbohydrates | 15g |
| Dietary Fiber | 1g |
| Sugars | 11g |
| Protein | 2g |
| Vitamin A | 1% DV |
| Vitamin C | 0% DV |
| Calcium | 15mg |
| Iron | 0.8mg |
| Potassium | 65mg |
Note: Nutritional values are approximate and will vary based on exact ingredients used (type of chocolate, cocoa powder), size of cookies, and how generously they’re coated in powdered sugar. These are indulgent treats meant for special occasions.