Decadent Chewy Cocoa Cookies with Marshmallow Delight
Introduction
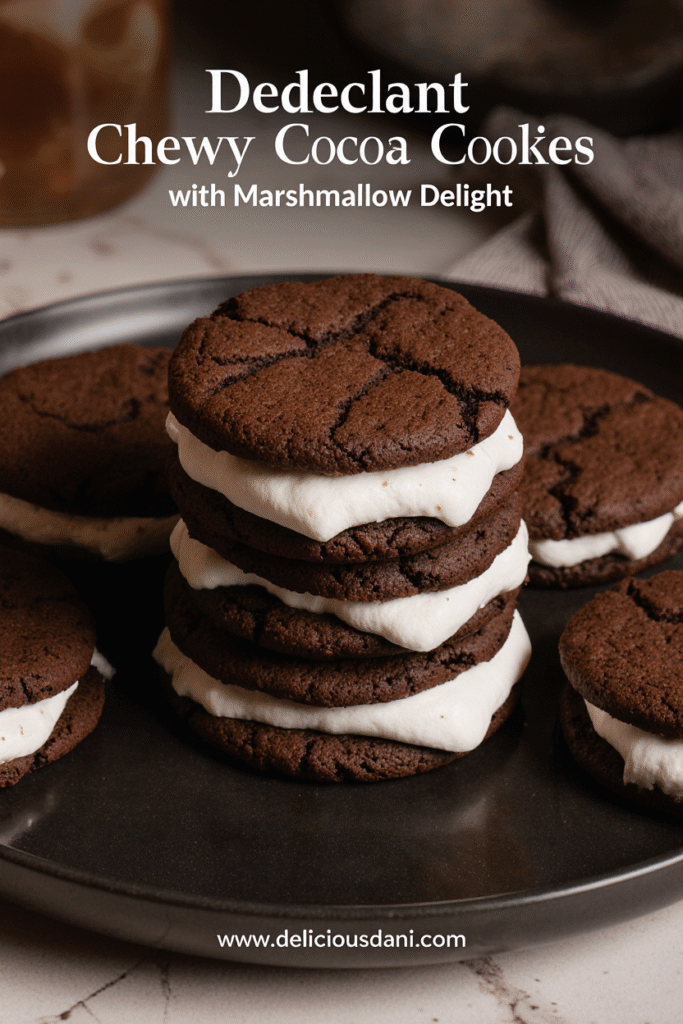
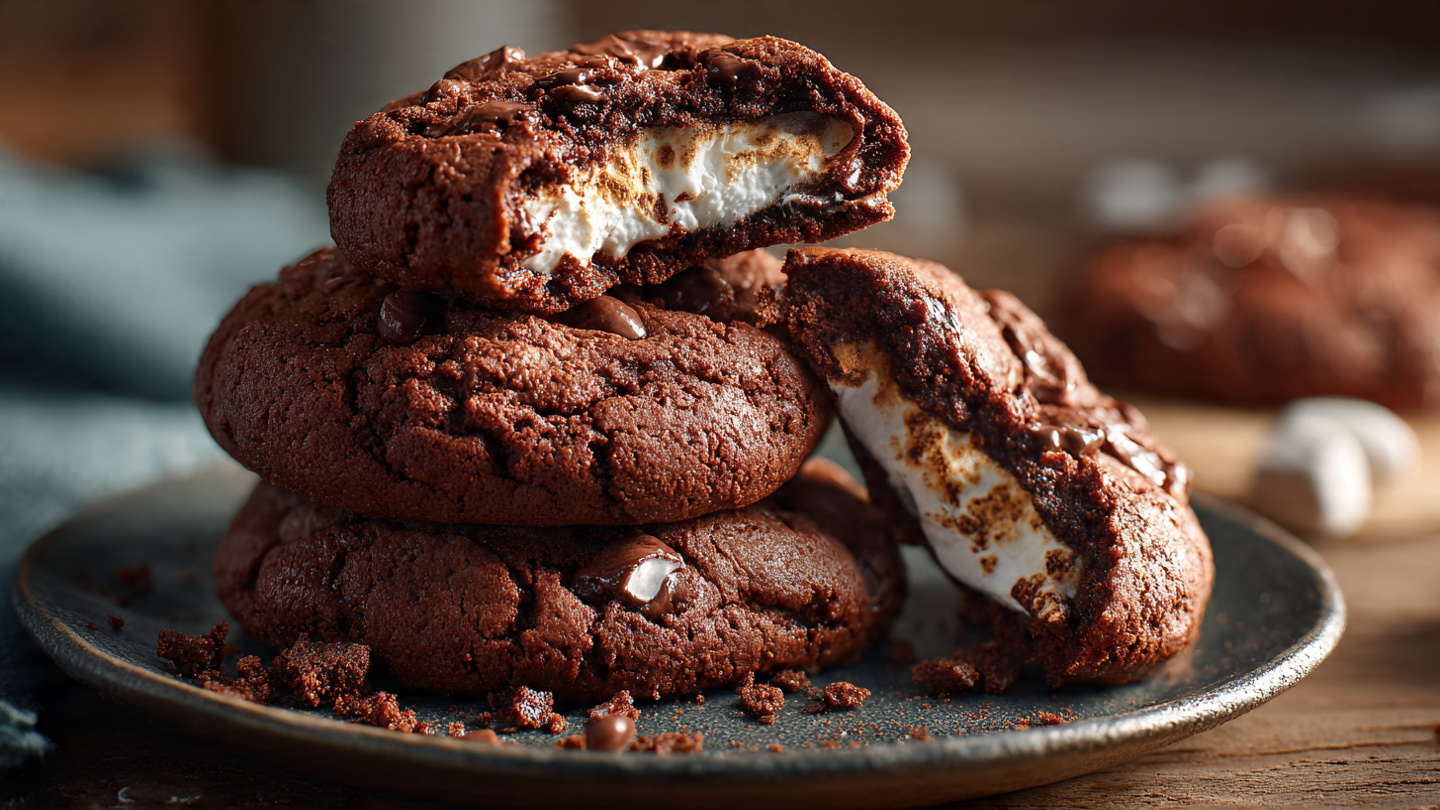
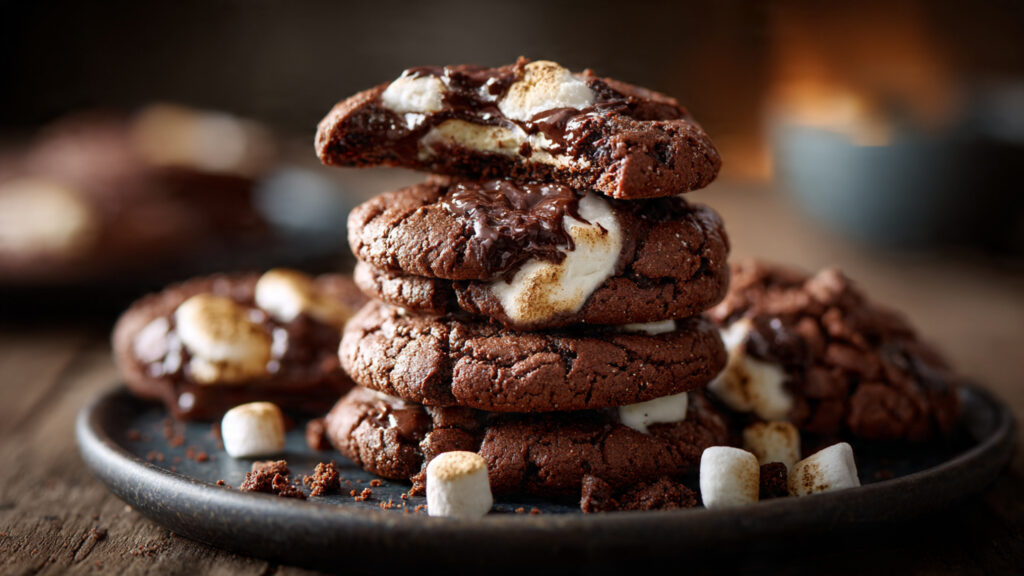
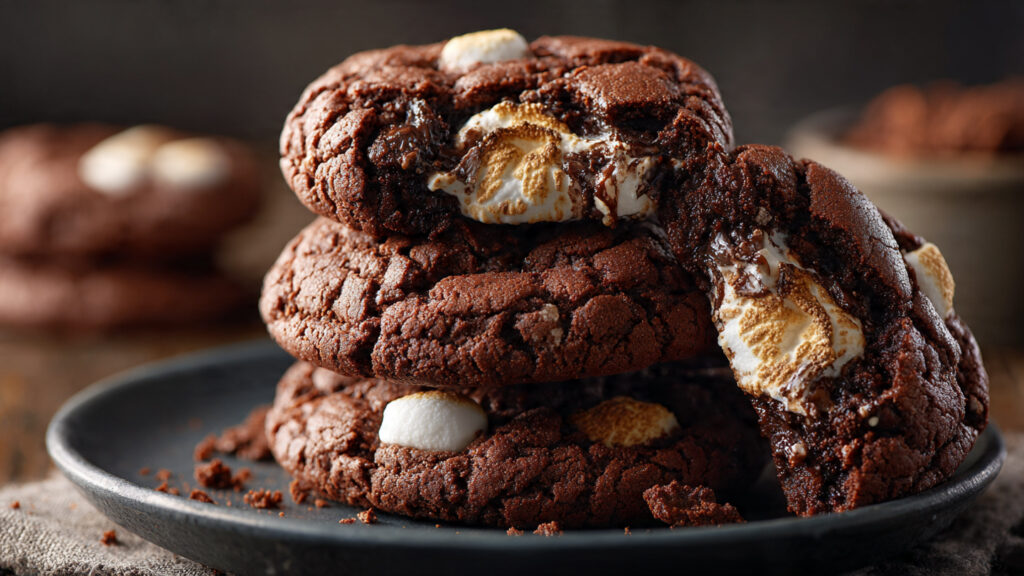
Prepare to experience pure chocolate heaven with these Decadent Chewy Cocoa Cookies with Marshmallow Delight – impossibly fudgy, intensely chocolatey cookies topped with toasted marshmallows that create the ultimate s’mores-inspired treat that’s somehow even better than the campfire classic! I created this recipe on a rainy evening when I was craving s’mores but couldn’t have a campfire, and what emerged from my oven was something magical: rich, brownie-like chocolate cookies with crispy edges and chewy centers, crowned with golden-toasted marshmallows that get beautifully caramelized and gooey under the broiler. What makes these cookies absolutely extraordinary is the layers of chocolate experience – deep cocoa powder creates intense chocolate flavor, optional chocolate chips add melty pockets of richness, and the toasted marshmallow on top provides that nostalgic, campfire sweetness that takes these from “just chocolate cookies” to “life-changing dessert experience.” These cookies have become my signature impressive dessert, my campfire alternative, my special occasion showstopper, my gift for chocolate lovers, and proof that sometimes the best recipes come from creative cravings on rainy days! Whether you’re a s’mores enthusiast, chocolate devotee, marshmallow lover, need impressive cookies for gatherings, or just want something warm, gooey, and utterly indulgent, these cocoa marshmallow cookies are about to become your most requested recipe!
Overview of Recipe Content
Decadent Chewy Cocoa Cookies with Marshmallow Delight are perfect for s’mores lovers without a campfire, impressive desserts for dinner parties, special occasion treats and celebrations, chocolate cravings that need serious satisfaction, kids’ parties (they’ll go wild!), Valentine’s Day or romantic occasions, holiday cookie platters with something unique, or anytime you want warm, gooey, chocolate-marshmallow bliss. It’s a great recipe because it delivers intense chocolate flavor from cocoa powder, creates that perfect chewy-fudgy texture like brownies, adds interactive fun with the toasted marshmallow step, looks absolutely stunning and bakery-worthy, captures s’mores nostalgia without a campfire, can be made year-round regardless of weather, and satisfies even the most serious chocolate cravings. The flavor profile is indulgent perfection: deep, rich, intense chocolate from quality cocoa, fudgy, brownie-like texture that’s never cakey, sweet, toasted marshmallow with slight char flavor, optional melty chocolate chips throughout, perfectly balanced sweetness with slight bitterness from dark cocoa, and that nostalgic campfire s’mores experience. This recipe is perfect for chocolate lovers and cocoa enthusiasts, s’mores fans seeking creative formats, impressive dessert seekers, people who love chewy cookies over crispy, marshmallow devotees, and anyone wanting bakery-quality results at home. It’s naturally nut-free (can contain chocolate), vegetarian, and always a showstopper!
Ingredients
For the Cocoa Cookies:
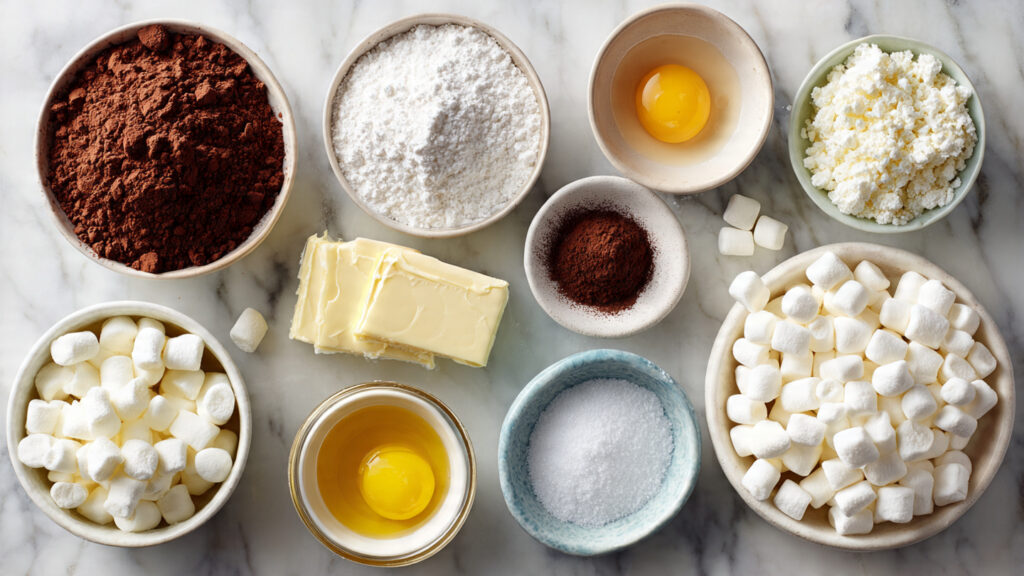
| Ingredient | Quantity |
|---|---|
| All-purpose flour | 1 cup (125g) |
| Unsweetened cocoa powder (Dutch-process or natural) | ½ cup (50g) |
| Baking soda | ½ teaspoon |
| Salt | ¼ teaspoon |
| Unsalted butter, melted and slightly cooled | ½ cup (113g) |
| Granulated sugar | 1 cup (200g) |
| Large egg, room temperature | 1 |
| Egg yolk, room temperature | 1 |
| Vanilla extract | 2 teaspoons |
| Milk (any kind) | 1 tablespoon |
| Chocolate chips or chunks (optional) | ½ cup (90g) |
For the Marshmallow Topping:
| Ingredient | Quantity | Notes |
|---|---|---|
| Large marshmallows | 12-18 | 1 per cookie |
| Or: jumbo marshmallows cut in half | 6-9 | Dramatic presentation |
| Or: mini marshmallows | 24-36 | Use 2-3 per cookie |
| Or: homemade marshmallows | As needed | Cut to size |
Optional Toppings and Additions:
| Item | Purpose |
|---|---|
| Graham cracker crumbs | S’mores authenticity |
| Chocolate drizzle (melted chocolate) | Extra chocolate |
| Sea salt flakes | Sweet-salty contrast |
| Mini chocolate chips | Decoration |
| Crushed chocolate sandwich cookies | Cookies and cream version |
| Caramel sauce drizzle | Sweet complexity |
Tools Needed
- Large mixing bowl (2)
- Whisk
- Rubber spatula
- Measuring cups and spoons
- Baking sheets (2)
- Parchment paper or silicone baking mats
- Cookie scoop or spoon
- Wire cooling rack
- Oven broiler
- Timer (critical for broiling marshmallows!)
- Optional: kitchen torch for toasting marshmallows
Suggested Substitutions and Additions
Cocoa Powder Types:
- Dutch-process cocoa: Darker, mellower, less acidic (recommended)
- Natural cocoa: Lighter, more acidic, fruitier notes
- Black cocoa: Very dark, Oreo-like (use half regular, half black)
- Quality matters: Use Valrhona, Ghirardelli, Guittard, or similar
- Don’t use hot chocolate mix: Not pure cocoa, contains sugar/milk
Flour Options:
- All-purpose flour: Standard, reliable (recommended)
- Bread flour: Chewier, denser cookies
- Cake flour: More tender, delicate (use ¾ cup + 2 tablespoons)
- Gluten-free flour blend: 1:1 substitution (may be slightly grittier)
- Combination: Half AP, half almond flour for richness
Butter Alternatives:
- Melted butter: Creates dense, fudgy texture (recommended)
- Browned butter: Nutty, caramelized flavor (amazing!)
- Coconut oil: Different flavor, vegan option
- Vegan butter: For dairy-free (Earth Balance works well)
- Combination: Half butter, half oil for ultra-fudgy
Sweetener Options:
- Granulated sugar: Creates crispy edges (recommended)
- Brown sugar: Chewier, more molasses flavor (can use all brown)
- Combination: Half white, half brown (balanced texture)
- Coconut sugar: Less refined, caramel notes
- Reduced sugar: Can reduce by ¼ cup (less sweet, drier)
Egg Considerations:
- 1 whole egg + 1 yolk: Creates chewy, fudgy texture (recommended)
- 2 whole eggs: More cake-like, less fudgy
- Flax eggs: Vegan option (texture differs significantly)
- Room temperature: Incorporates better, creates even texture
Marshmallow Options:
- Large marshmallows: Standard, perfect size (1 per cookie)
- Jumbo marshmallows: Cut in half, dramatic presentation
- Mini marshmallows: Use 2-3 per cookie, fun size
- Homemade marshmallows: Ultimate freshness and flavor
- Flavored marshmallows: Vanilla, strawberry, chocolate
- Vegan marshmallows: Dandies brand or homemade
Flavor Variations:
- Classic s’mores: As written with graham cracker crumbs
- Mint chocolate: Add 1 teaspoon peppermint extract
- Mexican hot chocolate: Add cinnamon, cayenne, espresso
- Mocha: Add 1 tablespoon instant espresso powder
- Orange chocolate: Add orange zest
- Salted caramel: Drizzle caramel, sprinkle sea salt
- Cookies and cream: Mix in crushed Oreos
- Rocky road: Add peanuts and mini marshmallows in dough
Mix-In Ideas:
- Chocolate chips: Dark, milk, semi-sweet, or white
- Chocolate chunks: Irregular pieces, gourmet look
- Peanut butter chips: Sweet-salty combination
- Toffee bits: Crunchy, buttery sweetness
- Crushed graham crackers: S’mores authenticity
- Nuts: Walnuts, pecans (½ cup chopped)
- Dried cherries: Sophisticated fruity note
- Espresso chips: Coffee-chocolate combo
Toasting Methods:
- Oven broiler: Quick, even (watch closely!)
- Kitchen torch: Control, professional look, fun
- Toaster oven broiler: Small batches
- Campfire/grill: Authentic s’mores experience (if available)
Dietary Modifications:
- Gluten-free: GF flour blend, check all ingredients
- Dairy-free: Vegan butter, dairy-free chocolate, vegan marshmallows
- Vegan: Flax eggs, vegan butter, vegan marshmallows, dairy-free chocolate
- Lower sugar: Reduce sugar by ¼ cup (less sweet)
- Nut-free: Already nut-free unless you add nuts
- Egg-free: Use flax eggs (texture will differ)
How to Make Decadent Chewy Cocoa Cookies with Marshmallow Delight
Step 1: Prepare and Preheat
Preheat your oven to 350°F (175°C). Position racks in the center and upper third of the oven. Line two baking sheets with parchment paper or silicone baking mats. Set aside.
Melt the butter in a microwave-safe bowl or small saucepan and let it cool for 5 minutes until it’s warm but not hot. You want melted butter that won’t scramble the eggs when mixed, but still fluid enough to incorporate easily.
Pro tip: If using browned butter (highly recommended for extra flavor!), brown the butter in a light-colored saucepan over medium heat until it smells nutty and golden brown bits appear at the bottom, then let cool 10 minutes before using.
Step 2: Mix Dry Ingredients
In a medium bowl, whisk together the flour, cocoa powder, baking soda, and salt. Whisk vigorously for 30-45 seconds to break up any cocoa powder lumps and ensure everything is evenly distributed. The mixture should be uniform dark brown with no streaks.
If your cocoa powder is lumpy, sift it first before measuring for the smoothest cookies. Quality cocoa powder makes a dramatic difference in flavor – use the best you can find!
Set the dry mixture aside while you prepare the wet ingredients.
Step 3: Mix Wet Ingredients
In a large mixing bowl, whisk together the melted (and slightly cooled) butter and granulated sugar vigorously for about 1 minute until well combined and slightly lighter in color. The mixture should look sandy and combined, though it won’t be fluffy like creamed butter and sugar.
Add the egg, egg yolk, vanilla extract, and milk. Whisk vigorously for 1-2 minutes until the mixture is smooth, glossy, and well combined. It should look thick and emulsified, almost like chocolate pudding or brownie batter. This vigorous whisking creates structure and that fudgy texture!
The mixture should be completely smooth with no streaks of egg, uniform in color, and quite thick. If you see egg bits, keep whisking!
Step 4: Combine Wet and Dry Ingredients
Pour the dry ingredients (flour-cocoa mixture) into the wet ingredients all at once. Using a rubber spatula, fold gently until just combined. The batter will be very thick – almost like brownie batter, not traditional cookie dough. This is perfect!
Mix just until no flour streaks remain – about 20-30 seconds of folding. Don’t overmix or the cookies will be tough instead of fudgy. A few small lumps are fine.
If adding chocolate chips or other mix-ins, fold them in now with just a few strokes until evenly distributed.
The dough should be thick, glossy, very dark brown, and smell intensely of chocolate. It will be softer than typical cookie dough and may seem too soft – that’s correct! It firms up as it sits and chills.
Important: Let the dough rest at room temperature for 10 minutes before scooping. This allows the flour to hydrate and the dough to firm up slightly, making it easier to scoop and creating better texture.
Step 5: Scoop and Bake Cookies
Using a cookie scoop (about 2 tablespoons) or spoon, scoop portions of dough and roll into balls. Place on prepared baking sheets, spacing them about 2-3 inches apart – these cookies spread moderately. You should fit about 6-8 cookies per sheet.
The dough will be soft and sticky – wet your hands slightly or use the cookie scoop for easiest handling. Don’t flatten the balls – they’ll spread and flatten naturally during baking.
Bake in the preheated 350°F (175°C) oven for 10-12 minutes. The cookies should look set at the edges but still slightly soft and underdone in the centers. The tops may look crackled and slightly dry but the centers should appear soft.
Critical: Don’t overbake! These cookies MUST be removed when they still look slightly underdone. They’ll look soft and fragile, almost like they need more time, but they continue cooking from residual heat as they cool. Overbaking creates dry, cakey cookies instead of fudgy, chewy ones. Remove when edges are set, centers soft.
Remove from oven and let cool on the baking sheet for 5 minutes – they’re too soft to move immediately. After 5 minutes, transfer to a wire cooling rack. Let cool for another 5-10 minutes until they’re warm but not hot. You want them still warm when you add marshmallows!
Step 6: Add Marshmallows and Toast
Once cookies are warm (not hot, not cold – warm is key!), place one large marshmallow (or 2-3 mini marshmallows) on top of each cookie, pressing down gently so they stick. The warmth of the cookie helps them adhere.
Now for the fun part – toasting! You have two options:
Broiler method: Place the marshmallow-topped cookies back on the baking sheet and place under the oven broiler (preheated to high) for 30 seconds to 1 minute. Watch them CONSTANTLY – they go from perfect to burned in seconds! You want golden-brown, toasted, slightly charred marshmallows. Remove as soon as they’re golden.
Kitchen torch method: Use a kitchen torch to toast the marshmallow tops directly on the cookies. This gives you more control and creates that professional, evenly toasted look. Toast until golden brown with slight charring.
The marshmallows will puff up, get golden-brown, and may char slightly in spots – this is perfect! That toasted flavor is what makes these cookies special.
Let the toasted marshmallow cookies sit for 2-3 minutes so the marshmallows settle and firm up slightly. They’ll be very hot and gooey initially!
Step 7: Optional Finishing Touches
While the marshmallows are still warm and sticky, you can add optional toppings:
- Sprinkle with graham cracker crumbs for authentic s’mores flavor
- Drizzle with melted chocolate (dark, milk, or white)
- Sprinkle with sea salt flakes for sweet-salty contrast
- Add mini chocolate chips that will slightly melt into the warm marshmallow
- Dust with cocoa powder for elegant presentation
These finishing touches are optional but add visual appeal and extra flavor dimension!
Serve the cookies warm or at room temperature. They’re best enjoyed within a few hours while the marshmallows are soft and fresh, but they stay delicious for days. Warm them slightly before serving leftovers to revive that just-baked, gooey marshmallow experience!
What to Serve with It
Decadent Chewy Cocoa Cookies with Marshmallow Delight are incredibly rich and indulgent, so simple pairings work best. The classic pairing is cold milk – the cold, creamy milk cuts through the intense chocolate and complements the sweet marshmallow perfectly. Chocolate milk creates ultimate chocolate overload for serious chocolate lovers!
Hot beverages that complement the s’mores theme: hot chocolate or cocoa (for ultimate chocolate indulgence), coffee or espresso (the slight bitterness balances sweetness), cappuccino or latte (creamy, comforting), chai tea (warm spices complement chocolate), or peppermint tea (refreshing, palate-cleansing).
Cold beverages for contrast: cold milk (classic, essential), iced coffee (sweet and bitter together), chocolate milk (double chocolate!), vanilla milkshake (dessert-on-dessert decadence), or cold brew coffee (smooth, less acidic).
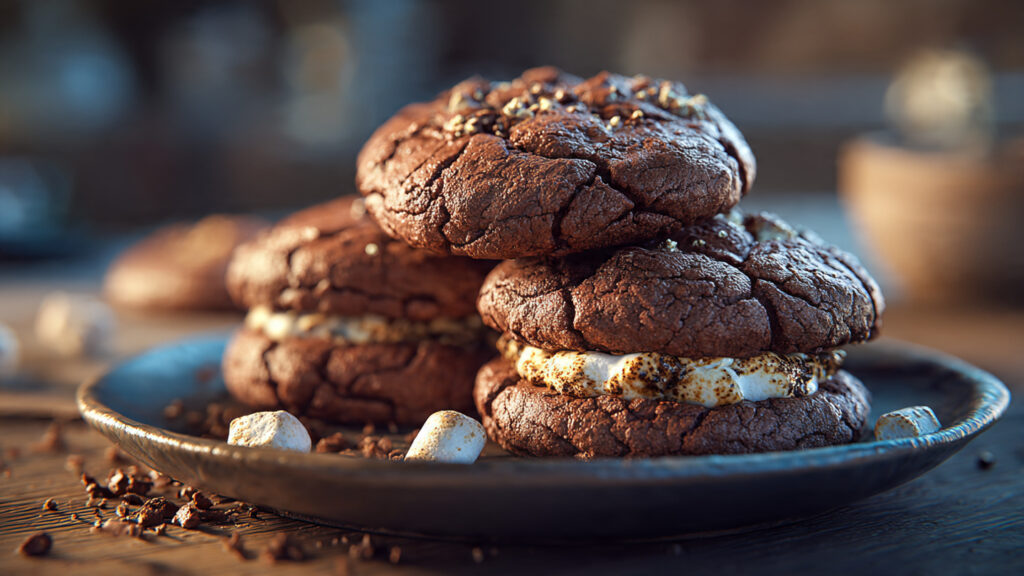
Ice cream pairing creates ultimate indulgence: vanilla ice cream (classic, lets chocolate shine), coffee ice cream (mocha combination), mint chocolate chip (refreshing contrast), s’mores ice cream (theme continuation), or salted caramel (sweet-salty complexity). Make ice cream sandwiches with two cookies and vanilla ice cream!
Fresh fruit provides bright, tart contrast to rich chocolate: fresh strawberries (classic chocolate pairing), raspberries (tart, beautiful), orange segments (citrus cuts richness), cherries (sophisticated pairing), or fresh berry compote (elegant plating).
For campfire theme parties, serve with: s’mores bar (graham crackers, chocolate bars, marshmallows for DIY), hot dogs and campfire foods, lemonade or fruit punch, trail mix, creating authentic camping vibes indoors.
For elegant dinner parties, plate individually with: raspberry coulis on the plate, fresh mint sprig, powdered sugar dusting, chocolate sauce drizzle, creating restaurant-quality presentation.
For kids’ parties, serve with: chocolate milk or regular milk, fruit kabobs (healthy contrast), pretzel rods (salty crunch), goldfish crackers (fun, kid-friendly), making a complete snack spread.
Graham crackers are natural accompaniment: serve alongside for authentic s’mores experience. Some people like to sandwich the cookie between graham crackers for full s’mores effect!
Wine pairing for adult gatherings: port (sweet fortified wine with chocolate), red wine (Cabernet Sauvignon with dark chocolate), dessert wine (late-harvest Riesling), or stout or porter beer (malty, chocolatey).
Tips for Making It Perfect
- Use quality cocoa powder for intense chocolate flavor: Since cocoa is the primary chocolate flavor (not chocolate chips), quality matters enormously! Cheap cocoa tastes bland, dusty, and bitter. Good cocoa (Valrhona, Ghirardelli, Guittard, Callebaut) tastes deeply chocolatey, smooth, and rich. Dutch-process is darker and mellower; natural is lighter and fruitier. Both work, but Dutch-process creates that deep, intense chocolate flavor these cookies deserve. Invest in good cocoa!
- Don’t overbake – cookies MUST look underdone: This is the #1 factor in achieving fudgy, chewy texture! Remove cookies when edges are set but centers still look soft, glossy, and slightly raw – about 10-12 minutes. They’ll look too soft and you’ll think they need more time, but they continue cooking from residual heat as they cool. Overbaking makes them dry and cakey instead of fudgy. Trust the timing and resist the urge to bake longer!
- Let dough rest 10 minutes before scooping: After mixing, let the dough sit at room temperature for 10 minutes. This allows flour to fully hydrate, cocoa to bloom, and dough to firm slightly. This resting creates better texture, easier scooping, and more consistent cookies. It also helps prevent excessive spreading. Worth the patience!
- Watch marshmallows CONSTANTLY when toasting: Marshmallows go from untoasted to golden to completely burned in literally 10-15 seconds under the broiler! Never walk away. Set a timer for 30 seconds, check, continue toasting in 10-second intervals if needed. Better to under-toast and add more time than to burn them! A kitchen torch gives more control but requires practice.
- Toast marshmallows while cookies are warm (not hot): The cookies should be warm but not hot when you add and toast marshmallows. Too hot and marshmallows melt completely into puddles; too cold and marshmallows don’t stick well. Aim for warm-to-the-touch temperature – about 5-10 minutes after removing from oven. This timing creates perfectly toasted marshmallows that stick but don’t completely melt.
- Melt butter and cool slightly before mixing: Melted butter creates that dense, fudgy, brownie-like texture (as opposed to creamed butter which creates cakey cookies). But if butter is too hot, it will scramble the eggs when mixed! Melt butter, then let cool for 5-10 minutes until warm but not hot. Test by touching – it should feel warm, not hot. This temperature is perfect for mixing.
- These cookies are best fresh but store well: Marshmallow-topped cookies are best within 6-12 hours while marshmallows are fresh and soft. After a day, marshmallows firm up and lose that gooey texture (still taste good!). For best results, bake cookies ahead but add and toast marshmallows shortly before serving. Alternatively, store cookies without marshmallows and add fresh before serving. Cookies alone keep for 5 days!
Storage Instructions
Room Temperature (Best for Freshness): Store cookies in an airtight container at room temperature for up to 3-4 days. Place parchment or waxed paper between layers to prevent sticking. The cookies stay soft and fudgy, though the marshmallow topping will firm up slightly after the first day (it won’t stay gooey forever, but still tastes great).
Marshmallow Considerations: Marshmallow-topped cookies are best enjoyed within 6-12 hours while the marshmallows are still soft and fresh-tasting. After a day or two, the marshmallows become firmer and more dense (similar to old marshmallows), though they’re still edible and tasty. For absolute best results, store cookies without marshmallows and add/toast fresh marshmallows before serving.
Refrigerator: You can refrigerate these cookies for up to 1 week in an airtight container, but refrigeration firms up both the cookie and marshmallow significantly. Bring to room temperature or warm briefly (10-15 seconds in microwave) before serving for best texture. Cold cookies are more brownie-like and dense; room temp cookies are softer and chewier.
Freezing Cookies (Excellent Make-Ahead): The chocolate cookies freeze beautifully without marshmallows! Cool completely, wrap individually in plastic wrap or freeze in single layer, then transfer to freezer bags or containers. Freeze for up to 3 months. To serve: thaw at room temperature for 30 minutes, warm slightly if desired, then add and toast fresh marshmallows. This is the best make-ahead strategy!
Freezing with Marshmallows: Not recommended! Frozen marshmallows become crystallized and grainy when thawed, losing that soft, fluffy texture. Always freeze cookies without marshmallows and add fresh before serving.
Reheating: These cookies are delicious reheated! Microwave for 10-15 seconds to warm through and soften the chocolate. The cookies become extra gooey and fudgy when warm. You can also warm in a 300°F oven for 3-5 minutes. Warming revives that just-baked experience!
Re-toasting Marshmallows: If marshmallows have firmed up after a day or two, you can briefly re-toast them with a kitchen torch or under the broiler (10-20 seconds) to soften and refresh them. This doesn’t restore the original texture perfectly but helps significantly.
Gift Packaging: For gifts, package cookies without marshmallows in pretty boxes or tins with parchment between layers. Include a bag of marshmallows and instructions: “Warm cookies slightly, add marshmallow, toast under broiler for 30 seconds. Enjoy!” This ensures recipients get the best experience.
Make-Ahead Strategy: For parties: bake cookies 1-3 days ahead, store in airtight containers at room temp. Add and toast marshmallows 1-4 hours before serving for freshest appearance and texture. This spreads out work and ensures impressive, fresh-tasting cookies!
Transporting: Without marshmallows, these cookies transport well in rigid containers. With marshmallows, they’re more delicate – transport in single layer, in rigid container, and avoid stacking. Keep cool but not cold. Add/toast marshmallows at destination if possible for best results.
Signs of Spoilage: Properly stored cookies should stay moist and smell chocolatey. Discard if you notice off odors, mold, or if cookies become hard and dry (though this is unlikely due to fudgy texture). The high cocoa and sugar content acts as preservative, so these keep well.
General Information
S’mores – the beloved campfire treat – was first documented in a 1927 Girl Scouts publication called “Tramping and Trailing with the Girl Scouts,” though the combination of graham crackers, chocolate, and marshmallows toasted over fire likely existed informally before then. The name “s’more” is a contraction of “some more” – as in “give me some more!” – reflecting how irresistible these treats are.
The classic s’more consists of toasted marshmallow and chocolate sandwiched between graham crackers, but the combination has inspired countless variations and adaptations. S’mores have become deeply embedded in American culture, representing summer, camping, childhood nostalgia, and simple pleasures around the campfire.
Indoor s’mores adaptations emerged as people sought to enjoy s’mores flavors year-round without requiring a campfire. S’mores dip, s’mores brownies, s’mores bars, s’mores cookies, and countless other variations have proliferated, particularly in the 2000s-2010s with food blogs and Pinterest.
Marshmallows themselves have ancient origins – the original marshmallow confection was made from the sap of the marshmallow plant (Althaea officinalis) and used medicinally by ancient Egyptians and Greeks. Modern marshmallows (invented in the mid-1800s) use gelatin, sugar, and corn syrup to create that fluffy texture we know today. The first commercial marshmallows were made in France in the mid-19th century.
Cocoa powder is made from cocoa beans that are roasted, processed to remove most of the cocoa butter, then ground into powder. Dutch-process cocoa (invented by Dutch chemist Coenraad Johannes van Houten in 1828) is treated with alkali to neutralize acidity, creating darker color and mellower flavor. Natural cocoa is more acidic and fruity. Both work in baking but create different flavors and colors.
The fudgy cookie texture in this recipe comes from the combination of melted butter (not creamed), high sugar-to-flour ratio, extra egg yolk (adds richness and chewiness), and underbaking (leaving centers soft). These techniques create brownie-like texture in cookie form – dense, fudgy, and intensely chocolatey.
Toasting marshmallows creates Maillard reactions (browning reactions between amino acids and sugars) that produce hundreds of flavor compounds, creating that characteristic caramelized, slightly smoky flavor we associate with campfire s’mores. The slight char adds complexity and nostalgia!
The visual appeal of these cookies – dark chocolate base with golden-toasted marshmallow crown – makes them perfect for social media and modern food photography. They represent the Instagram-era trend of photogenic, over-the-top desserts that look as impressive as they taste.
Culturally, these cookies represent creativity in the kitchen, nostalgia for summer camp experiences, American dessert innovation (taking classic flavors and reimagining them), and the joy of interactive cooking (toasting marshmallows is fun and engaging for all ages!).
Nutritionally, while these are indulgent treats, cocoa provides flavonoids and antioxidants, and the recipe uses real ingredients without artificial flavors. As desserts go, they’re more wholesome than many store-bought cookies with unpronounceable ingredients!
Frequently Asked Questions (FAQ)
Q: Can I make these without toasting the marshmallows? A: You can, but you’ll miss the best part! Untoasted marshmallows are just sweet and soft, but toasted marshmallows have that caramelized, slightly smoky, campfire flavor that makes s’mores special. The toasting creates hundreds of flavor compounds that transform plain marshmallows into something magical. It only takes 30-60 seconds – totally worth it! If you truly can’t toast, use marshmallows, but the cookies won’t have that signature s’mores experience.
Q: My cookies spread too much/are too flat – what happened? A: Usually from: (1) Butter too warm/hot when mixed – must be melted and cooled, (2) Didn’t let dough rest 10 minutes before scooping, (3) Oven not hot enough – verify temperature with thermometer, or (4) Too much butter/not enough flour. Make sure butter cools before mixing, let dough rest, and preheat oven fully. These cookies should be thick and fudgy, not flat and crispy!
Q: Can I use milk chocolate cocoa instead of dark/unsweetened cocoa? A: No! Drinking cocoa (hot chocolate mix) contains sugar, milk powder, and other ingredients. You need pure, unsweetened cocoa powder – nothing else added. Using sweetened cocoa will make cookies way too sweet and the texture will be wrong. Look for labels that say “100% cocoa” or “unsweetened cocoa powder.” Hershey’s, Ghirardelli, and similar brands all make pure cocoa powder.
Q: My marshmallows burned instantly – what did I do wrong? A: Broilers are extremely hot and marshmallows burn FAST! Always watch constantly – set a timer for 30 seconds and check. They can go from perfect to burned in 10 seconds. Tips: (1) Place oven rack farther from broiler element (not top position), (2) Watch through oven window constantly, (3) Remove immediately when golden, or (4) Use kitchen torch for more control. Never walk away while toasting!
Q: These cookies are too rich/intense for me – how can I make them less so? A: For less intense chocolate: (1) Use natural cocoa instead of Dutch-process (lighter flavor), (2) Reduce cocoa to ⅓ cup, increase flour to 1⅓ cups, (3) Use milk chocolate chips instead of dark, (4) Reduce sugar by ¼ cup, or (5) Make them smaller (use 1 tablespoon dough per cookie). Some people prefer less intense chocolate – adjust to your taste!
Q: Can I make these ahead for a party? A: Yes! Best strategy: Bake cookies 1-3 days ahead, store in airtight containers at room temp. Add and toast marshmallows 1-4 hours before party for freshest appearance. Marshmallows stay soft and fresh-looking for several hours after toasting. Don’t add marshmallows more than 24 hours ahead – they firm up and lose appeal. This timing ensures impressive, fresh cookies without last-minute stress!
Q: Can I skip the egg yolk and just use 2 whole eggs? A: You can, but texture will change! The extra yolk (1 whole egg + 1 yolk = 3 yolks total vs. 2 yolks from 2 whole eggs) adds richness, creates chewier texture, and contributes to that fudgy quality. Using 2 whole eggs makes slightly more cake-like, less fudgy cookies. For best results, use the egg + yolk combo as written. Save the extra white for scrambled eggs or meringues!
Conclusion
I’m absolutely thrilled to share these Decadent Chewy Cocoa Cookies with Marshmallow Delight with you – they’re the ultimate chocolate-lover’s dream and proof that sometimes the best recipes come from creative cravings and indoor adaptations of outdoor favorites! The combination of fudgy, intensely chocolatey cookies topped with golden-toasted marshmallows creates something truly special that captures all the magic of s’mores while being even more decadent and impressive. Whether you’re satisfying serious chocolate cravings, creating campfire nostalgia indoors, impressing guests at parties, or just want cookies that are as fun to make as they are to eat, these cocoa marshmallow cookies deliver every single time.
I’d absolutely love to hear how your cocoa marshmallow cookies turned out! Please leave a comment below sharing your experience, how you toasted your marshmallows, and what the reactions were. If these cookies disappeared faster than any dessert you’ve ever made and had everyone begging for the recipe, please give it a five-star rating – it helps other chocolate lovers discover this incredible recipe!
Don’t forget to snap photos of your cookies (especially those golden-toasted marshmallows – so gorgeous!) and share them on Instagram – tag me so I can see your creations and celebrate your chocolate-marshmallow masterpieces! And please pin this recipe to your “Chocolate Cookies,” “S’mores Recipes,” or “Showstopper Desserts” boards on Pinterest so you’ll always have it when you need something seriously impressive. Happy baking, and may your cookies always be fudgy, your marshmallows perfectly toasted, and your chocolate cravings completely satisfied!
Nutritional Information (per cookie)
Based on 12-15 cookies
| Nutrient | Amount |
|---|---|
| Calories | 215 |
| Total Fat | 8g |
| Saturated Fat | 5g |
| Trans Fat | 0g |
| Cholesterol | 50mg |
| Sodium | 125mg |
| Total Carbohydrates | 35g |
| Dietary Fiber | 2g |
| Sugars | 26g |
| Protein | 3g |
| Vitamin A | 5% DV |
| Vitamin C | 0% DV |
| Calcium | 25mg |
| Iron | 2mg |
| Potassium | 115mg |
Note: Nutritional values are approximate and will vary based on exact ingredients used, size of cookies, amount of chocolate chips added, and type/size of marshmallows used. These are indulgent treats meant for special occasions. Cocoa provides antioxidants and flavonoids.