Delicious Chocolate-Dipped Strawberry Frosted Wafers Made Easy
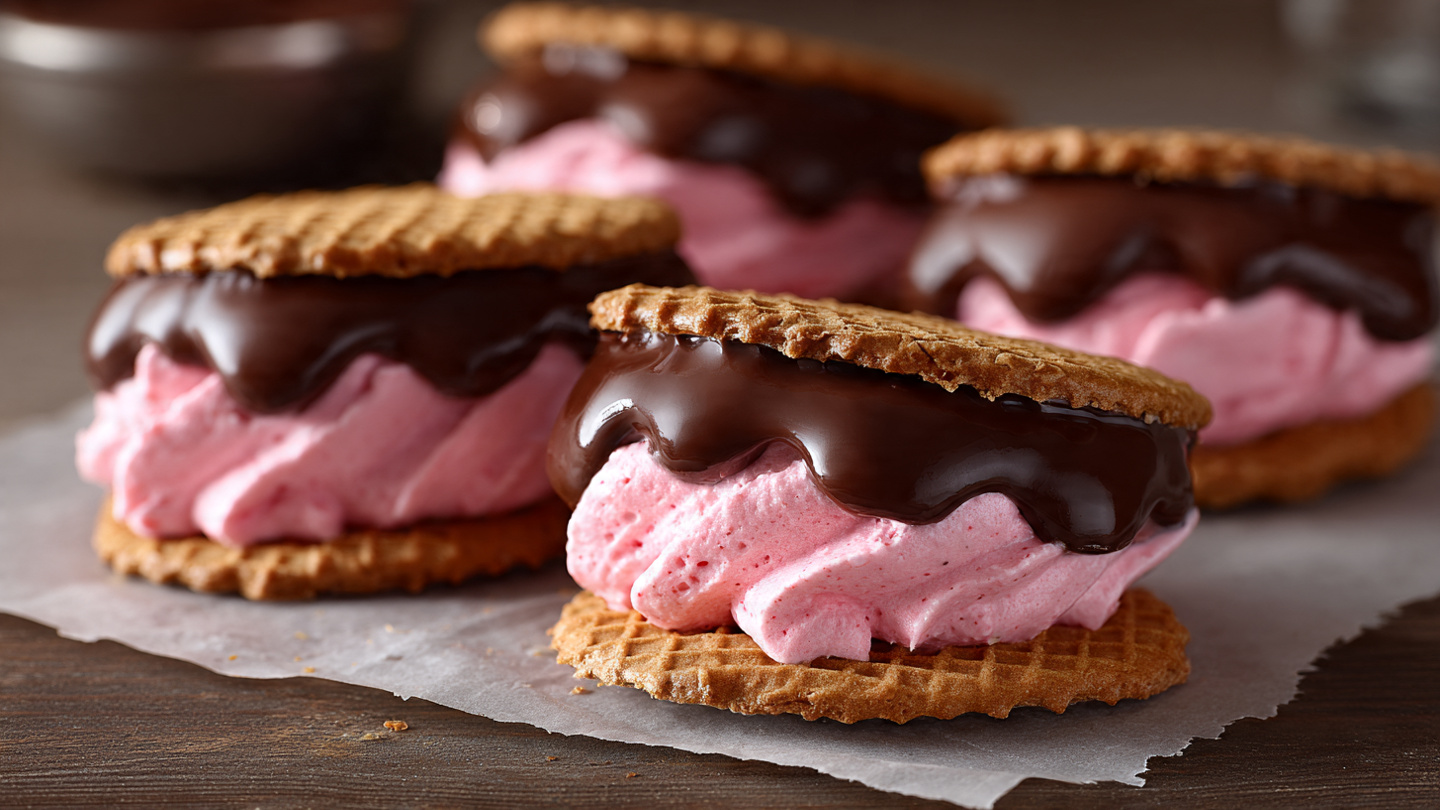
Get ready to discover the ultimate combination of crispy, delicate, and utterly addictive with these Delicious Chocolate-Dipped Strawberry Frosted Wafers – elegant, impressive treats that look like they came from a fancy bakery but are surprisingly simple to make at home! I first created these for a Valentine’s Day party when I wanted something that felt special and romantic without requiring professional pastry skills, and the moment I placed that first tray of pink-frosted, chocolate-dipped wafers on the dessert table, they disappeared faster than anything else. What makes these wafers absolutely extraordinary is the combination of textures and flavors: the ultra-crispy, light-as-air wafer cookies provide the perfect crunchy base, the sweet strawberry frosting adds fruity flavor and that gorgeous pink color, and the chocolate coating creates rich, glossy elegance that ties everything together. Whether you use store-bought wafer cookies for ultimate convenience or make your own for extra credit, these treats are endlessly customizable, perfect for gifting, and guaranteed to impress everyone who sees (and tastes!) them. These wafers have become my signature party treat, my Valentine’s Day tradition, my teacher appreciation gift, and proof that impressive desserts don’t have to be complicated! Whether you’re looking for easy elegant desserts, need beautiful gifts from the kitchen, love strawberry and chocolate together, or want something that looks professional with minimal effort, these chocolate-dipped strawberry frosted wafers are about to become your new favorite!
Overview of Recipe Content
Delicious Chocolate-Dipped Strawberry Frosted Wafers are perfect for Valentine’s Day treats and romantic occasions, wedding showers and baby showers (pink!), teacher appreciation gifts and hostess gifts, elegant tea parties and brunches, holiday cookie platters and dessert tables, easy impressive desserts for entertaining, kids’ parties (they love helping dip!), or anytime you want something beautiful and delicious. It’s a great recipe because it’s genuinely easy – mostly assembly with store-bought wafers!, looks incredibly elegant and professional, requires no baking (if using store-bought wafers), can be made days ahead, is endlessly customizable with colors and flavors, makes excellent gifts when packaged beautifully, and has that satisfying crunch-cream-chocolate combination. The flavor profile is sweet elegance: light, crispy wafer cookies with delicate crunch, sweet strawberry frosting with real fruit flavor, rich dark, milk, or white chocolate coating, optional toppings like sprinkles, nuts, or freeze-dried fruit, and perfectly balanced sweetness that’s indulgent but not cloying. This recipe is perfect for easy dessert seekers and no-bake treat lovers, strawberry and chocolate enthusiasts, gift-givers from the kitchen, party hosts wanting impressive presentations, people who love assembly projects, and anyone who wants bakery-quality results at home. It’s naturally vegetarian, can be made gluten-free with GF wafers, and is always stunning!

Ingredients
For the Base (Choose One):
- 1 package (8-10 oz/225-280g) vanilla wafer cookies (Nilla Wafers or similar)
- Or: 2 packages (5 oz each) Pirouline wafer rolls or similar
- Or: 30-40 homemade vanilla wafer cookies
- Or: Store-bought pizzelle cookies
For the Strawberry Frosting:
- 2 cups (240g) powdered sugar, sifted
- 3-4 tablespoons freeze-dried strawberries, ground to powder
- 3-4 tablespoons heavy cream or milk
- 2 tablespoons unsalted butter, softened
- ½ teaspoon vanilla extract
- Optional: 1-2 drops pink food coloring for more vibrant color
- Alternative: Use strawberry jam (½ cup) thinned with powdered sugar
For the Chocolate Coating:
- 12 oz (340g) chocolate (dark, milk, white, or combination)
- 1 tablespoon coconut oil or vegetable shortening (for smooth coating)
- Or: Use chocolate melting wafers/candy melts (already formulated for dipping)
For Decoration (Optional):
- Sprinkles (pink, red, white, or Valentine’s themed)
- Chopped nuts (pistachios, almonds, hazelnuts)
- Additional freeze-dried strawberries, crushed
- White chocolate drizzle
- Edible gold leaf or luster dust
- Sea salt flakes
- Shredded coconut
Tools Needed
- Baking sheets
- Parchment paper or silicone mats
- Microwave-safe bowl or double boiler (for melting chocolate)
- Food processor or spice grinder (for grinding freeze-dried fruit)
- Small offset spatula or butter knife (for spreading frosting)
- Fork or dipping tool (for chocolate dipping)
- Wire cooling rack
- Measuring cups and spoons
- Rubber spatula
- Storage containers or gift boxes
Suggested Substitutions and Additions
Wafer Cookie Options:
- Vanilla wafer cookies: Classic, easy (Nilla Wafers recommended)
- Pirouline or rolled wafers: Elegant, tube-shaped
- Pizzelle: Delicate Italian wafers
- Graham crackers: More substantial, works well
- Thin butter cookies: Rich, tender
- Homemade wafers: Best flavor and texture
- Ladyfinger cookies: Soft, spongy option
Strawberry Flavoring:
- Freeze-dried strawberries: Most intense flavor (recommended)
- Strawberry jam or preserves: Convenient, sweet
- Strawberry extract: Artificial but works
- Fresh strawberry puree: Must be very thick, less stable
- Strawberry powder: Specialty baking product
- Combination: Freeze-dried + extract for maximum flavor
Frosting Alternatives:
- Strawberry buttercream: As written (recommended)
- Cream cheese frosting: Tangier, richer (add strawberry)
- Royal icing: Hardens completely, very smooth
- Simple glaze: Powdered sugar + strawberry juice
- Nutella or chocolate-hazelnut spread: Different flavor profile
- Peanut butter frosting: For PB&J version
- Lemon frosting: Bright, citrusy alternative
Chocolate Options:
- Dark chocolate (60-70%): Rich, sophisticated, less sweet
- Milk chocolate: Classic, creamy, sweet
- White chocolate: Sweet, vanilla-forward, elegant
- Ruby chocolate: Pink, berry-flavored, trendy
- Combination: Half dipped in dark, half in white
- Candy melts: Easy melting, various colors
- Chocolate chips: Budget-friendly (thin with coconut oil)
Flavor Variations:
- Classic strawberry: As written
- Raspberry: Use freeze-dried raspberries
- Mixed berry: Combine strawberry and raspberry
- Lemon: Lemon frosting, white chocolate
- Orange: Orange frosting, dark chocolate
- Mint: Peppermint frosting, dark chocolate
- Peanut butter: PB frosting, milk chocolate
- Cookies and cream: Oreo crumbs in white chocolate
Coating Techniques:
- Full dip: Completely coat in chocolate
- Half dip: Dip halfway for two-tone look
- Drizzle: Melt chocolate, drizzle over frosted wafers
- Sandwich: Frost between two wafers, dip edges
- Bottom only: Chocolate on bottom for stability
- Diagonal: Dip at angle for modern look
Decoration Ideas:
- Minimalist: Just chocolate, no toppings
- Classic: Chocolate + sprinkles
- Elegant: White chocolate drizzle + gold leaf
- Rustic: Chopped nuts + sea salt
- Fruity: Freeze-dried fruit pieces
- Festive: Holiday-themed sprinkles
- Luxurious: Edible flowers + luster dust
Dietary Modifications:
- Gluten-free: Use GF wafer cookies or make GF wafers
- Dairy-free: Use dairy-free butter, coconut cream, dairy-free chocolate
- Vegan: Ensure all components are vegan (many wafers contain dairy)
- Lower sugar: Use sugar-free chocolate, reduce frosting sugar
- Nut-free: Avoid nut toppings, check wafer ingredients
- Keto: Use keto wafers, sugar-free frosting and chocolate

How to Make Chocolate-Dipped Strawberry Frosted Wafers
Step 1: Prepare Your Workspace
Line 2-3 baking sheets with parchment paper or silicone baking mats. You’ll need space for the wafers to dry after frosting and again after chocolate dipping. Set up your work area with everything within reach: wafer cookies, frosting ingredients, chocolate, and decorations. This assembly-line approach makes the process smooth and efficient.
If using store-bought wafer cookies, inspect them and discard any broken ones – you want perfectly intact wafers for the prettiest results. If making homemade wafers, bake them ahead and let them cool completely before starting.
Pro tip: Work in a cool room (under 72°F/22°C if possible) when working with chocolate. Warm kitchens cause chocolate to set slowly and can create bloom (gray streaks). If your kitchen is warm, use the refrigerator between steps.
Step 2: Make the Strawberry Frosting
If using freeze-dried strawberries (recommended for best flavor), grind them to a fine powder in a food processor or spice grinder. You want very fine powder with no chunks – this takes about 30-45 seconds of processing. The powder should be vibrant pink/red and smell intensely of strawberries. Measure out 3-4 tablespoons and set aside.
In a medium bowl, beat the softened butter with an electric mixer on medium speed for 1 minute until creamy. Add the powdered sugar (sifted for smoothest results), ground freeze-dried strawberries, vanilla extract, and 3 tablespoons of heavy cream. Beat on low speed until combined, then increase to medium-high and beat for 2-3 minutes until light, fluffy, and smooth.
Check the consistency – it should be spreadable but not runny, thick enough to hold its shape but soft enough to spread easily. If too thick, add cream 1 teaspoon at a time. If too thin, add more powdered sugar 1 tablespoon at a time. Taste and adjust – it should taste intensely of strawberries and be pleasantly sweet. Add 1-2 drops of pink food coloring if you want more vibrant color (optional – the freeze-dried strawberries provide natural color).
Alternative method: If using strawberry jam, mix ½ cup jam with 1 cup powdered sugar until smooth and spreadable. This creates a simpler but less stable frosting.
Step 3: Frost the Wafers
Using a small offset spatula, butter knife, or the back of a spoon, spread a thin, even layer of strawberry frosting on the top (flat) side of each wafer cookie. You want enough frosting to create flavor but not so much that it squishes out when you bite. About 1-2 teaspoons per cookie, spread to the edges or leaving a small border.
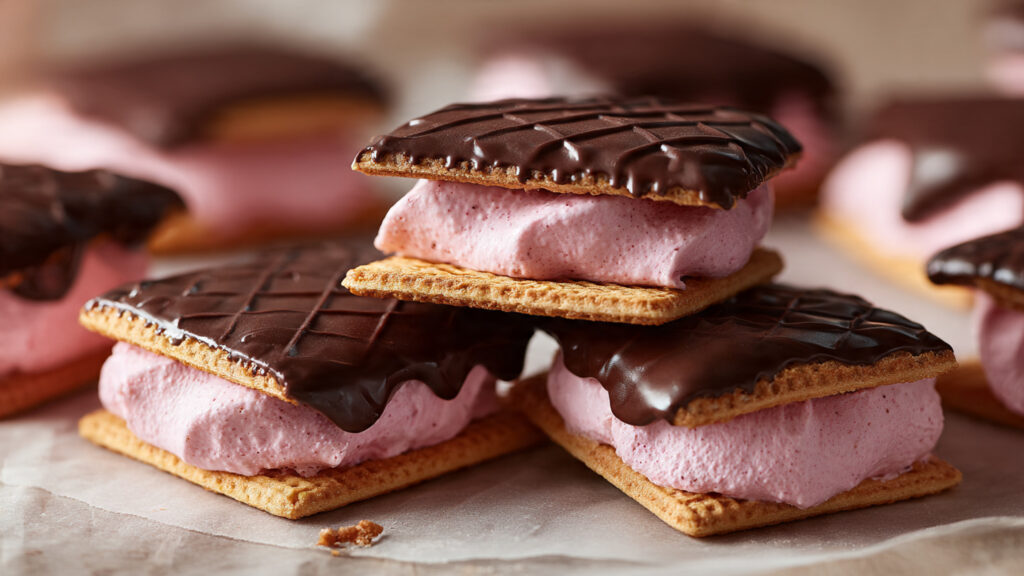
For sandwich cookies (optional elegant variation): spread frosting on one wafer, top with another wafer to create a sandwich, then dip the edges in chocolate. This creates a more substantial treat with frosting hidden inside!
Place frosted wafers on the prepared baking sheet, frosting side up. Continue until all wafers are frosted. If the frosting starts to set up and becomes hard to spread, microwave it for 5-10 seconds to soften, or add a few drops of cream.
Once all wafers are frosted, place the baking sheet in the refrigerator for 15-20 minutes to let the frosting firm up. This prevents it from smearing when you dip in chocolate.
Step 4: Melt the Chocolate
Choose your melting method: Microwave method: Place chopped chocolate (or chocolate chips) in a microwave-safe bowl with 1 tablespoon coconut oil or shortening. Microwave at 50% power in 30-second intervals, stirring between each, until smooth and completely melted. This usually takes 1½-2 minutes total. Don’t rush or overheat – burned chocolate is ruined!
Double boiler method: Fill a pot with 1-2 inches of water and bring to a simmer. Place a heat-safe bowl on top (don’t let bowl touch water). Add chocolate and coconut oil, stirring constantly until melted and smooth. Remove from heat.
The chocolate should be smooth, glossy, and fluid – not too thick (add more coconut oil) or too thin (let cool slightly). The consistency should coat a spoon and drip off slowly. Test the temperature on your wrist – it should feel warm but not hot. If too hot, wait a few minutes; dipping in hot chocolate melts the frosting!
Using candy melts: Follow package directions – they’re formulated for easy melting and coating!
Step 5: Dip the Wafers in Chocolate
Remove the chilled, frosted wafers from the refrigerator. Working with one at a time, hold a wafer by the edges (frosted side up) and dip it into the melted chocolate. You can:
- Full dip: Submerge completely, let excess drip off
- Half dip: Dip halfway for two-tone effect (pink frosting on top, chocolate on bottom)
- Bottom dip: Just coat the bottom for stability and chocolate flavor
- Edge dip: Dip just the edges of sandwich cookies
Let excess chocolate drip back into the bowl by gently shaking or tapping the wafer against the edge of the bowl. You want a thin, even coating – not thick globs. Use a fork or dipping tool to help hold the wafer and allow drainage.
Place the dipped wafer on a clean parchment-lined baking sheet. Repeat with remaining wafers, working quickly while chocolate is fluid. If chocolate starts to thicken or cool, reheat briefly.
Step 6: Add Decorations (While Chocolate is Wet)
While the chocolate coating is still wet, add any decorations you want! Work quickly – chocolate sets in just a few minutes. Options include:
- Sprinkle with colored sprinkles, sanding sugar, or nonpareils
- Sprinkle with crushed freeze-dried strawberries
- Add chopped nuts (pistachios are especially pretty)
- Place a small piece of edible gold leaf
- Dust with edible luster dust or pearl dust
- Sprinkle with flaky sea salt for sweet-salty contrast
- Add shredded coconut
Don’t overdo it – simple elegance is best! A light sprinkle of one or two things looks more sophisticated than heavy decoration.
Step 7: Let Chocolate Set Completely
Once all wafers are dipped and decorated, let them sit at room temperature until the chocolate is completely set and hardened – about 30-60 minutes. Don’t move or touch them during this time or you’ll leave fingerprints!
For faster setting, place the baking sheet in the refrigerator for 15-20 minutes. The chocolate will harden quickly and develop a nice shine. However, condensation can form if you leave them refrigerated too long, so remove once set.
Optional elegant finish: Once the chocolate is completely set, drizzle with contrasting chocolate (white chocolate over dark chocolate, or vice versa) for a professional bakery look. Let the drizzle set before handling.
Step 8: Store or Package for Gifting
Once completely set, the wafers can be enjoyed immediately or stored. For storage: layer between sheets of parchment or waxed paper in an airtight container. Store at cool room temperature for up to 1 week, or refrigerate for up to 2 weeks.
For gifting: arrange in decorative boxes lined with tissue paper, place in cellophane bags tied with ribbon, arrange on decorative plates wrapped in clear cellophane, or package in small boxes for individual gifts. Include a note about storage and that they’re homemade!
These wafers look incredibly professional and elegant – nobody will believe you made them yourself! Serve on pretty plates at parties, package as gifts, or enjoy with tea or coffee for a special treat.
What to Serve with It
Chocolate-Dipped Strawberry Frosted Wafers are elegant, bite-sized treats perfect for various serving occasions. For beverages, pair with: hot tea (Earl Grey, English Breakfast, or chamomile), coffee or espresso (the classic pairing with chocolate), hot chocolate (for ultimate indulgence), champagne or prosecco (elegant celebrations), strawberry lemonade (summer parties), milk (classic and simple), or dessert wine (Moscato d’Asti, rosé).
For tea party service, arrange on tiered cake stands with: finger sandwiches (cucumber, smoked salmon, chicken salad), scones with clotted cream and jam, petit fours and macarons, fresh fruit, creating an elegant spread.
For dessert tables, display alongside: fresh strawberries (thematic!), chocolate truffles, other dipped treats (pretzels, marshmallows), cookies and brownies, candy, creating variety and visual interest.
Ice cream pairing: Serve a wafer alongside vanilla ice cream, strawberry ice cream, or chocolate gelato as an elegant cookie garnish. The crunch contrasts beautifully with creamy ice cream.
For coffee service, offer as afternoon treats with coffee or espresso – the delicate wafers are perfect with strong coffee. Europeans often serve delicate cookies with afternoon coffee!
Romantic occasions (Valentine’s Day, anniversaries): arrange on pretty plates with fresh roses, serve with champagne or chocolate-covered strawberries, present in elegant gift boxes with ribbons.
For children’s parties, serve with: pink lemonade or strawberry milk, vanilla ice cream, arranged on colorful platters. Kids love the pink color and chocolate coating!
Brunch service: include on brunch dessert tables with fruit salad, mini pastries, and yogurt parfaits for sweet ending to brunch.
Elegant plating for dinner parties: serve 1-2 wafers per person on small dessert plates with fresh strawberry half, mint sprig, and chocolate sauce drizzle on the plate. Restaurant-quality presentation!
Holiday serving: adapt colors and decorations for any holiday – red and green for Christmas, pastels for Easter, orange and black for Halloween.

Tips for Making It Perfect
- Use room temperature frosting and cool wafers: If frosting is too cold (straight from fridge), it won’t spread smoothly and may tear delicate wafers. Let it come to room temp and beat briefly to restore smooth consistency. Conversely, wafers should be completely cool before frosting – warm wafers will melt frosting. Temperature control = professional results!
- Chill frosted wafers before chocolate dipping: After frosting, refrigerate wafers for 15-20 minutes before dipping in chocolate. This firms up the frosting so it doesn’t smear or mix into the chocolate when dipped. Skipping this step can create messy, smeared results instead of clean layers. Cold frosting = clean dipping!
- Add coconut oil to chocolate for smooth coating: Pure chocolate can be thick and difficult to dip smoothly. Adding 1 tablespoon coconut oil (or vegetable shortening) per 12 oz chocolate thins it slightly, creating smooth, thin coating that drips off beautifully and sets with nice shine. Professional chocolatiers use this technique! Don’t skip this step for best results.
- Let excess chocolate drip off completely: After dipping, hold the wafer over the bowl and gently shake or tap to remove excess chocolate. You want a thin, even coating – not thick globs that pool at the bottom. Thick chocolate makes wafers heavy and can overwhelm the delicate wafer-frosting balance. Patience = elegant results!
- Add decorations while chocolate is still wet: You have only 1-2 minutes after dipping before chocolate begins to set! Have all decorations ready and within reach before you start dipping. Apply sprinkles, nuts, or other toppings immediately after dipping each wafer. Once chocolate sets, decorations won’t stick. Work quickly and efficiently!
- Don’t refrigerate too long after dipping: While refrigeration speeds setting, leaving chocolate-dipped treats in the fridge too long causes condensation when brought to room temp, creating cloudy “bloom” on chocolate surface. Refrigerate just 15-20 minutes to set, then remove. Store at cool room temp for best appearance and texture.
- Use quality ingredients for best flavor: Since this recipe has few ingredients, quality matters! Use real chocolate (not chocolate-flavored coating), real freeze-dried fruit (not artificial flavoring), good quality wafer cookies. The difference in flavor between quality ingredients and cheap substitutes is dramatic. Invest in good chocolate especially – it’s what people taste most!
Storage Instructions
Room Temperature: Store chocolate-dipped wafers in an airtight container with parchment or waxed paper between layers at cool room temperature (60-70°F/15-21°C) for up to 1 week. They stay crispy and the chocolate maintains its shine. Don’t stack directly on top of each other without paper – they’ll stick together! Keep away from heat sources and direct sunlight.
Refrigerator: You can refrigerate for up to 2 weeks in an airtight container, but be aware of condensation issues. When bringing to room temperature, let them come up slowly in the closed container to minimize condensation. The wafers may soften slightly in the fridge from humidity. Best for longer storage but room temp is better for texture and appearance.
Freezing: These freeze well for up to 2 months! Layer between parchment paper in airtight containers or freezer bags. To thaw: remove from freezer and let come to room temperature in the sealed container (prevents condensation). Thaw for 30-60 minutes. The texture remains excellent after freezing – perfect for making big batches ahead!
Humidity Considerations: In very humid climates, chocolate can “bloom” (develop gray streaks) and wafers can soften. Store with silica gel packets in the container to absorb moisture, or keep refrigerated. Consider using candy melts instead of pure chocolate in humid climates – they’re more stable!
Make-Ahead Timeline:
- 1 week ahead: Make frosting, refrigerate in airtight container
- 2-3 days ahead: Frost wafers, store covered at room temp
- 1 day ahead: Dip in chocolate, let set, store at room temp
- Day of: Package for gifts or arrange for serving
This timeline works perfectly for stress-free entertaining or gift-giving!
Gifting Storage: If packaging as gifts, include a note: “Homemade chocolate-dipped wafers – store at room temperature for up to 1 week. Keep cool and away from heat.” Add made-on date for freshness tracking.
Reviving Softened Wafers: If wafers become soft from humidity, place unwrapped on a baking sheet in a 200°F oven for 5-10 minutes to crisp up, then let cool completely. This only works if chocolate hasn’t been added yet!
Signs of Spoilage: Properly stored wafers should stay crispy, chocolate should remain glossy (or matte, depending on chocolate type), and they should smell fresh and sweet. Discard if you notice any off odors, mold, or if wafers become unpleasantly soft or stale-tasting. The chocolate coating helps preserve them, but they’re still perishable.
Transporting: For transporting to parties or for gifts, keep cool and avoid stacking too high (they’re delicate). Use rigid containers with parchment between layers. Don’t leave in hot cars – chocolate will melt!
General Information
Wafer cookies have ancient origins, with thin, crisp wafers appearing in European baking for centuries. Medieval monks made communion wafers (unleavened, thin, crisp) that are ancestors of modern wafer cookies. The technique of making thin, crisp cookies between two hot irons evolved into pizzelle in Italy (13th century), stroopwafels in the Netherlands (18th century), and gaufrettes in France.
Vanilla wafers as we know them in America became popular in the late 19th century with commercial production. Nabisco’s Nilla Wafers (introduced in 1898, originally called “Vanilla Wafers”) became an American staple – simple, not-too-sweet cookies perfect for eating plain, making banana pudding, or using in other desserts.
The tradition of dipping cookies in chocolate has European roots, particularly in countries with strong chocolate traditions like Belgium, Switzerland, and France. Belgian speculoos cookies dipped in chocolate, French palmiers with chocolate, and Swiss chocolate-covered cookies all represent this technique. Chocolate-dipping became popular in America in the 20th century as chocolate became more affordable and accessible.
Strawberries and chocolate is a classic pairing that gained massive popularity in the mid-20th century, particularly with chocolate-covered strawberries becoming a symbol of romance and Valentine’s Day. The combination works because strawberries’ acidity and fruitiness contrast perfectly with chocolate’s richness and bitterness, creating balanced flavors.
Freeze-dried fruit in baking is a relatively modern innovation (1960s-1970s technology, mainstream baking use in 2000s-2010s). Freeze-drying removes water while preserving intense flavor and color, making it perfect for adding fruit flavor to frostings, chocolates, and desserts without adding moisture that causes instability. Professional pastry chefs embraced freeze-dried fruit powder in the 2010s, and home bakers followed.
The trend toward decorated, dipped cookies has exploded with social media, particularly Instagram and Pinterest, where beautiful, photogenic treats gain viral attention. These strawberry frosted wafers represent the intersection of simple technique, beautiful presentation, and social media appeal – they look professional and elegant but are actually quite easy to make.
Gifting homemade treats is an ancient tradition that modern life has somewhat diminished, but there’s a resurgence in handmade, thoughtful gifts from the kitchen. These wafers represent the best of homemade gifting: they look professional and impressive (people think they’re from a bakery!), they’re shelf-stable enough to gift without worry, and they show care and effort in a meaningful way.
The accessibility of this recipe – using mostly store-bought components assembled at home – represents a modern approach to homemade treats that respects busy schedules while still creating something special and delicious. It’s proof that “homemade” doesn’t have to mean “from scratch” to be meaningful and impressive!
Frequently Asked Questions (FAQ)
Q: Can I use fresh strawberries instead of freeze-dried? A: Not recommended! Fresh strawberries contain too much water, which makes frosting unstable and watery. They won’t provide intense flavor either. Freeze-dried strawberries are ground to powder, providing concentrated flavor and gorgeous color without moisture. If you can’t find freeze-dried, use strawberry jam (thicker consistency) or strawberry extract, but freeze-dried gives the best results by far.
Q: Why does my chocolate look streaky or gray? A: That’s called “bloom” and happens when chocolate experiences temperature fluctuations or humidity. It’s harmless and still edible! Causes: (1) Refrigerating too long causing condensation, (2) Storing in humid environment, (3) Chocolate wasn’t tempered properly. To prevent: let chocolate set at room temp (not fridge if possible), store in cool, dry place, add coconut oil for stability. Bloom doesn’t affect taste, just appearance.
Q: Can I make these with homemade wafer cookies? A: Absolutely! Homemade wafers taste even better. Make classic vanilla wafer cookies (thin, crispy butter cookies), Italian pizzelle, or French gaufrettes. Bake them thin and crispy, let cool completely, then proceed with frosting and dipping. Homemade wafers have better flavor and texture than store-bought, but they’re more work. Great for special occasions!
Q: The chocolate is too thick to dip smoothly – what do I do? A: Thin it! Add coconut oil or vegetable shortening 1 teaspoon at a time, stirring until you reach dipping consistency. The chocolate should coat smoothly and drip off slowly. Don’t add water or milk – they cause chocolate to seize (become grainy and unusable). Coconut oil or shortening keeps chocolate smooth and fluid. You may need 1-3 tablespoons total depending on chocolate thickness.
Q: How far ahead can I make these? A: Very flexible! Frosting: make 1 week ahead, refrigerate. Frosted wafers (no chocolate): 2-3 days ahead, room temp. Fully finished wafers: 3-5 days ahead at room temp, 2 weeks refrigerated, or 2 months frozen. For best results and easiest workflow, frost wafers 1-2 days ahead, dip in chocolate 1 day before serving. This spreads out work and ensures freshness!
Q: Can I make these dairy-free or vegan? A: Yes! Use vegan butter in frosting, coconut cream instead of dairy cream, and dairy-free chocolate (check labels – many dark chocolates are naturally dairy-free). Ensure wafer cookies are vegan (many contain butter or milk). The freeze-dried strawberries are naturally vegan. Everything else is easily adaptable to vegan with proper ingredient selection.
Q: Why is my frosting too runny/too thick? A: Consistency depends on: (1) Humidity in kitchen (more humid = thicker frosting needed), (2) Exact amount of liquid added, (3) Temperature of ingredients. Too runny: add more powdered sugar 1 tablespoon at a time. Too thick: add cream ½ teaspoon at a time. The frosting should spread easily but hold its shape – like thick peanut butter consistency. Adjust until it’s perfect!
Conclusion
I’m absolutely thrilled to share these Delicious Chocolate-Dipped Strawberry Frosted Wafers with you – they’re proof that impressive, elegant, bakery-quality treats can be surprisingly easy to make at home! The combination of crispy wafers, sweet strawberry frosting, and rich chocolate creates something special that looks beautiful, tastes amazing, and always gets rave reviews. Whether you’re making them for Valentine’s Day, gifting them to teachers and friends, or just treating yourself to something elegant, these wafers deliver joy and deliciousness in every bite.
I’d absolutely love to hear how your chocolate-dipped wafers turned out! Please leave a comment below sharing your experience, what decorations you used, and who you made them for. If these wafers impressed everyone and had people asking if you bought them from a bakery, please give it a five-star rating – it helps other home bakers discover this elegant recipe!
Don’t forget to snap photos of your gorgeous wafers (especially that pink frosting peeking out from chocolate – so pretty!) and share them on Instagram – tag me so I can see your beautiful creations and celebrate your treat-making success! And please pin this recipe to your “Easy Desserts,” “Valentine’s Day Treats,” or “Homemade Gifts” boards on Pinterest so you’ll always have it when you need something impressive. Happy dipping, and may your wafers always be crispy, beautiful, and absolutely delicious!
Nutritional Information (per wafer)
Based on 30-40 wafers (depending on size)
| Nutrient | Amount |
|---|---|
| Calories | 95 |
| Total Fat | 5g |
| Saturated Fat | 3g |
| Trans Fat | 0g |
| Cholesterol | 8mg |
| Sodium | 25mg |
| Total Carbohydrates | 13g |
| Dietary Fiber | 1g |
| Sugars | 10g |
| Protein | 1g |
| Vitamin A | 1% DV |
| Vitamin C | 2% DV |
| Calcium | 15mg |
| Iron | 0.5mg |
| Potassium | 45mg |
Note: Nutritional values are approximate and will vary significantly based on wafer cookie brand, amount of frosting per wafer, type of chocolate used, and decorations added. These are indulgent treats meant for special occasions.