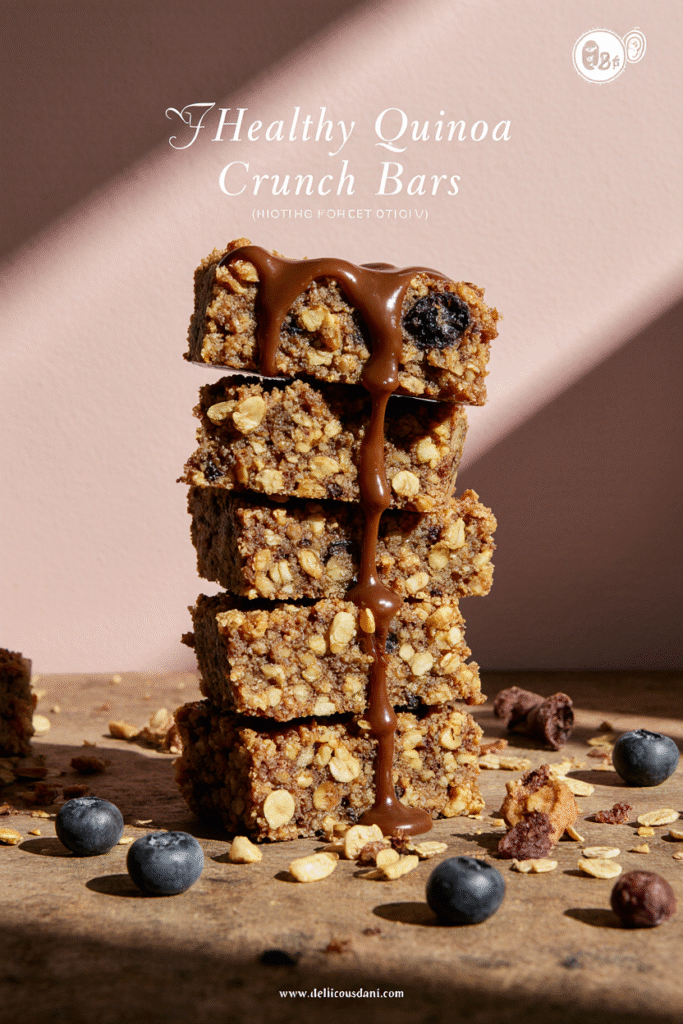
Healthy Quinoa Crunch Bars
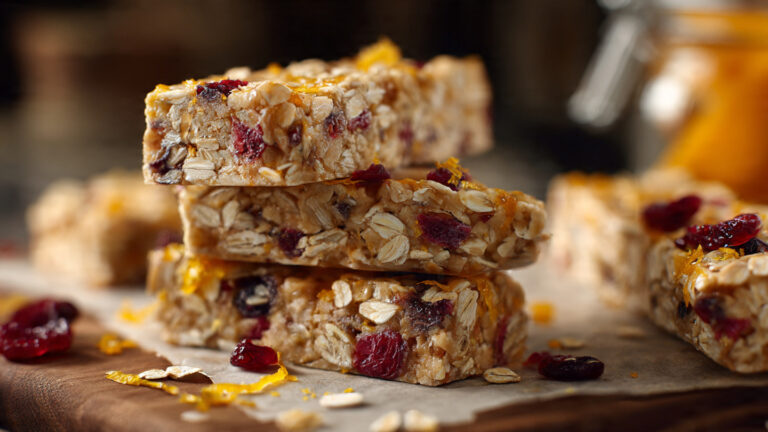
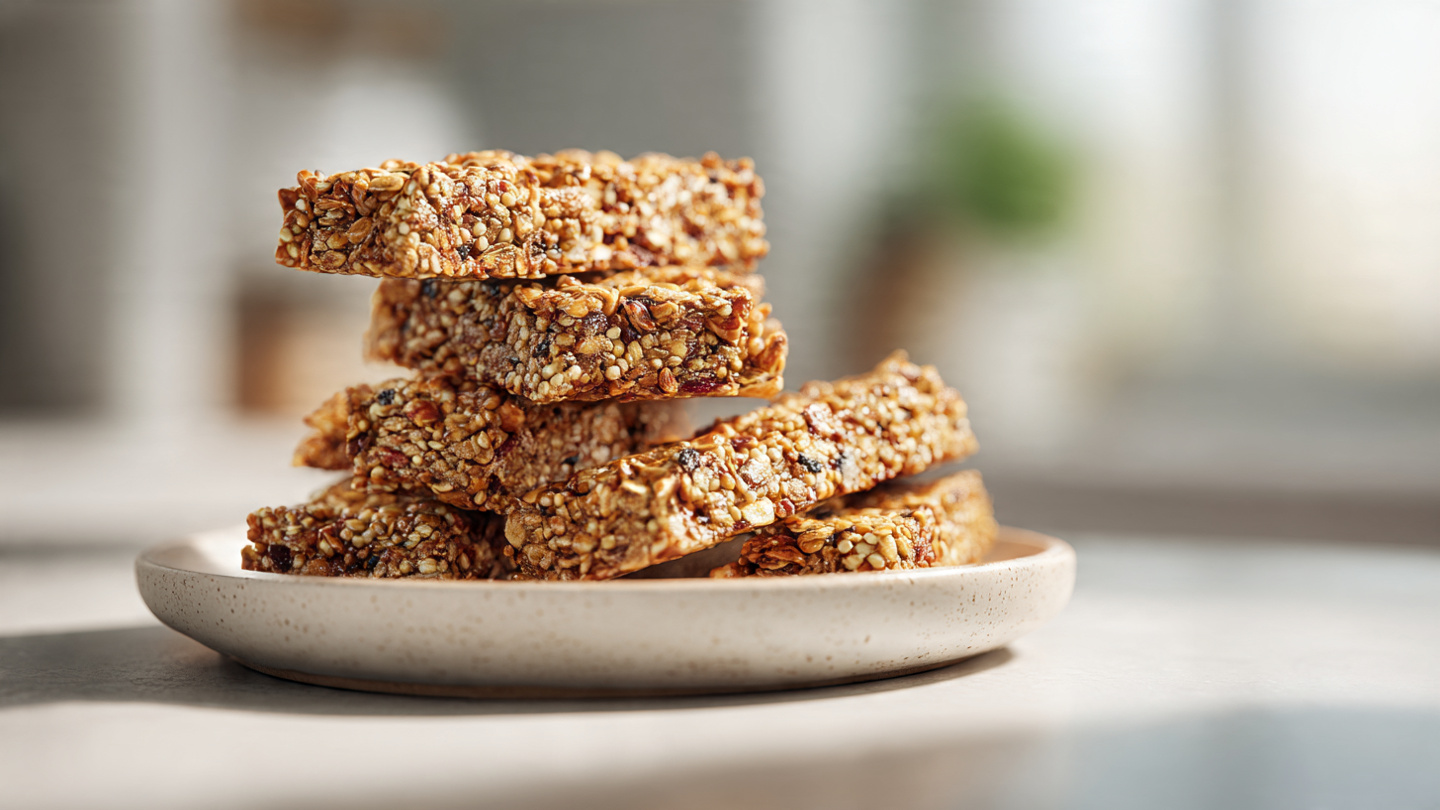
Get ready to discover your new favorite healthy snack with these Healthy Quinoa Crunch Bars – nutritious, satisfying, perfectly sweet treats that are packed with protein, fiber, and wholesome ingredients yet taste so good you’ll forget they’re actually good for you! I created this recipe during my quest to find healthy snacks that could satisfy my mid-afternoon cravings without the guilt, refined sugar, or artificial ingredients found in most store-bought bars, and after countless experiments, I finally nailed the perfect combination of crunchy quinoa, nuts, seeds, and natural sweeteners that hold together beautifully and taste absolutely delicious. What makes these bars absolutely extraordinary is the satisfying crunch from toasted quinoa and puffed rice combined with chewy dried fruit, creamy nut butter, and just enough natural sweetness from honey or maple syrup to make them feel like a treat while still being genuinely nutritious. These bars have become my meal prep staple, my hiking and travel companion, my kids’ lunchbox favorite, my post-workout refuel, and proof that healthy snacks don’t have to be boring or taste like cardboard! Whether you’re looking for clean eating snacks, need portable energy for busy days, want homemade alternatives to expensive store-bought bars, or just love crunchy-chewy texture combinations, these quinoa crunch bars are about to become your new obsession!
Overview of Recipe Content
Healthy Quinoa Crunch Bars are perfect for meal prep and grab-and-go snacks, pre- or post-workout fuel, hiking and travel snacks, kids’ lunchboxes and after-school treats, healthier alternatives to candy bars, using up odds and ends from your pantry, homemade gifts for health-conscious friends, or anytime you need nutritious, satisfying snacks. It’s a great recipe because it’s genuinely healthy with whole food ingredients, naturally gluten-free and can be vegan, provides lasting energy from protein, fiber, and healthy fats, costs much less than store-bought protein bars, is endlessly customizable to your taste preferences, uses simple, recognizable ingredients, and has that satisfying crunch-chewy texture. The flavor profile is wholesome deliciousness: nutty, crunchy quinoa and toasted seeds, creamy richness from nut or seed butter, natural sweetness from honey, maple syrup, or dates, chewy dried fruit that adds bursts of flavor, subtle vanilla and optional spices, and optional chocolate chips for treat-level satisfaction. This recipe is perfect for health-conscious snackers and meal preppers, busy parents packing lunchboxes, athletes and active people, hikers and travelers, anyone avoiding refined sugar and processed foods, and people who want control over their snack ingredients. It’s naturally gluten-free, easily made vegan, and always satisfying!
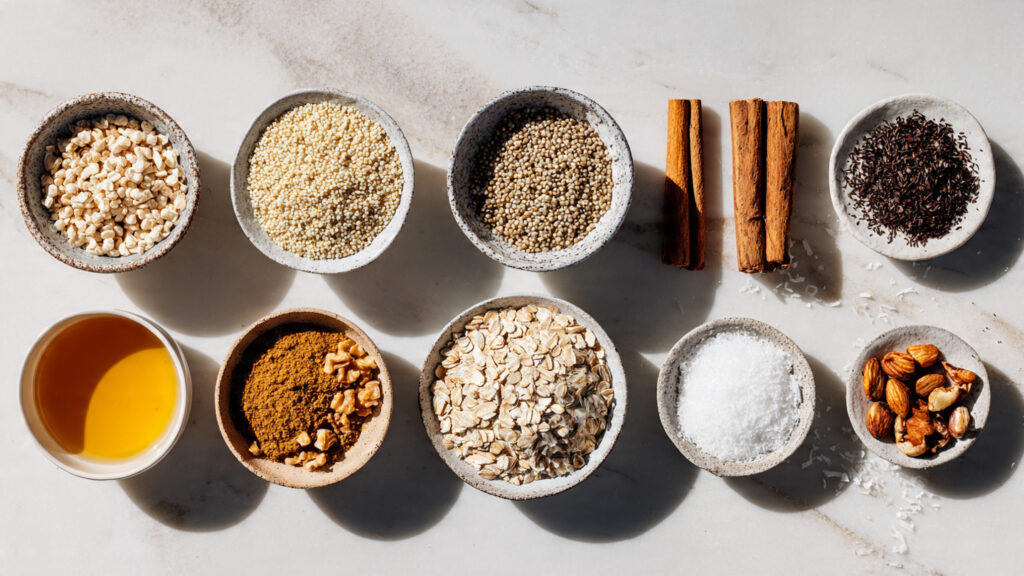
Ingredients
For the Dry Base:
| Ingredient | Quantity |
|---|---|
| Uncooked quinoa (any color) | 1 cup (170g) |
| Puffed rice cereal or puffed quinoa | 2 cups (50g) |
| Mixed nuts, roughly chopped (almonds, cashews, pecans, walnuts) | 1 cup (140g) |
| Seeds (pumpkin seeds, sunflower seeds, or mixture) | ½ cup (70g) |
| Dried fruit, chopped (cranberries, cherries, apricots, raisins, dates) | ½ cup (75g) |
| Mini chocolate chips or cacao nibs (optional) | ½ cup (90g) |
| Shredded coconut (optional) | ¼ cup (25g) |
For the Wet Binding Mixture:
| Ingredient | Quantity |
|---|---|
| Natural nut butter (almond, peanut, cashew, or sunflower seed butter) | ¾ cup (180ml) |
| Honey or pure maple syrup | ½ cup (120ml) |
| Coconut oil, melted | 2 tablespoons |
| Vanilla extract | 2 teaspoons |
| Salt (if nut butter is unsalted) | ½ teaspoon |
| Cinnamon or pumpkin pie spice (optional) | ½ teaspoon |
Optional Add-Ins for Nutrition Boost:
| Item | Purpose |
|---|---|
| Chia seeds | Omega-3s, fiber |
| Ground flaxseed | Omega-3s, lignans |
| Hemp hearts | Complete protein |
| Protein powder (vanilla or unflavored) | Extra protein |
| Maca powder | Adaptogen, energy |
Tools Needed
- Large skillet (for toasting quinoa)
- Large mixing bowl (2)
- 9×13-inch baking pan
- Parchment paper
- Rubber spatula
- Measuring cups and spoons
- Small saucepan (for heating wet ingredients)
- Sharp knife (for cutting bars)
- Storage containers or bags
Suggested Substitutions and Additions
Quinoa Preparation:
- Uncooked quinoa, toasted: Provides best crunch (recommended)
- Pre-cooked quinoa: Can use, but less crunchy
- Puffed quinoa: Already crunchy, skip toasting
- Combination: Half toasted, half puffed for varied texture
- Colors: Red, white, or tri-color all work
Nut and Seed Options:
- Almonds: Classic, crunchy, affordable
- Cashews: Creamy, mild, slightly sweet
- Pecans: Buttery, rich
- Walnuts: Earthy, omega-3s
- Pumpkin seeds (pepitas): Zinc, magnesium
- Sunflower seeds: Nut-free option, vitamin E
- Mixed: Variety for complexity (recommended)
- Nut-free: Use all seeds instead
Nut Butter Alternatives:
- Almond butter: Mild, popular, nutritious
- Peanut butter: Classic, affordable, protein-rich
- Cashew butter: Creamy, slightly sweet
- Sunflower seed butter: Nut-free, great alternative
- Tahini: Sesame-based, earthy, calcium-rich
- Mixed: Combine two types for complexity
- Coconut butter: Rich, tropical flavor
Sweetener Options:
- Honey: Natural, floral, antibacterial (not vegan)
- Maple syrup: Vegan, mineral-rich, distinct flavor
- Date syrup: Low-glycemic, rich flavor
- Brown rice syrup: Mild, less sweet
- Agave nectar: Vegan, very sweet (use less)
- Coconut nectar: Low-glycemic, caramel notes
- Dates: Blend with water to make paste (whole food option)
Dried Fruit Variations:
- Cranberries: Tart-sweet, antioxidant-rich
- Cherries: Sweet-tart, anti-inflammatory
- Apricots: Sweet, vitamin A
- Raisins or currants: Classic, iron-rich
- Dates: Very sweet, fiber, natural binder
- Figs: Honey-sweet, calcium
- Blueberries: Antioxidant powerhouses
- Mango or pineapple: Tropical twist
- Mixed: Variety for complexity
Flavor Variations:
- Classic: As written with vanilla
- Chocolate: Add cocoa powder + chocolate chips
- Peanut butter chocolate: PB + chocolate chips
- Tropical: Coconut, dried pineapple, macadamia nuts
- Apple cinnamon: Dried apples, extra cinnamon
- Lemon poppy seed: Lemon zest, poppy seeds
- Chai spice: Cinnamon, cardamom, ginger, cloves
- Pumpkin spice: Pumpkin seeds, pumpkin pie spice
- Cherry almond: Dried cherries, almonds, almond extract
Texture Add-Ins:
- Puffed rice, quinoa, or millet for extra crunch
- Crispy rice cereal for nostalgic texture
- Rolled oats (add before baking) for chewier bars
- Cacao nibs for chocolate crunch without sweetness
- Toasted coconut flakes for tropical crunch
- Crushed pretzels for sweet-salty (whole wheat or GF)
Nutrition Boosters:
- Chia seeds: Omega-3s, fiber, protein
- Ground flaxseed: Omega-3s, lignans
- Hemp hearts: Complete protein, omega balance
- Protein powder: Extra protein boost
- Maca powder: Adaptogen, energy
- Spirulina or chlorella: Greens boost (changes color!)
- Collagen powder: Protein, joint health
Dietary Modifications:
- Vegan: Use maple syrup, check all ingredients
- Nut-free: Seed butter + seeds only
- Grain-free: Skip puffed rice, use more nuts
- Low-sugar: Reduce sweetener, add more dates
- Paleo: Use honey, no puffed rice, more nuts
- Keto: Reduce sweetener drastically, more nuts and seeds
- Low-FODMAP: Check all ingredients carefully
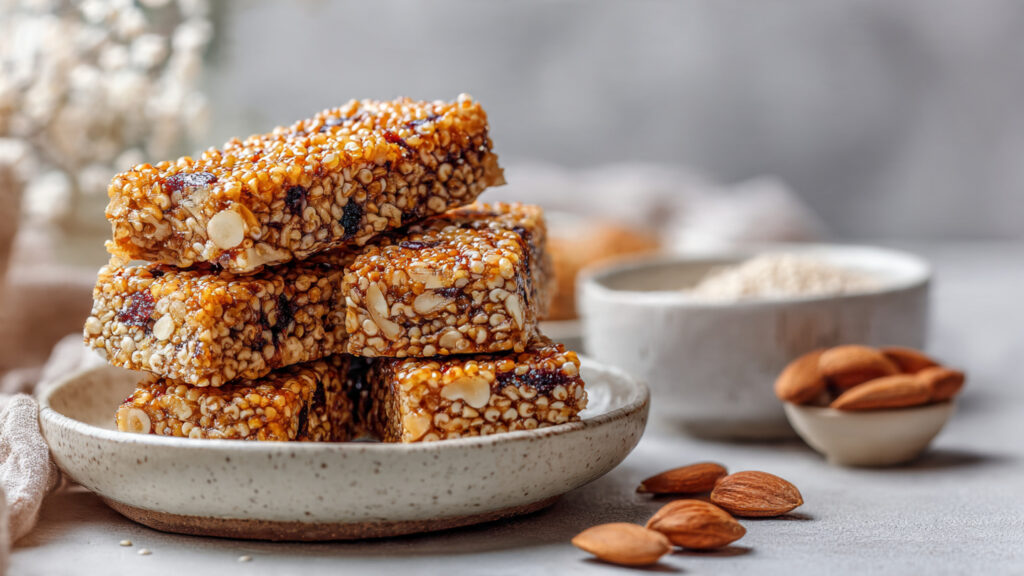
How to Make Healthy Quinoa Crunch Bars
Step 1: Prepare Pan and Toast Quinoa
Line a 9×13-inch baking pan with parchment paper, leaving overhang on two sides to create “handles” for easy removal later. This is crucial – these bars are sticky and you’ll want to lift them out cleanly! Set aside.
Rinse 1 cup of uncooked quinoa in a fine-mesh strainer under cold water for about 30 seconds. This removes the natural coating (saponin) that can taste bitter. Drain well and shake off excess water.
Heat a large, dry skillet over medium heat. Add the rinsed quinoa and toast, stirring frequently, for 8-10 minutes until the quinoa is dry, lightly golden, and smells nutty. You’ll hear it start to pop like tiny popcorn – that’s perfect! The toasting is what creates that incredible crunch. Remove from heat and transfer to a large mixing bowl.
Critical step: Toasting the quinoa is non-negotiable for this recipe! It transforms the texture from soft and chewy to crunchy and crispy, which is what makes these bars so satisfying and different from other granola bars.
Step 2: Prepare All Dry Ingredients
To the bowl with toasted quinoa, add the puffed rice cereal, chopped nuts, seeds, dried fruit (chopped into small pieces if large), and any optional add-ins like chocolate chips, coconut, chia seeds, or flaxseed. Toss everything together until evenly mixed.
If toasting nuts and seeds for extra flavor (recommended but optional), spread them on a baking sheet and toast in a 350°F (175°C) oven for 5-8 minutes until fragrant and lightly golden. Let cool before adding to the mix.
The dry mixture should be well-combined with everything evenly distributed. You want every bite to have a good mix of quinoa, nuts, fruit, and crunch. This is your chance to customize – add more of what you love, less of what you don’t!
Set the dry mixture aside while you prepare the wet binding ingredients.
Step 3: Make the Wet Binding Mixture
In a small saucepan over low heat, combine the nut butter, honey (or maple syrup), melted coconut oil, vanilla extract, salt (if needed), and any optional spices like cinnamon. Stir constantly for 2-3 minutes until everything is melted, smooth, and well combined.
The mixture should be fluid and pourable – not thick and stiff. If your nut butter is very thick, the gentle heat helps thin it out so it coats all the dry ingredients properly. Don’t overheat or boil – you just want it warm and fluid.
Remove from heat and let cool for 1-2 minutes. You want it warm (easier to mix) but not hot (would melt chocolate chips if using).
Pro tip: Natural nut butters (the kind that separates) work best for this recipe because they’re runnier and coat better. If using thick, no-stir nut butter, add an extra tablespoon of coconut oil to help with binding.
Step 4: Combine Wet and Dry Ingredients
Pour the warm wet mixture over the dry ingredients in the large bowl. Using a sturdy rubber spatula or wooden spoon, stir vigorously for 1-2 minutes until every piece of quinoa, nut, and fruit is coated in the sticky binding mixture. This takes some muscle – the mixture will be thick and sticky!
You want thorough coating – this is what holds the bars together. If the mixture seems too dry and crumbly (ingredients not sticking together), add more nut butter or honey 1 tablespoon at a time. If too wet (soupy, pooling liquid), add more puffed rice or oats.
The final consistency should be very sticky and hold together when pressed. Grab a handful and squeeze – it should form a clump that holds its shape. If it falls apart, you need more binding liquid.
Step 5: Press into Pan Firmly
Transfer the sticky mixture to your prepared 9×13-inch pan. Using the spatula, your hands (wet them first to prevent sticking!), or a piece of parchment paper, press the mixture down VERY firmly and evenly into the pan. Really press hard – firm packing is essential for bars that hold together and don’t crumble!
Pay special attention to corners and edges, making sure the mixture is even thickness throughout. The surface should be smooth and tightly compressed. If it’s not packed firmly enough, the bars will fall apart when you cut them.
Professional trick: Place another piece of parchment paper on top and use a flat-bottomed glass or measuring cup to press down hard all over the surface. This creates maximum compression and even thickness.
Step 6: Chill Until Set
Cover the pan with plastic wrap or aluminum foil and refrigerate for at least 2 hours, or preferably 4 hours or overnight. The bars need this time to firm up completely so they hold together when cut. Don’t rush this step – cutting too early results in crumbly, messy bars!
For faster setting, place in the freezer for 1 hour. The cold temperature firms up the coconut oil and nut butter, creating solid bars that slice cleanly.
The bars are ready when they’re completely firm to the touch and don’t feel soft or sticky. They should feel solid, almost hard, when cold.
Step 7: Cut and Store
Once completely set, use the parchment paper overhang to lift the entire block out of the pan onto a cutting board. Remove the parchment from the bottom.
Using a large, sharp knife, cut into bars. For standard snack bars, cut into 4 rows lengthwise and 6 rows crosswise, creating 24 bars. For larger meal-replacement bars, cut 3×4 for 12 bars. For bite-sized pieces, cut smaller squares.
Cutting tip: Wipe the knife clean between cuts for the neatest bars. You can also slightly warm the knife under hot water, dry it, then cut – the warmth helps slice through sticky ingredients.
The bars are ready to eat immediately or store! They’ll soften slightly at room temperature but remain firm and hold together well. Enjoy as a snack, breakfast on-the-go, pre- or post-workout fuel, or healthy dessert!
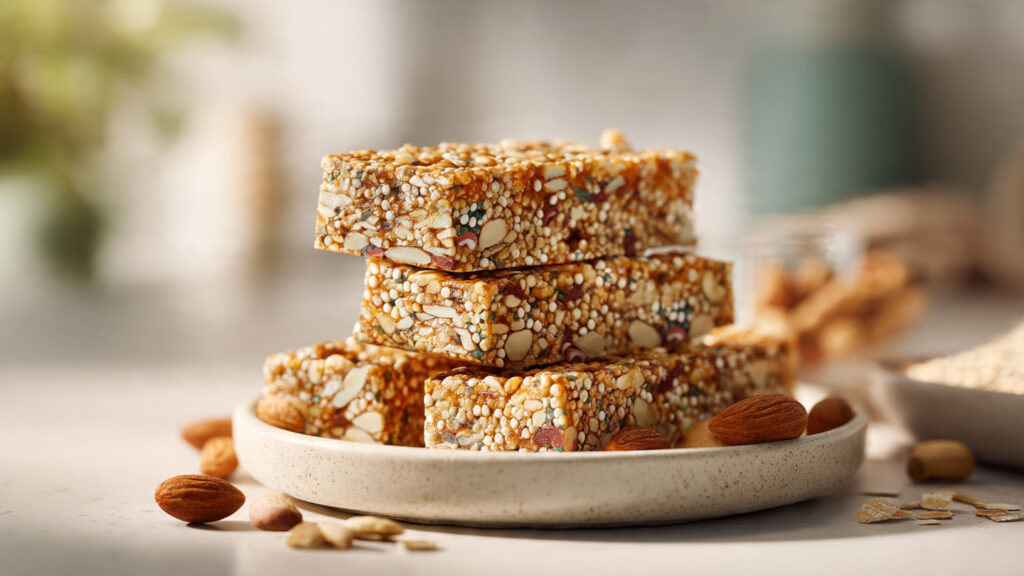
What to Serve with It
Healthy Quinoa Crunch Bars are complete, portable snacks that don’t require accompaniments, but certain pairings enhance the experience. For breakfast, pair with: Greek yogurt or skyr (extra protein), fresh fruit (berries, banana, apple), smoothie (green or fruit-based), coffee or tea (essential morning beverage), or hard-boiled eggs (if you want more protein).
For snack time, enjoy with: fresh apple or pear slices (crisp, refreshing contrast), string cheese or cheese cubes (protein and calcium), raw vegetables (carrots, cucumbers, bell peppers), hummus (for dipping veggies), or handful of fresh berries.
Beverage pairings that complement: water (always essential!), green tea or herbal tea (antioxidants, hydration), coffee (especially morning bars), protein shake (post-workout), coconut water (natural electrolytes), or almond or oat milk (creamy, mild).
For pre-workout fuel, eat a bar 30-60 minutes before exercise with: water or coconut water for hydration, banana for quick energy, or small amount of coffee for caffeine boost.
For post-workout recovery, pair with: protein shake or smoothie (muscle recovery), chocolate milk (classic recovery drink), tart cherry juice (inflammation reduction), or Greek yogurt (extra protein).
For hiking and outdoor adventures, pack with: trail mix (more variety), fresh fruit (apples, oranges – travel well), beef jerky or turkey jerky (savory protein), water or electrolyte drink, and dark chocolate (morale boost!).
For kids’ lunchboxes, add: string cheese or cheese cubes, baby carrots with ranch, fruit pouch or fresh fruit, crackers, and water bottle for complete lunch.
Elegant serving (yes, really!): cut into small squares, arrange on a platter with: fresh berries, dark chocolate squares, nuts, and dried fruit for a healthy dessert board at gatherings.
Anytime snacking: These bars are perfect solo snacks – no accompaniment needed! The combination of protein, fiber, and healthy fats provides sustained energy without causing blood sugar spikes. They’re genuinely satisfying and keep you full for hours.
Tips for Making It Perfect
- Toast the quinoa thoroughly for maximum crunch: This is the signature element that makes these bars special! Untoasted quinoa is soft and doesn’t provide that satisfying crunch. Toast in a dry skillet over medium heat for 8-10 minutes, stirring constantly, until golden and popping. It should smell nutty and toasty. This step is non-negotiable for the best texture and flavor!
- Press the mixture VERY firmly into the pan: This is the #1 factor in whether bars hold together or crumble! Use significant force – wet your hands or use parchment paper and a flat object to press down hard all over the surface. The mixture should be tightly compressed with no air pockets. Firm pressing = bars that stay together when cut and eaten.
- Chill completely before cutting – patience required!: Cutting too early is the most common mistake! The bars need at least 2 hours (preferably 4+ hours or overnight) in the refrigerator to firm up completely. The coconut oil and nut butter need to solidify. Room temperature bars are too soft and will fall apart. Cold bars slice cleanly and hold together perfectly. Don’t rush!
- Use natural, runny nut butter for best binding: Natural nut butters (where oil separates to the top) are thinner and coat dry ingredients better than thick, no-stir varieties. If using thick nut butter, add 1-2 extra tablespoons melted coconut oil to achieve proper consistency. The wet mixture should be fluid enough to coat everything thoroughly.
- Adjust sweetness and binding to your preference: Different brands of nut butter and sweeteners vary in consistency. After mixing wet and dry, grab a handful and squeeze – it should form a clump that holds together. Too crumbly? Add more nut butter or sweetener 1 tablespoon at a time. Too wet? Add more puffed rice or quinoa. The mixture should be sticky and cohesive, not crumbly or soupy.
- Store properly for best texture: These bars stay freshest when stored in an airtight container in the refrigerator. They soften at room temperature (still delicious but less firm), so keep cold for best texture. Layer between parchment paper to prevent sticking. They’re sturdy enough to pack in lunchboxes or bags – they’ll warm to room temp but hold together well.
- Customize without sacrificing structure: Feel free to swap nuts, fruits, and flavors, BUT maintain the ratios! Always include: toasted quinoa (crunch base), binding liquid (nut butter + sweetener + oil), and some puffed/crispy element. These three components create proper texture and structure. Swap within categories (different nuts, different fruits) but don’t eliminate entire categories or bars won’t work!
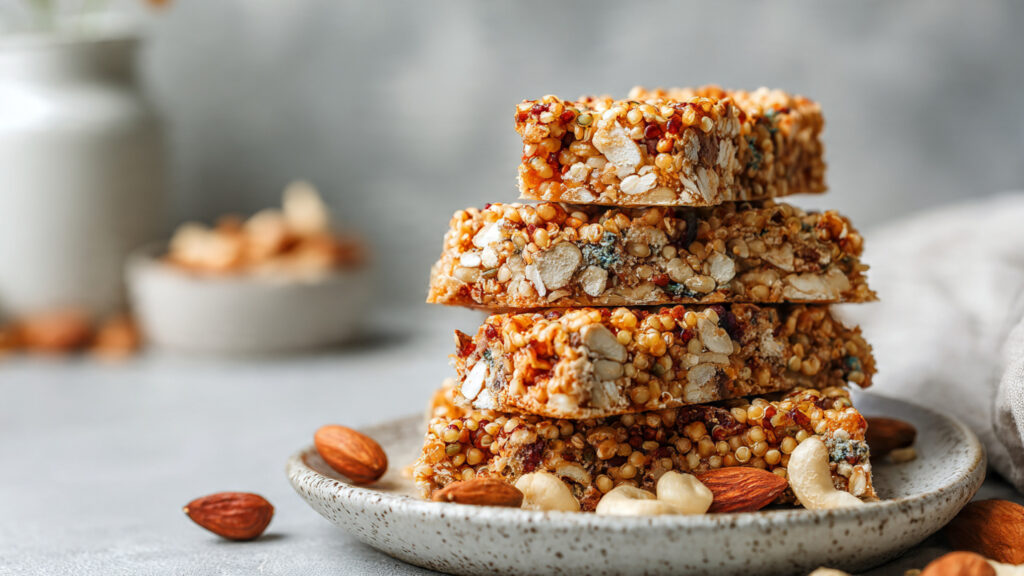
Storage Instructions
Refrigerator (Best for Firmness): Store quinoa crunch bars in an airtight container with parchment or waxed paper between layers in the refrigerator for up to 2 weeks. They stay firmest when cold – the coconut oil and nut butter remain solid, keeping bars together perfectly. This is the best storage method for maximum freshness and texture.
Room Temperature: Bars can be stored at cool room temperature (under 70°F/21°C) in an airtight container for up to 1 week. They’ll soften slightly and become chewier rather than crispy-crunchy, but they still hold together well and taste delicious. Perfect for packing in lunchboxes or bags where refrigeration isn’t available. In hot weather, they may become too soft – refrigerate instead.
Freezing (Excellent for Long-Term): These bars freeze beautifully for up to 3 months! Wrap individual bars in parchment paper, then place in freezer bags or airtight containers. No need to thaw – eat straight from frozen (they’re delicious cold and firm!) or let sit at room temperature for 10-15 minutes to soften slightly. Frozen bars are perfect grab-and-go options!
Individual Wrapping: For maximum convenience, wrap each bar individually in parchment paper, then store all wrapped bars in a container or bag. This makes them easy to grab one at a time for snacks, lunchboxes, or travel. Individual wrapping also prevents bars from sticking together and helps maintain freshness.
Travel and Hiking: These bars travel exceptionally well! Wrap individually and pack in your bag, backpack, or lunchbox. They’re sturdy and won’t crumble or get squashed easily. In very hot weather, they may soften – pack with an ice pack or freeze solid before packing for extended freshness. They’re shelf-stable at cool temperatures for 1-2 days without refrigeration.
Lunchbox Packing: Pack a bar in the morning for afternoon snack or lunch dessert. Include a small ice pack if possible, but the bars are fine at room temperature for several hours. They won’t spoil in a typical 4-6 hour period from morning to lunchtime.
Texture Changes: Fresh-made bars are crispiest and crunchiest. After a few days, they may soften slightly as moisture from dried fruit distributes throughout. This is normal! Some people prefer the softer texture after 2-3 days. The flavor often improves as it mellows and ingredients meld.
Signs of Spoilage: Properly stored bars should smell nutty and sweet. Discard if you notice: off odors (rancid nuts smell bitter), mold (from moisture), or if taste is unpleasant. The nuts and seeds contain oils that can go rancid over time, so use within recommended timeframes. Refrigeration slows rancidity significantly.
Reviving Softened Bars: If bars become too soft at room temperature, simply refrigerate for 30-60 minutes to firm up again. The cold re-solidifies coconut oil and nut butter, restoring that perfect texture.
General Information
Quinoa (pronounced KEEN-wah) is an ancient grain-like seed that was cultivated by the Inca civilization in the Andean region of South America over 5,000 years ago. The Incas called it “the mother of all grains” and considered it sacred. Quinoa was a staple food providing complete protein (all nine essential amino acids), which was crucial for people living at high altitudes with limited access to animal protein.
Quinoa was introduced to the wider world in the 1970s-1980s as Western nutritionists recognized its exceptional nutritional profile. It gained massive popularity in the 2000s-2010s during the health food movement as people sought alternatives to wheat and rice. The United Nations declared 2013 “The International Year of Quinoa” to recognize its role in food security and nutrition.
Homemade energy bars and granola bars emerged as alternatives to commercial products that are often loaded with refined sugar, artificial ingredients, and preservatives. The first commercial energy bar, “Space Food Sticks,” was developed in the 1960s for astronauts. PowerBar launched in 1986, followed by countless others targeting athletes and health-conscious consumers.
However, many commercial bars contain as much sugar as candy bars, use highly processed ingredients, and cost $2-4 each! The homemade bar movement of the 2010s responded to these issues, with home cooks creating healthier, cheaper, customizable versions. Food blogs and Pinterest exploded with granola bar and energy bar recipes using whole food ingredients.
Toasted quinoa as a crispy element in bars is a relatively recent innovation (2010s) as creative cooks discovered that dry-toasting quinoa transforms its texture from soft and chewy to crunchy and crispy – similar to puffed rice but with more nutritional value. This technique appears in South American cooking but was adapted by modern health food enthusiasts for bars, granola, and snacks.
The combination of nuts, seeds, and dried fruit bound with nut butter and natural sweeteners represents a “clean eating” approach that emphasizes whole foods over processed ingredients. This philosophy gained traction with paleo, whole30, and clean eating movements that emerged in the 2010s.
Nutritionally, these bars provide: complete protein from quinoa, healthy fats from nuts and seeds (omega-3s, omega-6s, monounsaturated fats), fiber from all components (helps with satiety and digestion), complex carbohydrates for sustained energy (no sugar crash), vitamins and minerals (vitamin E, magnesium, iron, zinc), and antioxidants from nuts, seeds, and dried fruit.
The environmental and economic benefits of homemade bars are significant: much less packaging waste than commercial bars, cost per bar is typically $0.50-1.00 vs. $2-4 for store-bought, you control exactly what goes in (no questionable ingredients), and you can customize to dietary needs and preferences.
Cultural significance: These bars represent a modern synthesis of ancient ingredients (quinoa, nuts, honey) with contemporary health consciousness and convenience needs. They’re a perfect example of how traditional, nutritious foods can be adapted for modern, busy lifestyles without sacrificing health or flavor!
Frequently Asked Questions (FAQ)
Q: Do I have to toast the quinoa or can I use cooked quinoa? A: You MUST toast dry, uncooked quinoa for this recipe! Toasting is what creates that signature crunch – it’s the whole point of these bars. Cooked quinoa is soft and mushy and won’t provide the crispy texture. Dry-toast the raw, rinsed quinoa in a skillet until it pops and smells nutty. This transforms the texture completely. Don’t skip this step!
Q: My bars are crumbly and fall apart – what went wrong? A: Crumbly bars result from: (1) Not pressing firmly enough into the pan – you need to compress HARD, (2) Not enough binding liquid (nut butter/honey) – add more if dry, (3) Not chilling long enough – must be completely cold and firm before cutting, or (4) Wrong ratios – too many dry ingredients vs. wet. Fix: Press harder, add more binder, chill longer. Prevention is easier than fixing, so really pack them tight!
Q: Can I make these nut-free for allergies? A: Absolutely! Replace nut butter with sunflower seed butter or tahini, use only seeds (no nuts) in the dry mixture – pumpkin seeds, sunflower seeds, hemp hearts work great. Everything else stays the same. Sunflower seed butter creates slightly green bars (chemical reaction with baking soda if present) but tastes great. These are easily made nut-free and safe for school lunches!
Q: How do these compare nutritionally to store-bought bars? A: Much better! Commercial bars often contain 12-20g sugar (candy bar levels), artificial ingredients, and preservatives. These homemade bars have: natural sweeteners in moderate amounts, whole food ingredients you can recognize, no preservatives or additives, more fiber and protein, healthy fats from nuts/seeds, and cost 75% less! You control every ingredient for your health goals.
Q: Can I reduce the sweetener to make them less sweet? A: Yes, but carefully! You can reduce honey/maple syrup by ¼ cup (to ¼ cup total), but the bars may be drier and more crumbly because sweetener helps bind. Compensate by adding 2-3 tablespoons more nut butter or use naturally sweet dried fruit like dates. The sweetener provides both flavor and structure, so some reduction is fine but don’t eliminate completely.
Q: Why did my bars turn green? A: If using sunflower seed butter (nut-free option) and your recipe contains baking soda/powder, a harmless chemical reaction occurs creating greenish color. It’s totally safe and doesn’t affect taste! The chlorogenic acid in sunflower seeds reacts with baking soda. This recipe doesn’t contain baking soda, so it shouldn’t happen, but if you add protein powder containing it, green is possible. Harmless but surprises some people!
Q: How long do these really keep me full? A: Very well! The combination of protein (quinoa, nuts, seeds), fiber (all ingredients), and healthy fats (nut butter, nuts, coconut oil) creates sustained energy lasting 2-4 hours. Unlike sugary snacks that spike blood sugar then crash, these provide steady energy. Many people find one bar is a complete snack that prevents hunger until the next meal. They’re genuinely satisfying!
Conclusion
I’m absolutely thrilled to share these Healthy Quinoa Crunch Bars with you – they’re proof that healthy snacks can be just as satisfying, crunchy, and delicious as anything processed or sugar-laden! The combination of toasted quinoa, nuts, seeds, and natural sweetness creates bars that are genuinely nutritious while tasting so good you’ll actually crave them. Whether you’re meal prepping for the week, packing lunchboxes, fueling adventures, or just want better-for-you snacks on hand, these bars deliver convenience, nutrition, and deliciousness in every bite.
I’d absolutely love to hear how your quinoa crunch bars turned out! Please leave a comment below sharing your experience, what mix-ins you used, and how they fit into your healthy lifestyle. If these bars became your new favorite snack and helped you avoid the vending machine, please give it a five-star rating – it helps other health-conscious people discover this recipe!
Don’t forget to snap photos of your perfectly cut bars (especially showing that gorgeous crunchy texture!) and share them on Instagram – tag me so I can see your creations and celebrate your healthy snacking success! And please pin this recipe to your “Healthy Snacks,” “Meal Prep,” or “Clean Eating” boards on Pinterest so you’ll always have it when you need nutritious, homemade goodness. Happy snacking, and may your bars always be crunchy, satisfying, and energizing!
Nutritional Information (per bar)
Based on 24 bars
| Nutrient | Amount |
|---|---|
| Calories | 165 |
| Total Fat | 9g |
| Saturated Fat | 2g |
| Trans Fat | 0g |
| Cholesterol | 0mg |
| Sodium | 50mg |
| Total Carbohydrates | 19g |
| Dietary Fiber | 3g |
| Sugars | 10g |
| Protein | 5g |
| Vitamin A | 1% DV |
| Vitamin C | 2% DV |
| Calcium | 35mg |
| Iron | 2mg |
| Potassium | 165mg |
Note: Nutritional values are approximate and will vary significantly based on exact nuts, seeds, dried fruit, nut butter, and sweetener used. These bars provide balanced nutrition with protein, fiber, healthy fats, and complex carbohydrates for sustained energy. Sugar content is from natural sources (honey/maple syrup and dried fruit).