Ultimate Twix-Style Cookies That Will Make You a Baking Star
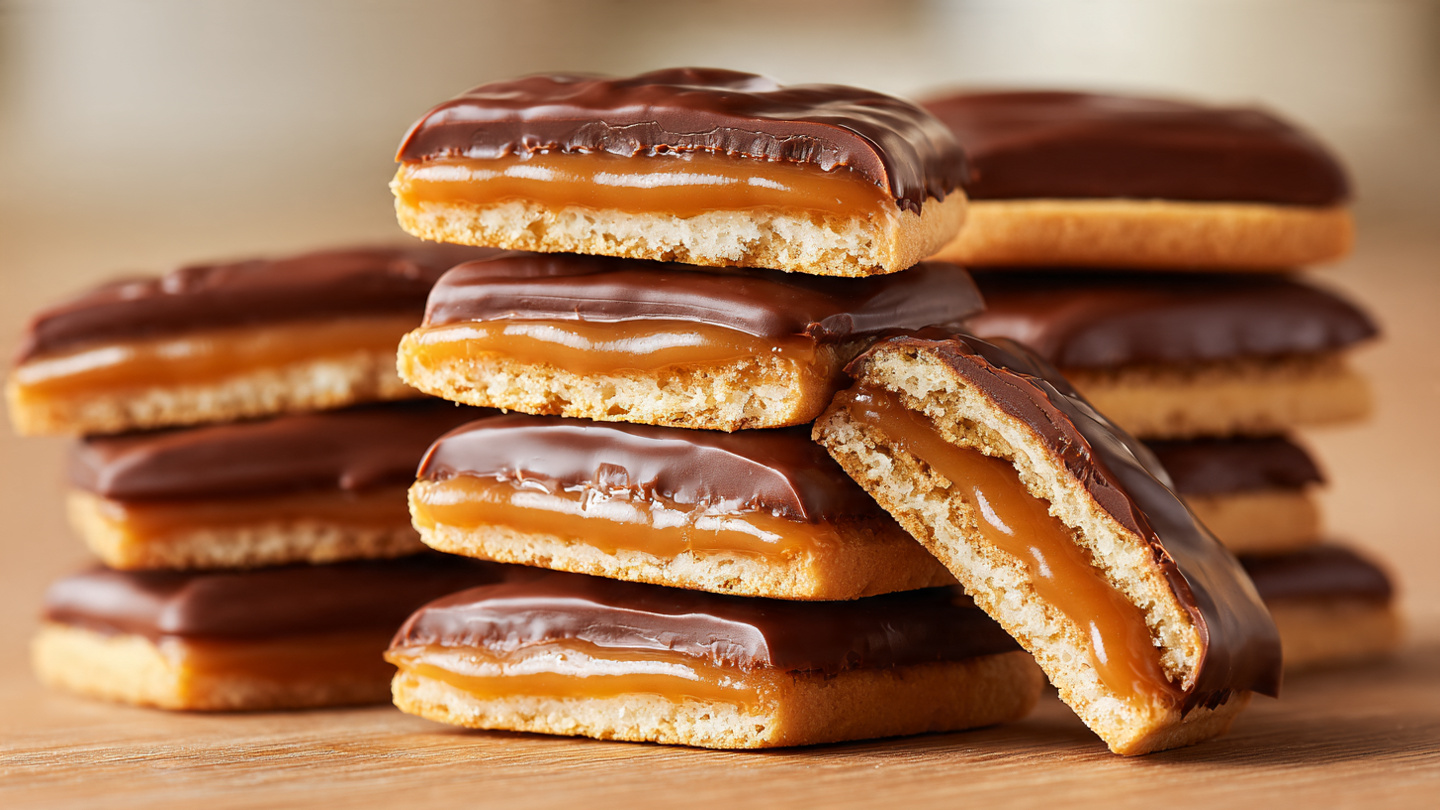
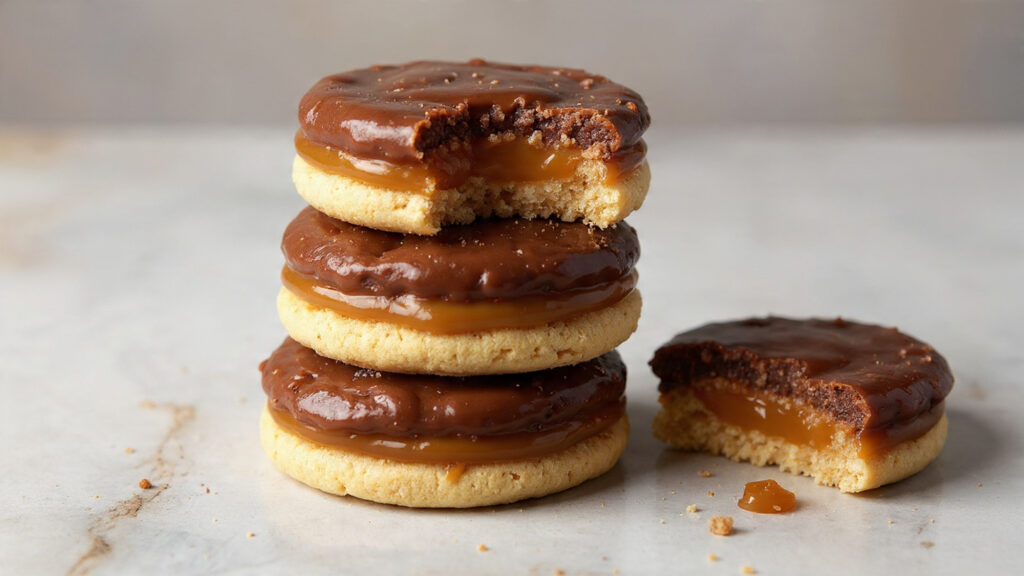
Get ready to become everyone’s favorite baker with these Ultimate Twix-Style Cookies – the most addictive, show-stopping treats that capture everything we love about Twix candy bars in homemade cookie form! I’ll never forget the first time I made these for a cookie exchange: grown adults were literally fighting over the last few cookies, and I had five people message me for the recipe before I even got home. What makes these cookies so incredible is the combination of textures and flavors: a buttery, crisp shortbread cookie base (just like a Twix), topped with a layer of gooey homemade caramel, all covered in rich chocolate coating. Each bite delivers that perfect symphony of buttery crunch, chewy caramel, and smooth chocolate that makes Twix bars so irresistible. The best part? While they look and taste like something from a fancy bakery, they’re actually quite straightforward to make – no fancy equipment required, and I’ll walk you through every step so you absolutely cannot fail. These cookies have become my signature bake, the thing I’m known for at every gathering, and the recipe that friends and family request for birthdays, holidays, and “just because” occasions. Whether you’re baking for a special event, making gifts, or simply want to experience the joy of creating something truly spectacular, these Twix-style cookies are about to make you a baking legend!
Overview of Recipe Content
Ultimate Twix-Style Cookies are perfect for holiday cookie exchanges and bake sales, birthday parties and celebrations, homemade gift-giving that truly impresses, bake sales that sell out instantly, potlucks where you want to be the star, satisfying serious sweet tooth cravings, or showing off your baking skills with something that looks professional. It’s a great recipe because it combines three classic elements (shortbread, caramel, chocolate) into one spectacular cookie, delivers that beloved Twix flavor in homemade form, creates impressive, bakery-quality results that photograph beautifully, and uses accessible ingredients with techniques anyone can master. The flavor profile is pure indulgence: buttery, crisp shortbread base with hints of vanilla and salt, rich, chewy caramel layer with deep brown sugar sweetness and a touch of sea salt, smooth, snappy milk or dark chocolate coating, and perfect balance of sweet, salty, crunchy, and chewy elements in every bite. This recipe is perfect for cookie lovers who want to level up their game, Twix candy bar enthusiasts, bakers looking for impressive gift ideas, anyone wanting a showstopper recipe that impresses, parents wanting to make special treats with kids, or experienced bakers seeking a fun project with guaranteed wow-factor. These cookies also transport well, keep fresh for days, and can be customized with different chocolates and toppings.
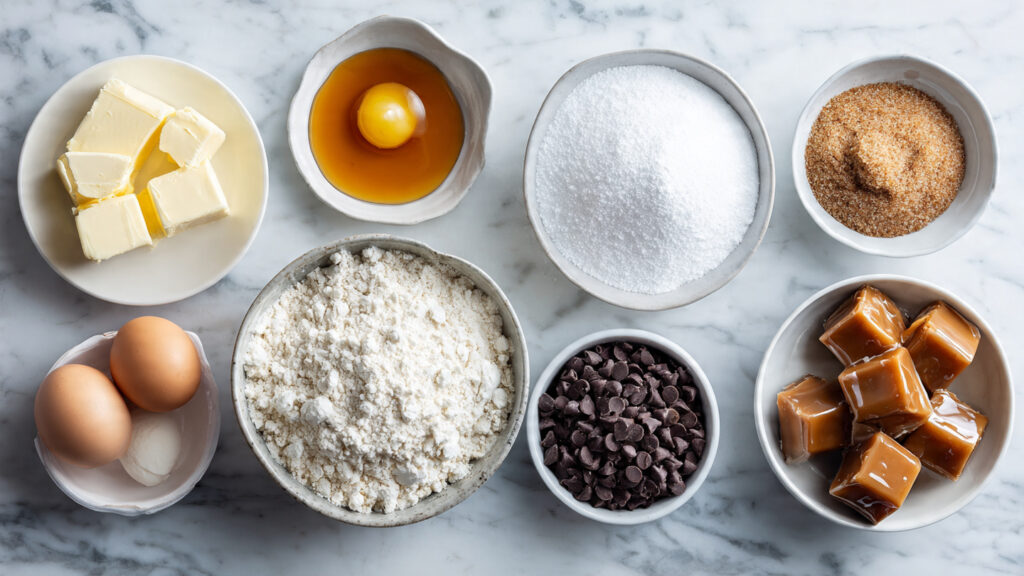
Ingredients
For the Shortbread Cookie Base:
| Ingredient | Quantity |
|---|---|
| Unsalted butter, softened to room temperature | 1 cup (226g) |
| Granulated sugar | ½ cup (100g) |
| Powdered sugar | ¼ cup (30g) |
| Vanilla extract | 1 teaspoon |
| Salt | ½ teaspoon |
| All-purpose flour | 2¼ cups (280g) |
| Cornstarch (for extra tender texture) | 2 tablespoons |
For the Caramel Layer:
| Ingredient | Quantity |
|---|---|
| Granulated sugar | 1 cup (200g) |
| Unsalted butter, cut into pieces | 6 tablespoons (85g) |
| Heavy cream, room temperature | ½ cup (120ml) |
| Vanilla extract | 1 teaspoon |
| Sea salt (or to taste) | ½ teaspoon |
| Light corn syrup (optional, helps prevent crystallization) | 2 tablespoons |
For the Chocolate Coating:
| Ingredient | Quantity |
|---|---|
| Milk chocolate chips or chopped milk chocolate | 12 oz (340g) |
| Coconut oil or vegetable shortening | 2 tablespoons |
| Or dark chocolate, semi-sweet, or combination | As preferred |
| Flaky sea salt for sprinkling on top (optional) | To taste |
Optional Garnishes:
| Garnish | Purpose |
|---|---|
| Extra caramel drizzle | Decorative and flavor |
| White chocolate drizzle | Visual contrast |
| Crushed pretzels | Salty crunch |
| Chopped nuts (pecans, almonds) | Texture and flavor |
| Mini chocolate chips | Decoration |
| Gold leaf | Fancy occasions |
Tools Needed
- 9×13-inch baking pan
- Parchment paper
- Large mixing bowl
- Medium saucepan (for caramel)
- Electric hand mixer or stand mixer
- Rubber spatula
- Measuring cups and spoons
- Wooden spoon
- Sharp knife or pizza cutter
- Candy thermometer (optional but helpful)
- Microwave-safe bowl or double boiler (for chocolate)
- Fork or dipping tool
- Wire cooling rack
- Cutting board
Suggested Substitutions and Additions
Butter Alternatives:
- Unsalted butter: Best choice for controlling salt levels
- Salted butter: Reduce added salt by half
- European-style butter: Higher fat content, richer flavor
- Margarine: Not recommended, affects texture and flavor
- Coconut oil: Can substitute in shortbread for dairy-free (flavor will differ)
Sugar Modifications:
- Granulated sugar: Standard for both cookie and caramel
- Powdered sugar in base: Creates tender, melt-in-mouth texture
- Brown sugar: Can use light brown sugar instead of granulated in base for deeper flavor
- Reduce sugar: Not recommended in caramel (affects chemistry), can reduce by 2 tablespoons in cookie base
Flour Options:
- All-purpose flour: Best choice
- Gluten-free flour blend: Use 1:1 substitute (Bob’s Red Mill works well)
- Whole wheat pastry flour: Can substitute up to half for nuttier flavor
- Cornstarch addition: Creates extra tender, crumbly shortbread texture
Caramel Variations:
- Homemade caramel: Most flavorful, best texture (as written)
- Store-bought caramel: Melt caramel squares or caramel bits (easier but less flavor)
- Dulce de leche: Can substitute for caramel for different flavor
- Salted vs unsalted: Adjust salt addition based on preference
- Add bourbon or rum: 1 tablespoon in caramel for adult version
Chocolate Options:
- Milk chocolate: Classic Twix flavor, sweet and creamy
- Dark chocolate: More sophisticated, less sweet
- Semi-sweet chocolate: Good middle ground
- White chocolate: Different but delicious
- Combination: Half milk, half dark for complexity
- Chocolate bark or candy melts: Easier to work with, different texture
Flavor Enhancements:
- Add ½ teaspoon espresso powder to chocolate for depth
- Mix ¼ teaspoon cinnamon into shortbread for warmth
- Add 1 teaspoon almond extract to shortbread
- Include orange zest in chocolate coating
- Add ½ cup mini chocolate chips to caramel layer
- Sprinkle crushed freeze-dried strawberries on chocolate
- Add ¼ cup toffee bits to caramel
Creative Variations:
- Peanut butter version: Add ½ cup peanut butter to caramel
- Coconut Twix: Add shredded coconut to caramel, use dark chocolate
- Pretzel Twix: Press crushed pretzels into caramel before chocolate
- S’mores style: Add mini marshmallows to caramel, use graham crackers in base
- Nutella layer: Spread Nutella between shortbread and caramel
- Cookie butter: Add Biscoff spread to caramel layer
Dietary Modifications:
- Gluten-free: Use gluten-free flour blend 1:1
- Dairy-free: Use coconut oil and dairy-free chocolate, coconut cream in caramel
- Vegan: Replace butter with vegan butter, use coconut cream, ensure chocolate is dairy-free
- Lower sugar: Difficult with caramel, but can reduce cookie base sugar by ¼ cup
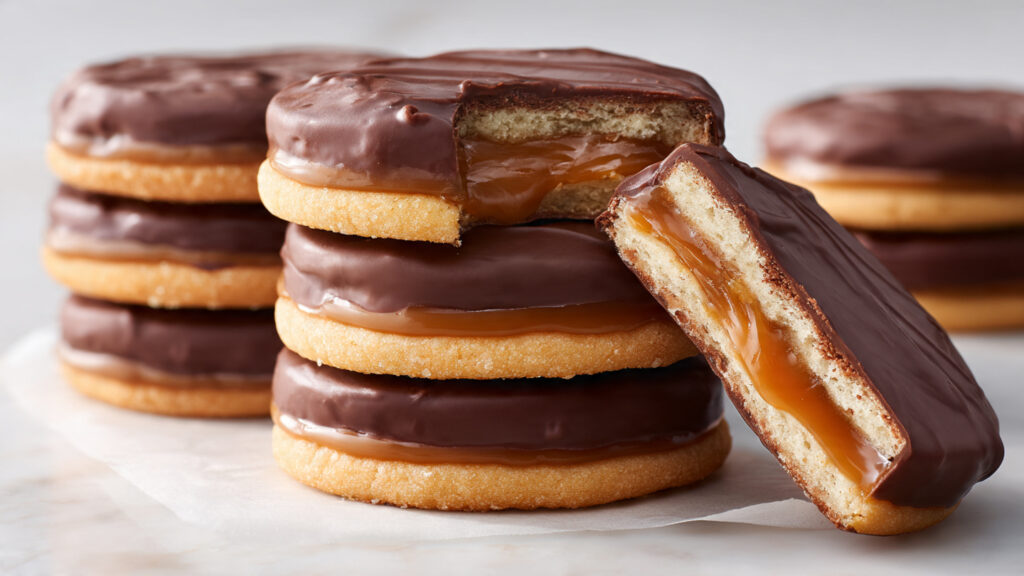
How to Make Ultimate Twix-Style Cookies
Step 1: Prepare Pan and Make Shortbread Base
Preheat your oven to 350°F (175°C). Line a 9×13-inch baking pan with parchment paper, leaving some overhang on two opposite sides – this creates “handles” that make removing the finished cookies incredibly easy. This step is crucial for success, so don’t skip it!
In a large mixing bowl (or stand mixer fitted with paddle attachment), beat the softened butter, granulated sugar, and powdered sugar together on medium-high speed for 3-4 minutes until very light, fluffy, and pale in color. This creaming process is important – it incorporates air that creates a tender, melt-in-your-mouth shortbread texture. Scrape down the sides of the bowl.
Add the vanilla extract and salt, beating until combined. The mixture should look almost like frosting at this point – light, fluffy, and creamy. In a separate bowl, whisk together the flour and cornstarch. Add the flour mixture to the butter mixture all at once. Mix on low speed just until the dough comes together and no flour streaks remain. Don’t overmix! The dough should be soft, slightly crumbly, and hold together when pressed.
Press the shortbread dough evenly into the bottom of your prepared pan. Use your hands or the bottom of a flat measuring cup to create an even, compact layer that covers the entire bottom with no gaps or thin spots. The more evenly you press it, the more uniform your cookies will be. Prick the surface all over with a fork – this prevents bubbling during baking.
Step 2: Bake the Shortbread Base
Place the pan in your preheated 350°F (175°C) oven and bake for 20-25 minutes until the shortbread is set and very lightly golden around the edges. The center should look dry and matte, not glossy or underbaked. It won’t brown much – that’s correct! Shortbread should be pale golden, not deep brown.
The shortbread should feel firm when lightly pressed and should no longer look wet or shiny in the center. If you see any bubbles that formed despite pricking, gently press them down with a spatula immediately after removing from the oven while the shortbread is still hot.
Remove from oven and let cool completely in the pan on a wire rack. This is important – if you add hot caramel to warm shortbread, the shortbread will become soggy instead of crisp. While the shortbread cools (this takes about 45-60 minutes), you can prepare your caramel.
Step 3: Make the Homemade Caramel
Now for the caramel – this is where the magic happens! In a medium, heavy-bottomed saucepan, add the granulated sugar. If using corn syrup, add it now and stir to coat the sugar (this helps prevent crystallization, though it’s optional). Place the pan over medium heat.
Watch carefully without stirring as the sugar begins to melt. After a few minutes, the sugar will start to liquify around the edges. At this point, you can gently swirl the pan (don’t stir!) to help even melting. Continue cooking, swirling occasionally, until all the sugar is melted and turns a deep amber color – similar to the color of iced tea or honey. This takes about 6-10 minutes total. Don’t walk away! Sugar can go from perfect to burnt in seconds.
Once the sugar reaches a deep amber color (but not dark brown or smoking), immediately remove from heat and carefully add the butter pieces. The mixture will bubble violently – this is normal! Stir with a wooden spoon or heat-proof spatula until the butter is completely melted and incorporated. The mixture will be very hot and bubbly.
Slowly pour in the heavy cream while stirring constantly. Again, it will bubble up dramatically – be careful! Keep stirring until the cream is fully incorporated and the mixture is smooth. Return the pan to medium heat and let it boil for 1-2 minutes, stirring constantly. If using a candy thermometer, you want it to reach about 225-230°F (soft ball stage). Remove from heat and stir in the vanilla extract and sea salt.
Let the caramel cool for 5-10 minutes until it’s warm but not boiling hot – if it’s too hot, it will make the shortbread soggy. The caramel should be pourable but starting to thicken slightly.
Step 4: Pour and Spread Caramel Layer
Once your shortbread base is completely cool and your caramel has cooled for 5-10 minutes, pour the warm (not hot) caramel over the shortbread base. Use a rubber spatula to spread it evenly to all edges and corners, creating a uniform layer about ¼-inch thick. Work quickly as caramel begins to set as it cools.
Make sure the caramel layer is as even as possible – this ensures uniform cookies and makes cutting much easier later. Smooth the top with an offset spatula or the back of a spoon for a professional finish.
Let the caramel cool and set completely at room temperature for at least 1-2 hours, or refrigerate for 30-45 minutes to speed this up. The caramel should be firm enough that when you touch it, it doesn’t stick to your finger, but it should still have some give – not rock hard. If you refrigerate it, let it sit at room temperature for 10-15 minutes before adding chocolate so the chocolate doesn’t crack when you cut it later.
Step 5: Cut Into Cookie Bars
Once the caramel is set but not rock-hard, it’s time to cut your cookies – this is much easier than trying to cut through chocolate! Use the parchment paper overhang to lift the entire slab out of the pan and onto a cutting board.
Using a sharp, large knife (wipe it clean between cuts for the neatest edges), cut the slab into cookies. You can make them traditional rectangular “bar” shapes like a Twix bar (about 1 inch by 3 inches), or cut them into squares, or even use cookie cutters for fun shapes. I usually get about 24-30 bars depending on size.
For the cleanest cuts: run your knife under hot water, dry it completely, then make your cuts. The warm knife will slice through the caramel smoothly. Wipe the knife clean and re-warm between cuts. If the caramel is too soft and oozes when you cut, refrigerate for 15 more minutes. If it’s too hard and cracks, let it sit at room temperature for 10-15 minutes.
Arrange your cut cookies on a parchment-lined baking sheet, leaving space between them for chocolate coating. If you have limited fridge space, you can stack them with parchment paper between layers – they won’t stick at this point.
Step 6: Coat with Chocolate
Now for the grand finale – the chocolate coating! In a microwave-safe bowl, combine the chocolate chips (or chopped chocolate) and coconut oil or shortening. Microwave on 50% power in 30-second intervals, stirring thoroughly between each interval. This gradual melting prevents the chocolate from seizing or burning. It typically takes 2-3 intervals (1-1.5 minutes total) to melt completely.
Alternatively, melt using a double boiler: place chocolate and oil in a heat-proof bowl set over a pot of simmering water (don’t let the bowl touch the water), stirring until smooth. The chocolate should be completely melted, smooth, and warm but not hot.
Working with one cookie at a time, drop it into the melted chocolate. Use a fork to flip it and ensure it’s completely coated on all sides. Lift it out with the fork, tap the fork gently on the edge of the bowl to let excess chocolate drip off, then use another fork or toothpick to slide the cookie onto a parchment-lined baking sheet.
Repeat with all cookies, working efficiently before the chocolate cools and thickens. If the chocolate gets too thick, microwave for 10-15 seconds to thin it again. While the chocolate is still wet, sprinkle with flaky sea salt if desired – this adds that perfect sweet-salty contrast!
Step 7: Set the Chocolate and Enjoy
Once all cookies are coated, place the baking sheet in the refrigerator for 15-20 minutes to set the chocolate quickly. The chocolate should become firm and no longer tacky to the touch. Once set, the cookies are ready to enjoy!
For extra flair, you can drizzle with melted white chocolate or additional caramel in a contrasting pattern. To do this: melt a small amount of white chocolate or save some caramel, place in a small zip-top bag, snip off a tiny corner, and drizzle back and forth over the set cookies. Return to the fridge for 5 minutes to set the drizzle.
Store in an airtight container with parchment paper between layers to prevent sticking. These cookies are best at room temperature when the caramel is slightly soft and chewy, though some people love them straight from the fridge when everything is firmer and the chocolate has that satisfying snap!
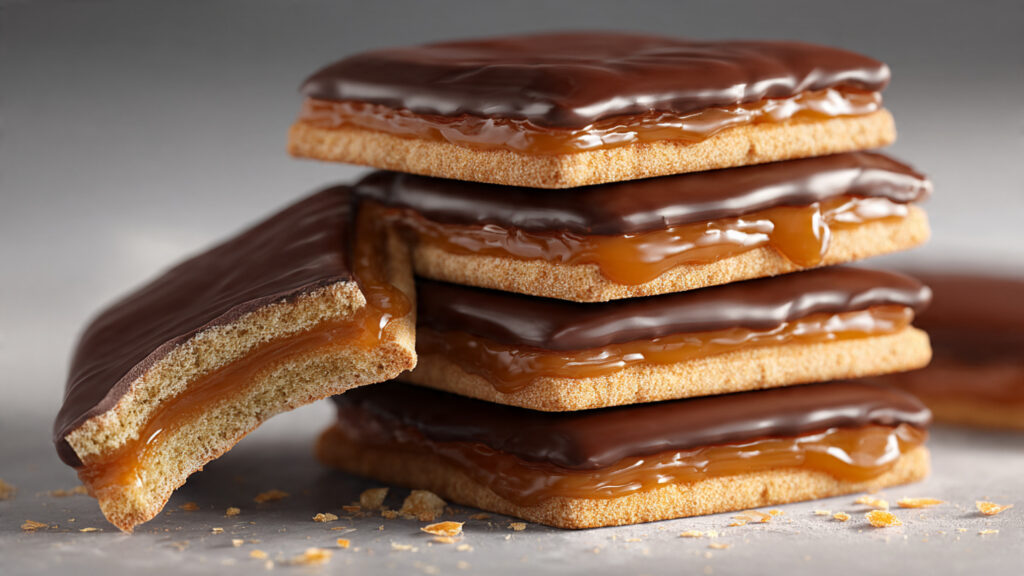
What to Serve with It
Ultimate Twix-Style Cookies are rich, indulgent treats that pair beautifully with certain beverages and accompaniments. The classic pairing is a glass of cold milk – the traditional cookie companion that cuts through the sweetness and provides the perfect contrast to the rich chocolate and caramel.
Coffee is another excellent pairing – whether it’s a strong espresso, cappuccino, or regular drip coffee, the slight bitterness balances the sweetness perfectly. These cookies are ideal for afternoon coffee breaks or as an after-dinner treat with espresso.
Hot chocolate or hot cocoa creates an ultra-indulgent experience, especially during winter months. For a special treat, top your hot chocolate with whipped cream and enjoy alongside these cookies for pure comfort.
For parties and events, serve these cookies as part of a dessert board or cookie platter alongside other treats like brownies, truffles, or fruit. The variety allows guests to try different sweets without committing to a large portion of one thing.
Vanilla ice cream is a luxurious pairing – sandwich a small scoop between two cookies, or serve a cookie on the side of an ice cream sundae. The cold, creamy ice cream with the chewy caramel and chocolate is absolutely divine.
For adult gatherings, pair with dessert wines, port, or coffee liqueurs like Baileys or Kahlúa. The cookies also pair surprisingly well with champagne or prosecco – the bubbles and acidity cut through the richness beautifully.
For casual entertaining, set up a cookie and milk bar with different milk options (whole, chocolate, almond, oat) and let guests choose their perfect pairing. You could also offer hot apple cider, chai tea, or peppermint hot chocolate for seasonal variations.
Tips for Making It Perfect
- Use room temperature butter for shortbread: This is crucial! Butter that’s too cold won’t cream properly and creates dense shortbread; butter that’s too soft or melted makes greasy cookies. Ideal butter should be soft enough to press a finger into easily but still hold its shape. Take it out of the fridge 30-60 minutes before baking.
- Don’t overmix the shortbread dough: Once you add the flour, mix only until just combined. Overmixing develops gluten, which creates tough, hard cookies instead of tender, crumbly shortbread. The dough should be soft and slightly crumbly but hold together when pressed.
- Watch your caramel carefully: Sugar can go from perfect to burnt in literal seconds. Once the sugar starts to turn amber, watch it like a hawk and be ready to remove it from heat the moment it reaches deep amber color (like iced tea). If it smokes or smells burnt, it’s too far – start over. Under-caramelized sugar won’t have enough flavor; over-caramelized is bitter and acrid.
- Let layers cool completely before proceeding: Hot caramel on warm shortbread = soggy base. Hot chocolate on warm caramel = melted, messy disaster. Patience is key! Let shortbread cool completely (45-60 minutes), let caramel set (1-2 hours or 30-45 minutes in fridge), then add chocolate. Rushing these steps ruins the texture.
- Cut before adding chocolate: This is the secret to professional-looking cookies! Cutting through chocolate is messy and creates cracks and chocolate shards everywhere. Cutting through just shortbread and caramel is clean and easy. Then coat the already-cut pieces in chocolate for perfect edges.
- Use the coconut oil in chocolate: This thins the chocolate to perfect coating consistency and creates that smooth, professional-looking shell. Without it, the chocolate is too thick and clumpy. The oil also helps the chocolate stay slightly softer and easier to bite through rather than rock-hard.
- Work efficiently but don’t rush: When coating in chocolate, work steadily but don’t stress. If the chocolate starts to thicken and become unworkable, just reheat it for 10-15 seconds. If you’re worried about timing, melt your chocolate in small batches and coat 8-10 cookies at a time, re-melting more chocolate as needed.
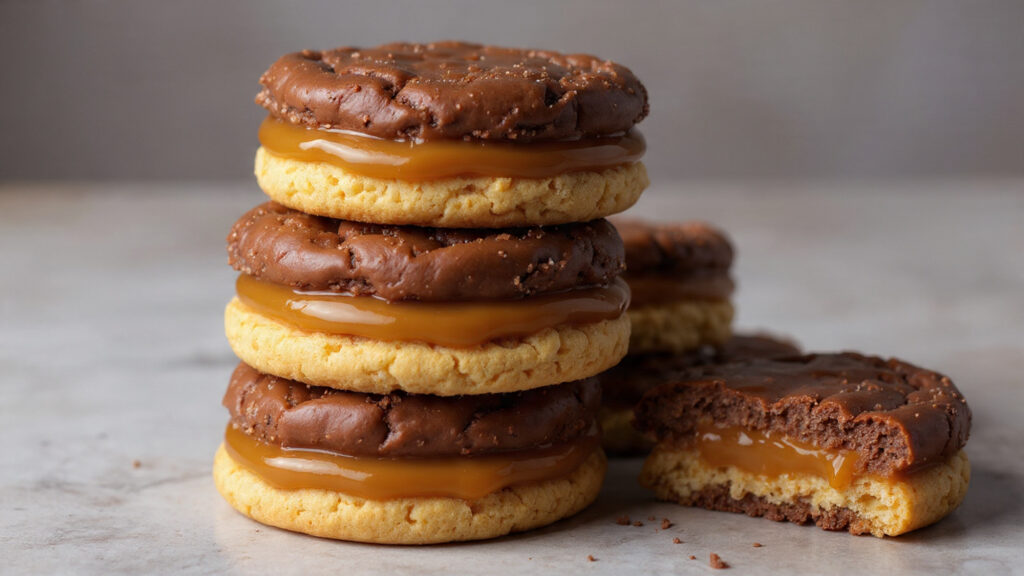
Storage Instructions
Room Temperature: Store completely set cookies in an airtight container at room temperature for up to 5 days. Layer them with parchment or wax paper between layers to prevent sticking. Room temperature is actually ideal for these cookies – the caramel stays soft and chewy, and the chocolate has a nice bite without being rock-hard. Keep them away from heat sources and direct sunlight, which can melt the chocolate.
Refrigerator: You can refrigerate these cookies for up to 2 weeks in an airtight container with parchment between layers. The caramel will become firmer and less chewy when cold, and the chocolate will be very snappy and hard. Some people prefer this texture! Bring to room temperature for 15-20 minutes before serving for the best texture and flavor, or enjoy them cold if you prefer.
Freezer: These cookies freeze beautifully for up to 3 months! Wrap them individually or in pairs with plastic wrap, then place all wrapped cookies in a freezer bag or airtight container. To serve, thaw at room temperature for 1-2 hours, or enjoy them partially frozen (they’re like frozen candy bars – delicious!). You can also freeze at different stages: unbaked shortbread dough (thaw and bake), baked shortbread with caramel before chocolate (thaw and coat), or finished cookies (thaw and enjoy).
Gift-Giving Storage: For gifts, arrange cookies in decorative tins, boxes, or cellophane bags tied with ribbon. Include a note that they’re best stored at room temperature and will keep for 5 days (or up to 2 weeks refrigerated). These make spectacular gifts because they look professional, taste incredible, and have good shelf life.
Make-Ahead Strategy: These are perfect for make-ahead! Bake shortbread up to 3 days ahead and store covered. Make caramel and add to shortbread up to 2 days ahead, refrigerate. Cut and coat in chocolate the day of serving, or do this step up to 5 days ahead. You can even make the entire recipe a week ahead and store in the fridge or freezer until needed!
Preventing Sticking: Always use parchment or wax paper between cookie layers when storing. The caramel and chocolate can stick together if stacked directly on top of each other, especially at room temperature. This also prevents the chocolate from getting scratched or the decorative drizzles from smearing.
General Information
While Twix candy bars were invented by Mars Limited in the United Kingdom in 1967 (and introduced to the United States in 1979), homemade “Twix-style” or “Twix copycat” cookies and bars are a relatively modern phenomenon that gained massive popularity in the 2010s through food blogs, Pinterest, and Instagram. The rise of home baking culture and the desire to recreate favorite store-bought treats in homemade form led creative bakers to deconstruct the beloved candy bar and reimagine it as a cookie.
The genius of Twix lies in its simple but perfect combination: buttery shortbread for crunch, chewy caramel for sweetness and texture contrast, and milk chocolate for richness and smoothness. This trio of flavors and textures creates what food scientists call “dynamic contrast” – the interplay of different textures and temperatures that makes food more interesting and satisfying to eat.
Shortbread itself has Scottish origins dating back to at least the 12th century, traditionally made with just three ingredients: butter, sugar, and flour in a 1:2:3 ratio. Its name comes from the “short” crumbly texture created by the high proportion of fat (butter) to flour, which inhibits gluten development.
Caramel (from the Latin “cannamellis” meaning “sugar cane”) has been made for centuries by heating sugar until it liquefies and browns through a process called pyrolysis. The addition of cream and butter to create soft caramel (like we use here) is a more modern French innovation called “caramel au beurre” or “caramel mou.”
The combination of all three elements in bar or cookie form represents modern American baking at its best: taking inspiration from beloved commercial products and elevating them with homemade quality, fresh ingredients, and the care that comes from baking by hand. These cookies also exemplify the “deconstruction and reconstruction” trend in contemporary baking – taking something familiar and presenting it in a new, often elevated form.
The popularity of these cookies on social media has been driven by their photogenic qualities – the layers are visually appealing, the chocolate coating looks professional, and that moment when you bite through and see the caramel stretch is pure food photography gold. This recipe represents how home bakers can create bakery-quality, Instagram-worthy treats that rival or surpass their commercial inspirations!
Frequently Asked Questions (FAQ)
Q: Can I use store-bought caramel instead of making my own? A: Yes, you can! Melt about 12-14 oz of soft caramel candies (like Kraft caramels) or caramel bits with 2-3 tablespoons of heavy cream in the microwave or on the stovetop, stirring until smooth. Pour over the cooled shortbread and proceed as directed. However, homemade caramel has much better flavor and texture – it’s worth trying! Store-bought tends to be sweeter and less complex, but it’s definitely easier and still delicious.
Q: My caramel turned out grainy – what went wrong? A: Grainy caramel is caused by sugar crystallization. This happens when: (1) You stirred the sugar while it was melting instead of just swirling the pan, (2) Sugar crystals from the sides of the pan fell back into the mixture, (3) You didn’t cook it to the right temperature. To prevent: don’t stir while melting, brush down pan sides with a wet pastry brush if crystals form, and optionally add 2 tablespoons corn syrup or lemon juice which inhibits crystallization. If it does crystallize, you can try adding a tablespoon of water and reheating, or start over.
Q: Can I make these without a candy thermometer? A: Absolutely! While a thermometer is helpful for beginners, you can make perfect caramel by visual cues alone. Cook the sugar until it’s a deep amber color (like iced tea or dark honey), then immediately remove from heat and add butter. For testing doneness after adding cream, drop a small bit into cold water – it should form a soft, flexible ball. This is how caramel was made for centuries before thermometers!
Q: My chocolate coating cracked when I cut the cookies – why? A: This is why we cut BEFORE adding chocolate! If you’ve already added chocolate, this happened because: (1) The chocolate was too cold and hard when you tried to cut, or (2) The knife wasn’t sharp or warm enough. To prevent: always cut into bars while it’s just shortbread and caramel, then coat individual pieces. If you must cut after chocolate, let it sit at room temperature for 20 minutes, use a very sharp knife warmed in hot water (and dried), and press straight down rather than sawing.
Q: Can I make these gluten-free? A: Yes! Use a 1:1 gluten-free flour blend (like Bob’s Red Mill or King Arthur) in place of all-purpose flour in the shortbread. Everything else in the recipe is naturally gluten-free. The texture will be slightly different – perhaps a bit more crumbly – but still delicious. Make sure your chocolate coating is also certified gluten-free if this is for someone with celiac disease.
Q: How do I prevent the caramel from being too hard or too soft? A: Caramel firmness depends on cooking temperature. If your caramel is too soft and oozes out when you bite the cookie, it wasn’t cooked long enough – cook to 225-230°F or until it forms a soft ball in cold water. If it’s rock-hard and hurts your teeth, it was cooked too long – aim for 225°F max and remove promptly. The perfect caramel should be chewy but not sticky, firm but not hard, and should stay in place when you bite the cookie but have some give.
Q: Can I make these in different sizes or shapes? A: Definitely! You can make them mini (bite-sized squares), regular bars like I describe, large squares for a more substantial treat, or even cut them with cookie cutters for fun shapes (hearts, circles, etc.). Just know that cutting with shaped cookie cutters will leave scraps – these “ugly” pieces are perfect for the baker to snack on! You can also make this as one large bar and cut it into individual servings when serving, rather than coating each piece individually in chocolate.
Conclusion
I’m so excited for you to make these Ultimate Twix-Style Cookies and experience the magic of creating something that looks professional, tastes incredible, and will absolutely make you a baking star! There’s nothing quite like the pride you’ll feel when people bite into these cookies and their eyes light up, or when someone asks “Did you really make these yourself?!” Trust me, you’ll be making these again and again for every occasion that calls for something special.
I’d absolutely love to hear about your Twix cookie success! Please leave a comment below sharing how they turned out, what occasion you made them for, or any creative variations you tried. If these cookies made you the hero of your cookie exchange, party, or family gathering, please give this recipe a five-star rating – it helps other aspiring baking stars find this recipe!
Don’t forget to snap photos of your beautiful layered cookies (especially that chocolate-coated perfection!) and share them on Instagram – tag me so I can see your creation and celebrate your baking achievement! And please pin this recipe to your “Show-Stopping Cookies,” “Homemade Candy Bars,” or “Gift-Worthy Baking” boards on Pinterest so you’ll always have it when you need to impress. Happy baking, and may your shortbread always be buttery, your caramel perfectly chewy, and your chocolate coating smooth and glossy!
Nutritional Information (per serving)
Based on 30 cookies (1 cookie per serving)
| Nutrient | Amount |
|---|---|
| Calories | 195 |
| Total Fat | 11g |
| Saturated Fat | 7g |
| Trans Fat | 0g |
| Cholesterol | 20mg |
| Sodium | 75mg |
| Total Carbohydrates | 24g |
| Dietary Fiber | 1g |
| Sugars | 17g |
| Protein | 2g |
| Vitamin A | 6% DV |
| Vitamin C | 0% DV |
| Calcium | 25mg |
| Iron | 0.5mg |
| Potassium | 55mg |
Note: Nutritional values are approximate and will vary based on exact ingredient brands used, size of cookies cut, and type of chocolate used. These are indulgent treats meant for special occasions and should be enjoyed in moderation as part of a balanced diet.