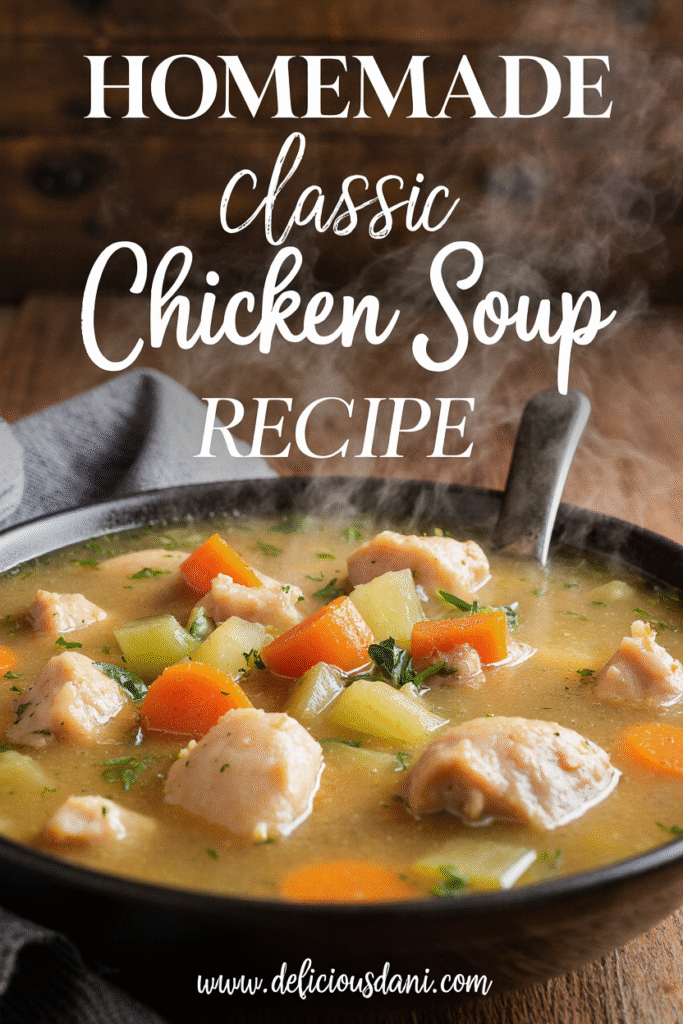
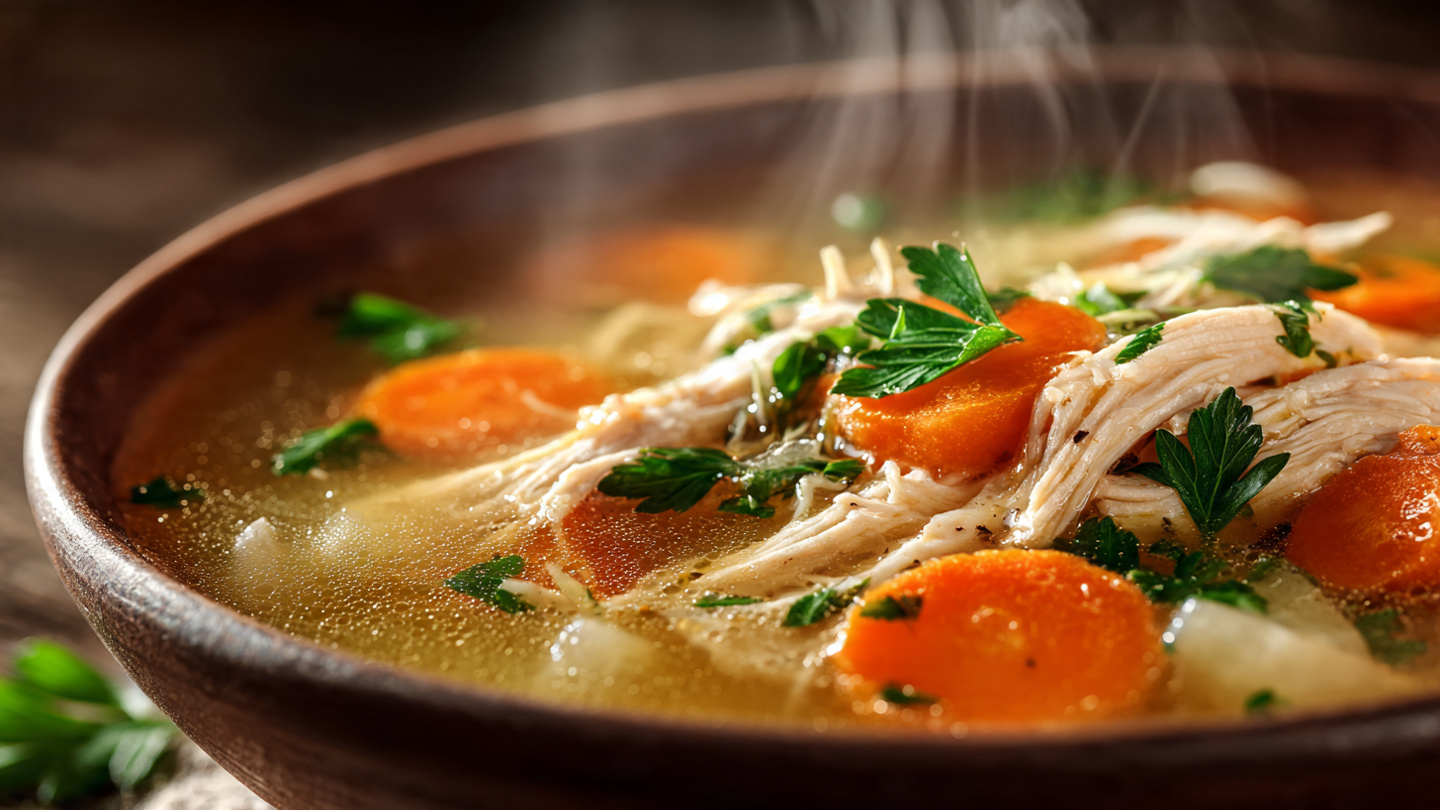
Homemade Classic Chicken Soup Recipe
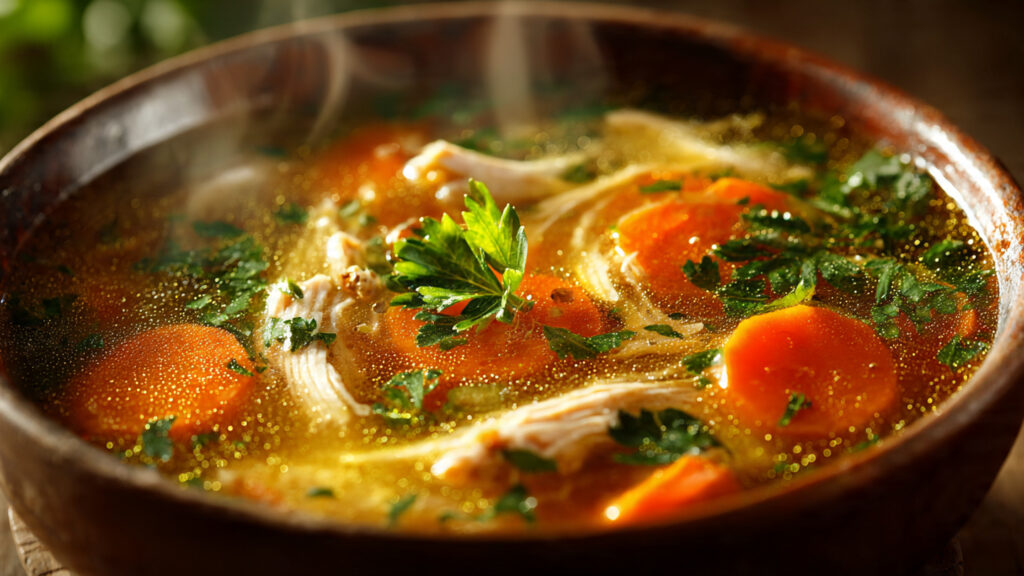
Welcome to the ultimate comfort food experience: Homemade Classic Chicken Soup – that soul-warming, deeply nourishing bowl of golden broth, tender chicken, and hearty vegetables that has been healing bodies and hearts for generations! I learned this recipe from my grandmother, who swore by its healing powers and made it every time anyone in the family felt under the weather, and I can honestly say there’s something almost magical about how a steaming bowl of homemade chicken soup can make everything feel better. What makes this soup absolutely extraordinary is the depth of flavor that comes from simmering a whole chicken (or chicken pieces) with aromatic vegetables until the broth is rich, golden, and packed with that elusive “liquid gold” quality you can’t get from a carton. The tender, fall-off-the-bone chicken, the perfectly cooked vegetables, the silky noodles or rice, and that crystal-clear, flavorful broth create a complete meal that’s satisfying, nourishing, and incredibly versatile. This soup has been my family’s remedy for colds and flu, my go-to comfort meal on chilly days, my gift to friends going through difficult times, and my proof that the simplest foods, made with care and quality ingredients, are often the most extraordinary. Whether you’re feeling under the weather, craving comfort, cooking for someone you love, or just want to master this essential recipe, this classic chicken soup is about to become your most treasured recipe!
Overview of Recipe Content
Homemade Classic Chicken Soup is perfect for fighting colds and flu (seriously, it helps!), comfort food on chilly or rainy days, cooking for sick family or friends, using up leftover roasted chicken or turkey, making ahead and freezing for easy meals, nourishing new mothers or people recovering from illness, teaching basic cooking skills (it’s foundational!), or anytime you need something warm, wholesome, and satisfying. It’s a great recipe because it’s naturally healing with immune-boosting properties, uses simple, wholesome ingredients, can be made from scratch or with shortcuts, freezes beautifully for months, is endlessly customizable to preferences and what you have on hand, provides multiple meals from one pot, and brings comfort like nothing else. The flavor profile is pure, simple comfort: rich, golden chicken broth with deep savory flavor, tender, juicy chicken that melts in your mouth, sweet carrots, celery, and onions that create aromatic base, fresh herbs (parsley, dill, thyme) that add brightness, perfectly cooked noodles, rice, or potatoes for heartiness, and subtle seasoning that enhances without overwhelming. This recipe is perfect for home cooks of all skill levels, people feeling under the weather, comfort food lovers, meal preppers and freezer cooking enthusiasts, parents feeding families, and anyone wanting to master this essential recipe. It’s naturally gluten-free without noodles, dairy-free, and easily made low-sodium.
Ingredients
For the Broth Base:
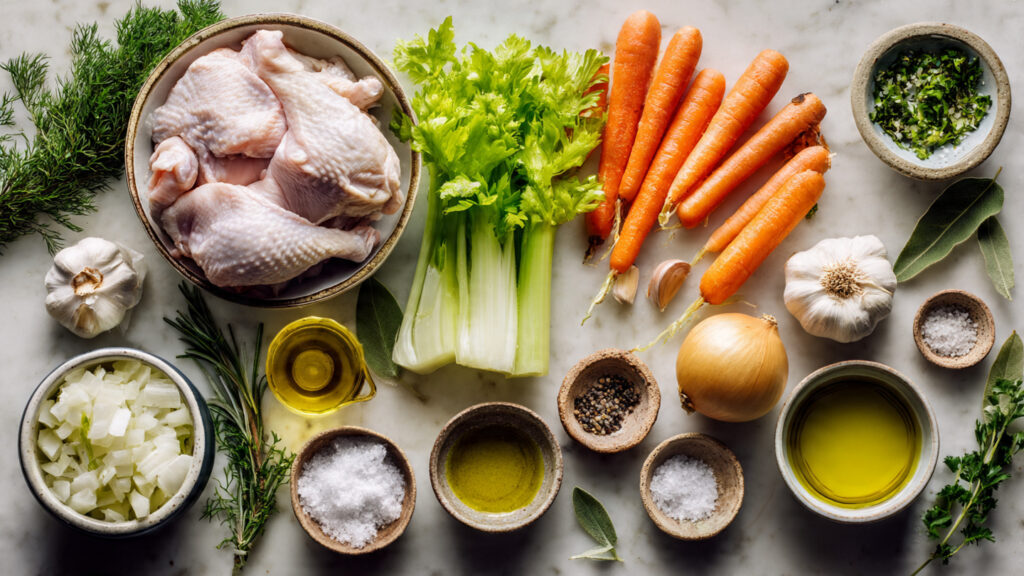
- 1 whole chicken (3-4 lbs/1.4-1.8kg) or 2-3 lbs (900g-1.4kg) chicken pieces (breasts, thighs, drumsticks)
- 10-12 cups (2.4-2.8L) cold water (enough to cover chicken)
- 2 large onions, quartered (skin on for deeper color, optional)
- 4 large carrots, peeled and cut into chunks
- 4 celery stalks, cut into chunks
- 4-6 cloves garlic, smashed
- 2 bay leaves
- 6-8 whole black peppercorns
- 1 teaspoon dried thyme (or 3-4 fresh thyme sprigs)
- 1 tablespoon salt (adjust to taste)
- Optional: 1 parsnip, 1 turnip, fresh parsley stems, fresh dill stems
For the Soup (After Straining):
- Reserved cooked chicken, shredded or diced
- 3 medium carrots, peeled and sliced or diced
- 3 celery stalks, sliced
- 1 medium onion, diced (optional, if you want more onion)
- 2 cups (200g) egg noodles, or 1 cup (200g) uncooked rice, or 2-3 medium potatoes diced
- ¼ cup (15g) fresh parsley, chopped
- 2 tablespoons fresh dill, chopped (optional but wonderful)
- Salt and black pepper to taste
- Optional: 1 cup (150g) frozen peas, splash of lemon juice
Optional Additions:
- 1-2 tablespoons lemon juice for brightness
- 1 teaspoon turmeric for color and anti-inflammatory benefits
- Fresh ginger (1-inch piece) for immune boost
- Jalapeño or red pepper flakes for heat
Tools Needed
- Large stockpot or Dutch oven (8-10 quart capacity minimum)
- Cutting board and sharp knife
- Vegetable peeler
- Fine-mesh strainer or colander
- Large bowl (for straining broth)
- Tongs or large fork (for removing chicken)
- Ladle
- Measuring cups and spoons
- Fat separator (optional but helpful)
- Storage containers for leftovers/freezing
Suggested Substitutions and Additions
Chicken Options:
- Whole chicken: Best flavor, most economical, makes richest broth
- Chicken pieces: Breasts, thighs, drumsticks, wings (bone-in, skin-on best)
- Rotisserie chicken: Ultimate shortcut, use bones for broth
- Chicken carcass/bones: After roasting, makes incredible broth
- Leftover turkey: Post-Thanksgiving, same method
- Chicken backs and necks: Cheapest option, incredible flavor
- Mix: Combination of pieces for flavor and meat
Broth Shortcuts:
- Store-bought broth: Use 8-10 cups, simmer with chicken and vegetables
- Bone broth: Richer, more collagen
- Bouillon cubes/paste: Budget option (watch sodium)
- Combination: Half homemade, half store-bought
Vegetable Variations:
- Classic: Onions, carrots, celery (the holy trinity)
- Root vegetables: Parsnips, turnips, rutabaga
- Potatoes: Yukon gold, russet, red potatoes
- Greens: Spinach, kale (add at end)
- Mushrooms: Sliced, adds umami
- Sweet potato: Adds sweetness and color
- Corn: Fresh or frozen kernels
- Green beans: Fresh or frozen
Starch Options:
- Egg noodles: Classic, comforting
- Rice: White, brown, wild rice
- Orzo: Small pasta, elegant
- Matzo balls: Jewish tradition (separate recipe)
- Dumplings: Fluffy, hearty
- Quinoa: Healthier, gluten-free
- Barley: Nutty, chewy
- Potatoes: Diced, traditional
- No starch: Keep it pure and light
Herb and Seasoning Options:
- Classic: Parsley, dill, thyme, bay leaves
- Italian: Basil, oregano, rosemary
- Asian-inspired: Ginger, lemongrass, star anise
- Mediterranean: Oregano, lemon, garlic
- Mexican: Cilantro, lime, jalapeño
- Fresh vs. dried: Fresh at end, dried during cooking
Flavor Enhancements:
- Add splash of white wine with vegetables
- Include Parmesan rind during simmering
- Add miso paste at end for umami
- Include fish sauce (sounds odd, tastes amazing)
- Add lemon juice or zest for brightness
- Include turmeric for golden color
- Add a little soy sauce for depth
- Include fresh ginger for immune boost
Regional Variations:
- Jewish Penicillin: Extra garlic, dill, sometimes matzo balls
- Asian: Ginger, bok choy, rice noodles, soy sauce
- Mexican (Caldo de Pollo): Cilantro, lime, jalapeños, corn
- Greek (Avgolemono): Lemon and egg for creaminess
- Italian (Pastina): Small pasta, lemon, parmesan
- Southern: More vegetables, sometimes hot sauce
Dietary Modifications:
- Gluten-free: Use rice, quinoa, or GF noodles
- Low-carb: Skip starch, extra vegetables
- Paleo: No noodles, use sweet potatoes
- Low-sodium: Homemade broth, control salt
- Vegan: Use vegetable broth, chickpeas for protein (different recipe!)
- Whole30: Compliant ingredients, no noodles
How to Make Homemade Classic Chicken Soup
Step 1: Prepare the Chicken and Aromatics
Start by rinsing your whole chicken (or chicken pieces) under cold water and patting dry with paper towels. Remove any giblets from the cavity if using a whole chicken – save them for the broth or discard. Place the chicken in your large stockpot or Dutch oven.
Prepare your aromatics: quarter the onions (you can leave the skin on for a deeper, more golden broth color – it’s a chef’s trick!), cut carrots and celery into large chunks (3-4 inch pieces), and smash the garlic cloves with the flat side of your knife. These large pieces will simmer for a long time and are meant to flavor the broth – you’ll strain them out later and add fresh vegetables for eating.
Add all the aromatics to the pot with the chicken: onions, carrots, celery, garlic, bay leaves, peppercorns, thyme, and parsley stems if using. Add salt (start with 1 tablespoon – you can adjust later). If using optional ingredients like parsnip, turnip, or ginger, add them now too.
Step 2: Add Water and Bring to Boil
Add cold water to the pot – enough to completely cover the chicken by about 2 inches (10-12 cups). Using cold water is important! It allows proteins to release slowly as the water heats, creating a clearer, cleaner-tasting broth. Hot water causes proteins to coagulate quickly, making cloudy broth.
Place the pot over high heat and bring to a boil, uncovered. This will take about 15-20 minutes depending on the amount of water and your stove. Watch carefully during this stage – as the water heats, foam and scum will rise to the surface. This is normal! It’s protein and impurities from the chicken.
As soon as the water reaches a rolling boil, reduce the heat to low so the liquid is just barely simmering – you should see small bubbles occasionally breaking the surface, not a vigorous boil. Vigorous boiling makes cloudy, greasy broth and tough chicken.
Step 3: Skim and Simmer Low and Slow
During the first 15-20 minutes of simmering, use a large spoon or ladle to carefully skim off and discard the foam and scum that rises to the surface. This step is what creates that beautiful, clear, golden broth! Don’t skip it – just skim every 5 minutes or so until the scum stops appearing.
Once you’ve skimmed the initial foam, partially cover the pot (leave it slightly ajar to allow steam to escape) and let it simmer very gently for 1½ to 2 hours for a whole chicken, or 45-60 minutes for chicken pieces. The chicken is done when the meat is falling-off-the-bone tender and an instant-read thermometer reads 165°F (74°C) in the thickest part.
Low and slow is the secret to rich, flavorful broth and tender chicken! The long, gentle simmer extracts maximum flavor from the bones, vegetables, and aromatics. Resist the urge to rush this step – good chicken soup can’t be hurried!
Pro tip: The longer you simmer (up to 3-4 hours), the richer and more flavorful the broth becomes, though the chicken can become too soft if simmered too long. For ultimate broth, some cooks simmer the bones and vegetables for 3-4 hours, but remove the chicken after 1-1½ hours to prevent it from becoming too mushy.
Step 4: Remove Chicken and Strain Broth
When the chicken is very tender and falling off the bones, carefully remove it from the pot using tongs or a large fork and transfer to a large bowl or plate. Let it cool until you can handle it safely (about 10-15 minutes), then shred or dice the meat, discarding skin, bones, and any cartilage. Set the shredded chicken aside – you’ll add it back to the soup later.
Now strain the broth: place a fine-mesh strainer or colander over a large bowl or another pot, and carefully pour the broth through to catch all the vegetables, herbs, and aromatics. Discard these cooked-down vegetables (they’ve given all their flavor to the broth) – they’re mushy and not appetizing to eat. You want fresh vegetables for serving!
If you have time, let the strained broth cool completely and refrigerate for several hours or overnight. The fat will solidify on top and can be easily lifted off and discarded, leaving you with crystal-clear, virtually fat-free broth. For quicker fat removal, use a fat separator, or skim the surface with a large spoon while the broth is still hot.
Step 5: Add Fresh Vegetables and Starch
Return the strained, defatted broth to the clean pot and bring to a simmer over medium heat. Taste the broth and adjust seasoning – it should taste rich, savory, and well-seasoned. Add more salt and pepper as needed. Remember, the broth should taste slightly over-seasoned at this point because you’re adding chicken, vegetables, and starch that will dilute the flavor.
Add your fresh vegetables for eating: sliced or diced carrots, sliced celery, and diced onion if using. These will actually be part of the final soup, not just flavoring, so cut them nicely and uniformly. Simmer for 10-15 minutes until vegetables are tender but not mushy.
If using noodles, add them now and cook according to package directions (usually 6-10 minutes) until tender. If using rice, add it now and simmer for 15-20 minutes until tender. If using potatoes, add them with the vegetables so they cook at the same time (15-20 minutes).
Important note about noodles and rice: If you’re freezing soup or making it ahead, cook noodles/rice separately and add to individual bowls when serving. Noodles and rice absorb liquid as they sit, making the soup too thick and the noodles/rice mushy. For best results, keep them separate until serving!
Step 6: Add Chicken and Fresh Herbs
When the vegetables and starch are tender, add the reserved shredded chicken back to the pot. Stir gently to combine. Let it simmer for just 2-3 minutes to heat the chicken through – don’t overcook or the chicken will become dry and stringy.
Remove from heat and stir in fresh herbs: chopped parsley and dill if using. The fresh herbs add incredible aroma and brightness that dried herbs can’t provide. If adding frozen peas, stir them in now – the residual heat will cook them perfectly without making them mushy.
Taste one final time and adjust seasoning with salt, pepper, and a squeeze of lemon juice if desired. The lemon juice is optional but adds a wonderful brightness that makes all the flavors pop!
Step 7: Serve and Enjoy
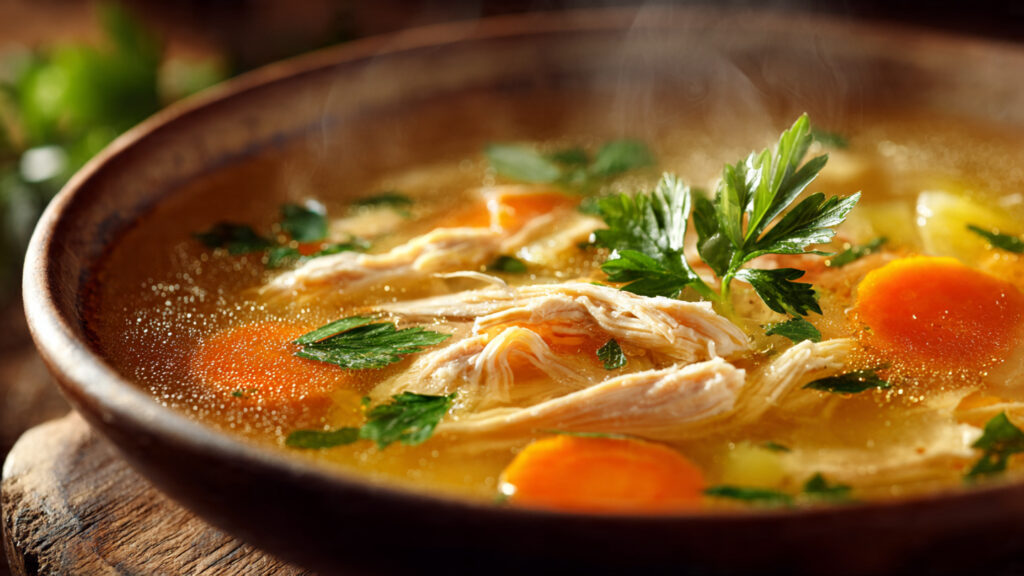
Ladle the hot soup into bowls, making sure each serving has a good amount of chicken, vegetables, and noodles or rice. Garnish with extra fresh herbs if desired. Serve immediately while piping hot with crusty bread, crackers, or on its own.
This is when the magic happens – that first spoonful of hot, golden, aromatic soup that warms you from the inside out and makes everything feel better. Whether you’re fighting a cold, comforting a loved one, or just enjoying a cozy meal, there’s nothing quite like homemade chicken soup!
- Gluten-free: Use rice, quinoa, or GF noodles
- Low-carb: Skip starch, extra vegetables
- Paleo: No noodles, use sweet potatoes
- Low-sodium: Homemade broth, control salt
- Vegan: Use vegetable broth, chickpeas for protein (different recipe!)
- Whole30: Compliant ingredients, no noodles
How to Make Homemade Classic Chicken Soup
Step 1: Prepare the Chicken and Aromatics
Start by rinsing your whole chicken (or chicken pieces) under cold water and patting dry with paper towels. Remove any giblets from the cavity if using a whole chicken – save them for the broth or discard. Place the chicken in your large stockpot or Dutch oven.
Prepare your aromatics: quarter the onions (you can leave the skin on for a deeper, more golden broth color – it’s a chef’s trick!), cut carrots and celery into large chunks (3-4 inch pieces), and smash the garlic cloves with the flat side of your knife. These large pieces will simmer for a long time and are meant to flavor the broth – you’ll strain them out later and add fresh vegetables for eating.
Add all the aromatics to the pot with the chicken: onions, carrots, celery, garlic, bay leaves, peppercorns, thyme, and parsley stems if using. Add salt (start with 1 tablespoon – you can adjust later). If using optional ingredients like parsnip, turnip, or ginger, add them now too.
Step 2: Add Water and Bring to Boil
Add cold water to the pot – enough to completely cover the chicken by about 2 inches (10-12 cups). Using cold water is important! It allows proteins to release slowly as the water heats, creating a clearer, cleaner-tasting broth. Hot water causes proteins to coagulate quickly, making cloudy broth.
Place the pot over high heat and bring to a boil, uncovered. This will take about 15-20 minutes depending on the amount of water and your stove. Watch carefully during this stage – as the water heats, foam and scum will rise to the surface. This is normal! It’s protein and impurities from the chicken.
As soon as the water reaches a rolling boil, reduce the heat to low so the liquid is just barely simmering – you should see small bubbles occasionally breaking the surface, not a vigorous boil. Vigorous boiling makes cloudy, greasy broth and tough chicken.
Step 3: Skim and Simmer Low and Slow
During the first 15-20 minutes of simmering, use a large spoon or ladle to carefully skim off and discard the foam and scum that rises to the surface. This step is what creates that beautiful, clear, golden broth! Don’t skip it – just skim every 5 minutes or so until the scum stops appearing.
Once you’ve skimmed the initial foam, partially cover the pot (leave it slightly ajar to allow steam to escape) and let it simmer very gently for 1½ to 2 hours for a whole chicken, or 45-60 minutes for chicken pieces. The chicken is done when the meat is falling-off-the-bone tender and an instant-read thermometer reads 165°F (74°C) in the thickest part.
Low and slow is the secret to rich, flavorful broth and tender chicken! The long, gentle simmer extracts maximum flavor from the bones, vegetables, and aromatics. Resist the urge to rush this step – good chicken soup can’t be hurried!
Pro tip: The longer you simmer (up to 3-4 hours), the richer and more flavorful the broth becomes, though the chicken can become too soft if simmered too long. For ultimate broth, some cooks simmer the bones and vegetables for 3-4 hours, but remove the chicken after 1-1½ hours to prevent it from becoming too mushy.
Step 4: Remove Chicken and Strain Broth
When the chicken is very tender and falling off the bones, carefully remove it from the pot using tongs or a large fork and transfer to a large bowl or plate. Let it cool until you can handle it safely (about 10-15 minutes), then shred or dice the meat, discarding skin, bones, and any cartilage. Set the shredded chicken aside – you’ll add it back to the soup later.
Now strain the broth: place a fine-mesh strainer or colander over a large bowl or another pot, and carefully pour the broth through to catch all the vegetables, herbs, and aromatics. Discard these cooked-down vegetables (they’ve given all their flavor to the broth) – they’re mushy and not appetizing to eat. You want fresh vegetables for serving!
If you have time, let the strained broth cool completely and refrigerate for several hours or overnight. The fat will solidify on top and can be easily lifted off and discarded, leaving you with crystal-clear, virtually fat-free broth. For quicker fat removal, use a fat separator, or skim the surface with a large spoon while the broth is still hot.
Step 5: Add Fresh Vegetables and Starch
Return the strained, defatted broth to the clean pot and bring to a simmer over medium heat. Taste the broth and adjust seasoning – it should taste rich, savory, and well-seasoned. Add more salt and pepper as needed. Remember, the broth should taste slightly over-seasoned at this point because you’re adding chicken, vegetables, and starch that will dilute the flavor.
Add your fresh vegetables for eating: sliced or diced carrots, sliced celery, and diced onion if using. These will actually be part of the final soup, not just flavoring, so cut them nicely and uniformly. Simmer for 10-15 minutes until vegetables are tender but not mushy.
If using noodles, add them now and cook according to package directions (usually 6-10 minutes) until tender. If using rice, add it now and simmer for 15-20 minutes until tender. If using potatoes, add them with the vegetables so they cook at the same time (15-20 minutes).
Important note about noodles and rice: If you’re freezing soup or making it ahead, cook noodles/rice separately and add to individual bowls when serving. Noodles and rice absorb liquid as they sit, making the soup too thick and the noodles/rice mushy. For best results, keep them separate until serving!
Step 6: Add Chicken and Fresh Herbs
When the vegetables and starch are tender, add the reserved shredded chicken back to the pot. Stir gently to combine. Let it simmer for just 2-3 minutes to heat the chicken through – don’t overcook or the chicken will become dry and stringy.
Remove from heat and stir in fresh herbs: chopped parsley and dill if using. The fresh herbs add incredible aroma and brightness that dried herbs can’t provide. If adding frozen peas, stir them in now – the residual heat will cook them perfectly without making them mushy.
Taste one final time and adjust seasoning with salt, pepper, and a squeeze of lemon juice if desired. The lemon juice is optional but adds a wonderful brightness that makes all the flavors pop!
Step 7: Serve and Enjoy
Ladle the hot soup into bowls, making sure each serving has a good amount of chicken, vegetables, and noodles or rice. Garnish with extra fresh herbs if desired. Serve immediately while piping hot with crusty bread, crackers, or on its own.
This is when the magic happens – that first spoonful of hot, golden, aromatic soup that warms you from the inside out and makes everything feel better. Whether you’re fighting a cold, comforting a loved one, or just enjoying a cozy meal, there’s nothing quite like homemade chicken soup!
What to Serve with It
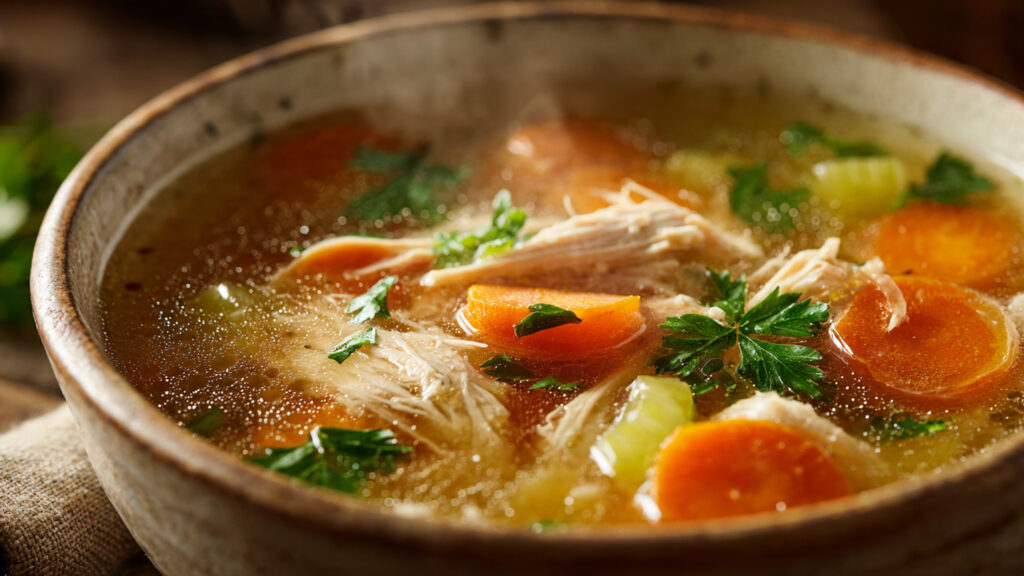
Homemade Classic Chicken Soup is a complete meal on its own, but certain accompaniments enhance the experience and make it even more satisfying. For bread and crackers, the classic pairings are: crusty bread (sourdough, French bread, Italian bread) for dipping and soaking up broth, oyster crackers (traditional, salty, crunchy), saltine crackers (classic American pairing), matzo (especially for Jewish-style chicken soup), cornbread (Southern comfort), biscuits (flaky, buttery), or dinner rolls (soft, warm).
For a more substantial meal, add: grilled cheese sandwich (ultimate comfort food combo), simple green salad with vinaigrette (fresh, light contrast), Caesar salad (classic steakhouse-style meal), coleslaw (crunchy, tangy), or potato salad (for a full comfort food spread).
Toppings and garnishes that guests can add to their bowls: extra fresh herbs (parsley, dill, cilantro), lemon wedges for squeezing, hot sauce or red pepper flakes for heat, grated Parmesan cheese (not traditional but delicious!), oyster crackers or croutons for crunch, sliced avocado (creamy, rich), sour cream or Greek yogurt (cooling, tangy), or chopped green onions (fresh, sharp).
For beverages, serve with: hot tea (chamomile, peppermint, ginger for sick days), lemonade (refreshing contrast), iced tea (Southern tradition), water with lemon (hydrating), or ginger ale (soothing for upset stomachs).
For feeding the sick, keep it simple: plain crackers, ginger ale, weak tea, and maybe toast. The soup itself is the medicine!
For family dinners, make it special: homemade bread or rolls, butter, a simple salad, and maybe apple pie or cookies for dessert.
For meal prep, portion soup into containers with: crackers in separate bags, bread on the side, and extra herbs in small containers to add fresh when reheating.
Tips for Making It Perfect
- Use a whole chicken or bone-in pieces for best flavor: While boneless, skinless chicken breasts work in a pinch, they produce bland, thin broth. Bones and skin are where the flavor, gelatin, and richness come from! A whole chicken or bone-in, skin-on pieces create that golden, flavorful, healing broth you crave. The collagen from bones creates body and that lovely jiggly texture when cold (sign of quality broth!).
- Start with cold water and bring to a gentle simmer: Never add chicken to already-boiling water! Cold water allows proteins to release slowly, creating clearer broth. And once boiling, reduce to a bare simmer – vigorous boiling makes cloudy, greasy soup and tough chicken. You want gentle bubbles, barely breaking the surface, for tender chicken and clear, clean-tasting broth.
- Skim the scum during the first 15-20 minutes: Those grayish foam and scum that rise to the surface contain impurities and excess protein. Skimming them off creates beautiful, clear, golden broth. Use a large spoon or ladle and skim every 5 minutes initially until it stops appearing. Don’t skip this step if you want restaurant-quality soup!
- Simmer low and slow – don’t rush it: The magic happens during the long, gentle simmer! This is when flavors develop, bones release gelatin, and that healing quality develops. Minimum 1½-2 hours for whole chicken, but 3-4 hours creates even richer broth. You can’t rush good soup – it needs time to develop complexity and depth.
- Season the broth well before adding other ingredients: The broth should taste almost too salty on its own because you’re adding chicken, vegetables, and noodles/rice that will dilute it. Taste and adjust seasoning at every stage. Under-seasoned soup is disappointing even with perfect technique. Salt brings out all the other flavors!
- Add noodles/rice separately if making ahead or freezing: Noodles and rice continue absorbing liquid as they sit, turning your soup into thick, gluey mush. For best results when meal prepping, store broth with vegetables and chicken, but keep noodles/rice separate. Cook fresh and add to each bowl when serving. Your soup will stay perfect for days!
- Don’t overcook the final vegetables: The first batch of vegetables (for flavoring broth) gets cooked for hours and discarded. The second batch (for eating) should be tender but still have a little bite – about 10-15 minutes. Overcooked vegetables turn to mush and lose their color and nutrition. Add them after straining, cook until just tender, and serve!
Storage Instructions
Refrigerator: Store cooled soup in airtight containers in the refrigerator for up to 4-5 days. The soup actually improves over the first 24 hours as flavors meld! If the soup contains noodles or rice, note that they’ll continue absorbing liquid and may become very soft – this is why storing them separately is ideal. The broth may gel when cold (from collagen) – this is a sign of quality! It will liquify again when reheated.
Separating Components: For longest storage and best quality, store separately: broth with vegetables and chicken in one container, cooked noodles/rice in another. When serving, reheat broth, add fresh or reheated noodles/rice to bowls, and ladle hot soup over. This keeps everything at perfect texture.
Freezing: Chicken soup freezes beautifully for up to 3-4 months! Cool completely first, then freeze in portions. Use freezer-safe containers, leaving 1 inch headspace for expansion, or use freezer bags (lay flat for space-saving stacking). IMPORTANT: freeze broth, chicken, and vegetables together, but NOT noodles or rice – they become mushy when frozen and thawed. Add fresh when serving.
Freezing Tips: Label containers with date and contents. Freeze in various portion sizes (individual servings, family meals) for flexibility. For quickest thawing, freeze in ice cube trays or muffin tins, then transfer cubes to bags. Fat may solidify on top when frozen – just reheat and stir, or remove if desired.
Reheating: Reheat gently on the stovetop over medium heat, stirring occasionally, until steaming hot (165°F/74°C internal temp). Microwave individual portions in 2-minute intervals, stirring between, until hot throughout. Add fresh herbs after reheating for best flavor. Don’t boil vigorously when reheating or chicken will become tough.
Thawing: Thaw frozen soup overnight in the refrigerator, or place sealed container in cold water for faster thawing. You can also reheat from frozen – just allow extra time and stir frequently as it defrosts and heats.
Broth Only: If you made extra broth, freeze it in ice cube trays, then transfer cubes to bags. These broth cubes are perfect for adding to recipes, cooking rice, making gravy, or enriching other soups. Homemade broth is liquid gold!
Signs of Spoilage: Discard soup if it smells sour or off, develops mold, or tastes fermented. Properly stored soup should smell fragrant and appetizing. The fat may solidify on top when cold – this is normal and protective, not spoilage.
Make-Ahead Strategy: Make soup 1-3 days ahead for best flavor development. For big events or meal prep, make a double or triple batch and freeze in portions. You’ll thank yourself when you need quick, nourishing meals or when someone gets sick!
General Information
Chicken soup is arguably one of the oldest and most universal comfort foods in human history, with versions appearing in virtually every culture that has domesticated chickens. The tradition of using chicken soup for healing dates back at least 2,000 years – the ancient Greek physician Hippocrates prescribed chicken soup for various ailments, and the 12th-century Jewish philosopher and physician Maimonides recommended chicken soup for respiratory illnesses.
The term “Jewish Penicillin” for chicken soup emerged in the 20th century, referring to the traditional Jewish practice of making rich chicken soup (often with extra garlic and dill, sometimes with matzo balls) for sick family members. This wasn’t just folklore – modern scientific research has actually validated some of chicken soup’s healing properties!
Scientific studies have shown that chicken soup may help with cold and flu symptoms in several ways: The hot liquid helps loosen mucus and keeps you hydrated. The steam from hot soup may help clear nasal passages. The soup contains anti-inflammatory compounds from the vegetables and chicken that may reduce upper respiratory symptoms. The warmth and salt can be soothing to a sore throat. The nutrients (protein, vitamins, minerals) support immune function and healing. And perhaps most importantly, the comfort and care associated with homemade soup reduces stress, which supports immune function.
A famous 2000 study by Dr. Stephen Rennard at the University of Nebraska Medical Center found that his wife’s chicken soup recipe did indeed have anti-inflammatory properties that could theoretically improve cold symptoms. The study suggested that the combination of chicken and vegetables creates compounds that reduce inflammation.
Cultural variations of chicken soup appear worldwide: Jewish chicken soup with matzo balls (matzah ball soup), Chinese chicken soup with ginger and bok choy, Mexican caldo de pollo with cilantro and lime, Greek avgolemono with lemon and egg, Korean samgyetang with ginseng and rice, Filipino tinola with green papaya and ginger, and countless other regional variations. Each culture has adapted this healing food to local ingredients and tastes.
The phrase “A watched pot never boils” actually comes from the patience required in making chicken soup – the long, slow simmer that can’t be rushed is a meditation on taking time to do things properly and lovingly.
Homemade vs. canned/carton soup: While convenient, commercial chicken soup can’t compare to homemade in flavor, nutrition, or healing properties. Homemade soup contains more protein, vitamins, minerals, and those beneficial compounds from slow-simmered bones and vegetables. It also has far less sodium and no preservatives or artificial ingredients. The act of making soup – choosing quality ingredients, taking time, cooking with care – is itself a form of love and medicine.
In many cultures, making chicken soup for a sick family member is one of the fundamental expressions of care and love. It’s often the first dish new cooks learn to make, and recipes are passed down through generations, each family adding their own touches that make it uniquely theirs.
Frequently Asked Questions (FAQ)
Q: Can I use boneless, skinless chicken breasts? A: You can, but the soup won’t be as flavorful or rich. Bones and skin are where most of the flavor and gelatin come from! For best results, use a whole chicken or bone-in, skin-on pieces. If you must use boneless, skinless breasts, add extra store-bought broth (chicken or bone broth) for flavor, simmer longer with aromatics, and consider adding a Parmesan rind or splash of fish sauce for umami depth. The texture will be fine but the broth will be thinner.
Q: How do I make my broth clear and golden, not cloudy? A: Clear broth comes from: (1) Starting with cold water (not hot), (2) Bringing to a bare simmer (not vigorous boil), (3) Skimming scum during the first 15-20 minutes, and (4) Maintaining gentle heat throughout. Boiling vigorously makes cloudy broth because it emulsifies fat into the liquid. For the golden color, use onion skins (contains natural dye) or add a pinch of turmeric. Strain through cheesecloth for ultra-clear professional results!
Q: Can I make this in a slow cooker or Instant Pot? A: Yes! Slow cooker: Place chicken, vegetables, seasonings, and water in slow cooker. Cook on low for 6-8 hours or high for 3-4 hours. Strain, add fresh vegetables and noodles, cook 1 hour more. Instant Pot: Place everything in pot, pressure cook on high for 30 minutes (whole chicken) or 15 minutes (pieces), natural release 10 minutes. Strain, sauté mode for fresh vegetables and noodles. Both work great, though traditional stovetop offers most control.
Q: My chicken is tough and dry – what went wrong? A: Two possible issues: (1) Overcooked – chicken breasts especially can dry out if simmered too long. Remove them after 30-45 minutes, thighs/drumsticks after 45-60 minutes, or (2) Boiled too vigorously – vigorous boiling toughens meat. Keep it at a gentle simmer. Dark meat (thighs, drumsticks) is more forgiving than white meat and stays juicier longer. Some cooks prefer to remove all chicken after 1 hour, shred it, then return to soup at the end just to heat through.
Q: Should I add noodles/rice to the soup or serve separately? A: For immediate serving: add to soup! For leftovers/meal prep: cook separately! Noodles and rice continue absorbing liquid as they sit, making soup thick and gluey, and they become mushy after a day or two. For best results, especially if making ahead, freezing, or storing leftovers, keep starch separate and add to individual bowls when serving. Your future self will thank you!
Q: Can I use a rotisserie chicken instead of cooking raw chicken? A: Absolutely! This is the ultimate shortcut. Use the rotisserie chicken meat and simmer the bones, skin, and scraps in water with vegetables for 1-2 hours to make broth. Strain, add fresh vegetables, noodles, and the shredded rotisserie meat. You get homemade-quality soup in much less time! This is perfect for quick weeknight soup or using leftover rotisserie chicken.
Q: Why does my homemade soup taste bland? A: Under-seasoning is the most common issue! The broth needs to taste almost too salty on its own because you’re adding chicken, vegetables, and noodles that dilute it. Taste and adjust at every stage. Also ensure: (1) You used enough aromatic vegetables (onions, garlic, celery), (2) Soup simmered long enough (minimum 1½ hours), (3) You added herbs and maybe lemon juice at the end, and (4) You used quality chicken (free-range has more flavor). Salt is your friend – use enough!
Conclusion
I’m so honored to share this Homemade Classic Chicken Soup Recipe with you – it’s more than just a recipe, it’s a tradition, a healing remedy, and an expression of care that has been passed down through generations in kitchens around the world. The rich, golden broth, tender chicken, perfectly cooked vegetables, and comforting warmth create something that nourishes both body and soul. Whether you’re making it for someone who’s feeling under the weather, treating your family to ultimate comfort food, or simply want to master this essential recipe, I hope this soup brings as much comfort and joy to your home as it has to mine.
I’d absolutely love to hear how your chicken soup turned out! Please leave a comment below sharing your experience, any family traditions you incorporated, or how it helped someone feel better. If this soup warmed hearts and healed bodies in your home, please give it a five-star rating – it helps other home cooks discover this timeless recipe!
Don’t forget to snap a photo of your beautiful golden soup (especially that steam rising from the bowl!) and share it on Instagram – tag me so I can see your creation and celebrate the healing power of homemade cooking! And please pin this recipe to your “Comfort Food,” “Healing Foods,” or “Soup Recipes” boards on Pinterest so you’ll always have it when someone needs care. Happy cooking, and may your soup always be golden, flavorful, and full of love!
Nutritional Information (per serving)
Based on 8 servings (including chicken, vegetables, and noodles)
| Nutrient | Amount |
|---|---|
| Calories | 245 |
| Total Fat | 7g |
| Saturated Fat | 2g |
| Trans Fat | 0g |
| Cholesterol | 75mg |
| Sodium | 685mg |
| Total Carbohydrates | 22g |
| Dietary Fiber | 3g |
| Sugars | 4g |
| Protein | 24g |
| Vitamin A | 85% DV |
| Vitamin C | 12% DV |
| Calcium | 45mg |
| Iron | 2mg |
| Potassium | 485mg |
Note: Nutritional values are approximate and will vary significantly based on type of chicken used (white vs. dark meat, skin on or off), amount of fat removed from broth, type and amount of starch added, and exact vegetables used. Sodium content depends heavily on how much salt is added. This is naturally a very nutritious, protein-rich, vitamin-packed meal.